Better-Than-Boxed-Mix Brownies

IMG_5367In late April, my boyfriend, Kaleb, and I decided to take a Saturday off of homework and instead spend the day shopping in a nearby city. That meant clothing stores for me, an art supply store for Kaleb, and REI for us both. We ate lunch buffet-style at a little Indian restaurant I had heard good things about, and it was delicious. Kaleb bought me a new sundress at Target, I watched him wander around his art store with childlike excitement in his eyes, and we had fun pining over all the incredible REI running clothes we can’t afford. We got back to our university campus in the early evening and ate chicken gyros at the cafeteria, which was a pleasant surprise considering that on weekends it usually features very few, very unexciting options. After dinner, we settled down to watch House M.D., one of the shows that we are currently re-watching. It was a fabulous day…until about 8pm.

To spare you the details, I ended up getting a mild case of food poisoning, which kept me in bed all the next day and unable to attend one of the massive outdoor programs we were putting on as Resident Assistants. Darn. 😦 I moaned to Kaleb that I might never eat at a buffet again, sounding just like my mother. She once had a horrific experience at a buffet in an airport–food poisoning on an airplane=not fun at all–and has refused to come within five feet of so much as a salad bar ever since. Of course, seeing as there was an eight-hour gap between my lunch and my symptoms, the culprit could just as easily have been the gyro I ate in my very own university cafeteria, but there’s no way of knowing. Either way, it might be a while before I will touch chicken curry or Greek tzatziki sauce again. IMG_5369

The kicker is that just that morning I had exclaimed to Kaleb how I hadn’t been sick in over a year, which seemed like quite the triumph. I immediately regretted saying anything that could jinx my healthy streak, and sure enough I paid the price for that moment of gloating with my illness later that night.

“Isn’t it so weird that I got food poisoning on the very day I was bragging about not getting sick?” I asked Kaleb.

“Umm..not really, actually….” he said, much to my disappointment.

“Why?!” I demanded.

“Well, because you worry about getting food poisoning pretty much every day,” he said. I thought about this for a few moments, then begrudgingly agreed. Yeah, okay…that is valid.

The truth is, I am just a teeny bit paranoid about food poisoning, and am constantly asking if it’s okay to eat this turkey sandwich that’s been sitting out for an hour, drink this milk that has a sell-by date of three days ago, or buy sushi from the cooler in our campus store that seemed to be not quite cold enough. My dad patiently texts reassurance from hundreds of miles away, and Kaleb patiently voices reassurance from our kitchen counter or a cafeteria table. It’s not like I question everything I eat–maybe one thing every few days–but I certainly have earned my reputation as a constant food-poisoning-worrier amongst those who know me well.IMG_5377

Surprisingly, one thing I have never worried about is raw eggs–but only if they’re in something I’m baking. I grew up licking mounds of raw cookie dough off my fingers as my mom washed the dishes, and I can never resist taste-testing cake batters, muffin batters, and brownie batters. I once read a book in which a girl’s mother let her mix up an entire bowl of brownie batter and eat it with a spoon when the girl came home from a hard day at school, and I always yearned to re-create that scene in my own kitchen. I don’t think I ever did, but not for lack of want. I realize that salmonella and other food-borne pathogens are potentially very dangerous, but I’m afraid that my cookie-dough-eating days are far from being over. Sometimes I think I am nothing more than a walking contradiction, but I mean, we’re talking about raw chocolate chip cookie dough. Let’s be real.

Anywhoo, enter these fantastic brownies. The title says it all: they really are better than a boxed-mix version, but still have those characteristic crackly tops and chewy, fudgy interiors. These are not, I repeat not, cakey brownies. There is nothing dry, crumbly, or cake-like about them. One of the reasons I love them so much is that it almost seems like you are eating a square of brownie batter…they’re that rich! I had the slight problem of “evening my rows” as I cut these babies, and by the end of the whole ordeal I had probably consumed close to a whole brownie’s worth. I still maintain that I was ensuring that each square had perfectly straight edges and no stray crumbs attached, but I also refused Kaleb’s offer to help me cut them and take some of the “work” off my hands. IMG_5390

All you need to mix up these brownies is one bowl, one whisk, and one rubber spatula. I recommend weighing your ingredients to ensure the perfect texture, but regular measurements are also listed for those of you who don’t own a kitchen scale. Be careful to take these brownies out of the oven as soon as a toothpick comes out clean so that you don’t over-bake them, which could result in dryness. I warn you that they are a little difficult to cut cleanly due to the fudginess (which I declare is a word), but that just means all the more post-cutting “clean up” for you. 🙂 And you don’t even need to worry about consuming raw eggs, since they’ll be all baked up by then! You can have your brownie “batter” and eat it too, without a trace of salmonella paranoia. Yay!

Note: just to be on the safe side for food poisoning, you should probably eat up all these brownies as fast as you can. No point in risking it by letting them sit around, right? 😉IMG_5382

Better-Than-Boxed-Mix Brownies

1/3 cup (28 grams) unsweetened cocoa powder

1/2 cup + 2 tablespoons boiling water

2 ounces unsweetened chocolate, finely chopped

4 tablespoons (57 grams) unsalted butter, melted

1/2 cup + 2 tablespoons (140 grams) vegetable oil

2 eggs + 2 egg yolks

2 teaspoons vanilla extract

2 & 1/2 cups (496 grams) granulated sugar

1 & 3/4 cup (248 grams) all-purpose flour

3/4 teaspoon salt

Directions:

Adjust your oven rack to its lowest position and preheat the oven to 350 degrees F. Line a 9×13″ pan with aluminum foil, leaving a 1″ overhang. Spray with cooking spray and set aside.

In a large bowl, whisk together the cocoa powder and boiling water until smooth. Quickly add in the chopped unsweetened chocolate, and whisk until the chocolate is melted. Add the butter and oil and whisk until combined (the mixture may look separated or curdled, which is fine). Whisk in the eggs, egg yolks, and vanilla until smooth.

Whisk in the sugar until the mixture is homogenous. Using a rubber spatula, fold in the flour and salt until just combined.

Pour the batter into the prepared pan and spread it out evenly. Bake for 30-35 minutes, or until an inserted toothpick comes out clean (or with just a few crumbs attached). Transfer the pan to a wire rack and cool for 1 & 1/2 hours.

Holding onto the foil, lift the brownies out of the pan and place directly on the cooling rack. Cool completely before slicing into squares. Store in an airtight container at room temperature.

Recipe from Brown Eyed Baker, originally from Cook’s Illustrated

Oatmeal Chocolate Fudge Bars

IMG_5366If there’s one thing I’ve learned from my many years of baking, purchasing, reading about, talking about, and eating food, it’s that “healthy” means something different to just about everyone. Yes, we can probably all agree that deep-fried Twinkies have a very low chance of ever making it into the “healthy” category, and I’ve never met a person who has labeled fresh broccoli as “unhealthy,” but there is still a crazy level of disagreement when it comes to clean eating. I’ve read diet books that forbid the consumption of bananas, grapes, and watermelon due to their high sugar contents, but the vending machine in my residence hall back at school has a “fit pick” sticker pasted on Grandma’s Oatmeal-Raisin Cookies. There are also “fit pick” stickers on bags of low-fat pretzels and salted peanuts, which are scorned by others for their simple carbohydrates and high fat content, respectively. Sometimes it seems like there’s just no winning.IMG_5348

All that being said, there is winning when it comes to this recipe! I’m going to refrain from trying to convince you that these Oatmeal Chocolate Fudge Bars are “healthy” (because, yes, there are real milk chocolate chips and gobs of peanut butter in them), but I will say that they have no flour, no butter, no white sugar, and no un-pronouncable additives or preservatives. What they do have is a soft, slightly crumbly crust made from oats, maple syrup, and peanut butter–side note: pure maple syrup+peanut butter is one of the best unlikely combos ever–and a thick, smooth filling that consists purely of chocolate and peanut butter. I personally think these bars taste best when eaten straight from the fridge, but you can also freeze them to make them last longer. Although if you’re anything like my family and me, the bars will be devoured in record-breaking time whether or not they’re hidden away in the freezer. I recommend saving yourself the trouble by keeping them thawed in the fridge and at-the-ready for eager consumption. Even if you decide that these Oatmeal Chocolate Fudge bars aren’t 100% healthy, they are certainly 100% delicious…and when it comes to desserts, that’s what really matters, right? IMG_5340

Oatmeal Chocolate Fudge Bars

Yield: 16-25 bars (depending on how large you cut them)

2 & 3/4 cups quick-cooking oats (220g)*

1/2 teaspoon salt

1/2 cup pure maple syrup**

1/4 cup + 1/2 cup creamy peanut butter, divided

1 tablespoon water

1 teaspoon vanilla extract

5 ounces chocolate chips (I used milk chocolate)

Directions:

Line an 8×8″ pan with aluminum foil or parchment paper, leaving a short overhang, and set aside. In a medium-sized bowl, whisk together the maple syrup, 1/4 cup peanut butter, water, and vanilla until smooth. Stir in the oats and salt.

Scoop about 2/3 of the oat mixture into the prepared pan and press it down firmly and evenly with the back of a metal spoon. Set aside.

In a smaller bowl, combine the 1/2 cup peanut butter and chocolate chips. Microwave for about 40-60 seconds, stirring after each 20-second increment, until the mixture is smooth. Pour the chocolate mixture over the oat layer in the pan and spread evenly.

Sprinkle the remaining oat mixture evenly over the melted chocolate, and carefully press it down. Chill for at least an hour, or until the chocolate is firm. Carefully lift the bars out of the pan while holding onto the foil or parchment paper, and cut into squares.

*I only had old-fashioned rolled oats on hand, so I just pulsed them about 20 times in my food processor. Using old-fashioned oats by themselves will change the texture of the bars, making them more crumbly.

**Honey or agave nectar can be substituted for the maple syrup. If you do use maple syrup, make sure you are using PURE maple syrup (not regular pancake syrup).

Recipe adapted from Chocolate Covered KatieIMG_5349

Caramel Chocolate Chip Cookie Bars

Bars1I kind of have mixed feelings toward the whole DYI craze. Cognitively I know it’s often a really good idea for the environment, for your bank account, for your health and for your sense of accomplishment to do things like make your own yogurt and can your own tomatoes and bake your own bread, but realistically it can be a little hard to put into motion. I mean, sometimes my greatest sense of accomplishment about the day comes from taking the time to rinse and recycle a peanut butter jar rather than simply throwing it away. I try. I promise I do!

Sadly, corporations are onto me and my fellow lazy busy well-intentioned members of society. Containers of pre-peeled/pre-cut veggies, packets of pre-made spice mixtures, and bags of pre-shredded cheese stare at us from grocery store aisles saying, “Buy me, buy me! Your life will be so EASY if you just BUY me!”  Basically, the fewer steps you have to do, the more expensive a product is. And the more waste and manpower go into creating it. And the more marketed it is. And the more tempting it is to toss it into your cart with a mixture of guilt and gleeful relief. Hashtag-first-world-problems.

Sometimes I manage to refrain from buying all the enticing lazy-person products out there, but sometimes I just can’t help myself. It should come as no surprise that baking aisles are already a little bit dangerous for me, especially the chocolate chip area. Who knew there were so many kinds of special delicious add-ins these days?! Things like mint-filled chocolate morsels and neapolitan marshmallows were definitely not around ten years ago. Right?Bars2

I’ve only recently become aware about the existence of wonderful little things called caramel bits, which are essentially round bits of caramel. Shocker! Whenever I do bake with caramel, I usually just use the little plastic-wrapped caramel squares, especially if I’ll be melting them down. The only problem is that it takes for-freaking-EVER to unwrap all those tiny cubes. That’s why it’s so amazing that someone came up with the fantastic idea of making caramel bits that require NO UNWRAPPING AT ALL! It’s a dream come true for nerds like me.

Naturally, I knew it wouldn’t be long before I’d have to incorporate caramel bits into a baking project. Sadly, baking projects don’t happen all that often these days due to my busy college life, but once in a while I find time to clear a space in my cluttered little kitchen and create something wonderful. Last time’s something-wonderful was Caramel Chocolate Chip Cookie Bars. Chocolate chip cookie bars are about as easy as it gets…just your standard chocolate chip cookie recipe pressed into a 9×13 pan and baked until golden-brown. Simple, standard, but always delicious!

I won’t even pretend that it’s possible for me to KEEP a recipe simple and standard, so I turned the melted butter from the recipe into browned butter (please don’t laugh, those of you aware of my obsession) and added in caramel bits along with miniature chocolate chips. It was an excellent idea, if I do say so myself. The nutty browned butter paired with chocolate and caramel was a fantastic flavor trio, especially in the form of extra-chewy cookie bars. And I didn’t even have to feel guilty for using my newfound caramel bits since I was saving a step AND saving on waste (because no plastic wrappers)! Totally economical. Totally budget-friendly. Totally healthy. Or at least we can pretend. One thing that these bars definitely WILL bring you is a sense of accomplishment. Because delicious things are always good accomplishments. Remember that!Bars5

Caramel Chocolate Chip Cookie Bars

Makes 24 bars

12 tablespoons (1.5 sticks) unsalted butter

1 cup brown sugar, packed

1/2 cup granulated sugar

1 large egg

1 large egg yolk

2 teaspoons vanilla extract

2 cups + 2 tablespoons all-purpose flour

1/2 teaspoon baking soda

1/2 teaspoon salt

1 cup mini chocolate chips (increase to 1.5 cups if using standard-size)

1/2 cup caramel bits (optional)

Directions:

Preheat oven to 325 degrees F. Line a 9×13″ glass pan with tin foil and spray lightly with cooking spray. Set aside.

Melt the butter in a small saucepan over medium heat, whisking constantly. Keep whisking as the butter foams and bubbles. When the butter becomes golden-brown and fragrant, immediately turn off the heat and pour the browned butter into a mixing bowl. Let cool for 5 minutes.

Meanwhile, combine the flour, baking soda, and salt in a separate bowl.

Whisk the sugars into the melted butter until smooth. Whisk in the egg and egg yolk, followed by the vanilla. Stir in the flour mixture just until incorporated. Stir in the chocolate chips and caramel bits.

Spread the mixture into the prepared pan and pat down evenly. Bake for 25-30 minutes or until golden-brown. Let the bars cool before cutting.

(Recipe adapted from Two Peas and Their Pod)

Pumpkin-Chocolate Chip Bars

Pumpkin bars1Much of the world makes no sense to me. You may be thinking Thank you, Captain Obvious, but I’m talking about all the little facts and rules that just don’t seem reasonable. For example, in school you can get an A, B, C, D…or an F. I have never understood why there isn’t an E. Also, why do “fat chance” and “slim chance” mean the same thing, when they clearly sound like opposites? The teeny tiny candy bars are the “fun-sized” ones, and the numbers 11-13 have special names that completely ignore the pattern. Senseless, I tell you!

One of the things that always stumped me when I was little was the dates of the seasons. If it was up to me, summer would be June-August, fall would be September-November, winter would be December-February, and spring would be March-May. Of course, now I know that the “official” seasons do have a bit of legitimate reason behind them (“equinox” was not a term I was familiar with at the innocent age of 5), but I still find it strange to think that the coldest days in early December are actually “autumn” days and that the first three weeks of March are technically winter. Right now, for instance, we’re still on the tail end of summer. I can’t say that the weather down here in Oregon is disagreeing (we’re expected to reach 93 degrees today!), but with the start of school and the first orange leaves appearing on the trees outside my window, I can’t help but consider it to be autumn. September 15 just doesn’t make you think “summer!” Am I right or am I right?Pumpkin bars8

I’ve decided to officially declare it fall on Emma’s Baking Addiction and break out the pumpkin! One of my favorite times of the year to bake is during these autumn months, during the harvest season of giant juicy apples and bright orange pumpkins. I love baking with warm fall spices such as cinnamon, nutmeg, ginger, and cloves, especially when paired with apple or pumpkin baked goods. There’s nothing like the smell of pumpkin snickerdoodle bars or apple-cinnamon bread baking in the oven and filling the house with the scents of the season. I’ve been known to go a little pumpkin-crazy throughout September, October, and November, so expect more pumpkin recipes to come!Pumpkin bars5

Pumpkin is making its first debut of the year in the form of these Pumpkin-Chocolate Chip Bars. At first, the combination of pumpkin and chocolate may sound a bit odd (if it doesn’t, then hooray for you and your natural ability to recognize a good combo when you see one!) but it’s really fantastic. The soft, sweet, spiced pumpkin bars studded with pockets of rich chocolate are heaven! Also, don’t confuse these bars with snack cake or sheet cake…they’re a lot more like blondies in texture, and are supremely chewy and moist. There’s a time and a place for crumbly, fluffy pumpkin cake, but this is not it! These bars also stay soft for days, and I find that they taste best on the second or even third day when the flavors have melded and the spicy pumpkin flavor is enhanced.

Welcome fall with open arms by making a batch of these Pumpkin-Chocolate Chip Bars! I’ve already been asked for the recipe, and they didn’t last long around these parts. I’m so glad I didn’t wait until the official fall equinox to bake these…they’re just too good!Pumpkin bars2

Pumpkin-Chocolate Chip Bars

Makes about 16 bars

1/2 cup butter, melted

1 cup light brown sugar, packed

1 large egg

3/4 cup canned pure pumpkin

2 teaspoons vanilla extract

2 teaspoons pumpkin pie spice*

1 teaspoon ground cinnamon

1/8 teaspoon salt

1 & 1/4 cups all-purpose flour

1 cup chocolate chips

*Instead of pumpkin pie spice, you can use a mixture of 1 tsp cinnamon, 1/2 tsp ground ginger, and 1/4 tsp each of nutmeg and cloves

Directions:

Preheat oven to 350 degrees F. Line an 8×8 baking pan with aluminum foil or parchment paper, leaving a slight overhang. Spray or grease lightly and set aside.

In a large bowl, whisk together the melted butter, brown sugar, egg, pumpkin, vanilla, cinnamon, spices, and salt until smooth. Gently stir in the flour just until combined. Fold in the chocolate chips, reserving a tablespoon or so to sprinkle on top.

Spread the batter into the prepared pan. Smooth the top with a spatula and sprinkle evenly with reserved chocolate chips. Bake for about 30-34 minutes, or until an inserted toothpick comes out clean or with just a few moist crumbs. Cool completely before slicing into squares.

(Recipe adapted from Averie Cooks)

Butterscotch Browned Butter Blondies

bbb4Bear with me here, okay? The last ten days have been a whirlwind of packing boxes, saying see-you-laters, driving, unpacking, saying hello-agains, setting up a mini-apartment, and starting new classes. I’ve started round 2 of this crazy thing called college, and once again I am reminded that yes, it is possible to simultaneously hate change and love it, and to feel approximately 10,000 emotions all at once. So I’m sorry for the brief hiatus from baking, but I’m sure you kind souls will understand!

The bad news is that my super-talented photographer brother is far far away in Montana (sniffle), so my baked goods no longer have the luxury of being beautified and clarified by his mad skills. Instead, we get my not-so-talented iPhone photos. Let’s just say that beauty and clarity are not the first two adjectives that come to mind when I look at them! We all know that we eat with our eyes, so just use your imagination and trust that these blondies taste even more delicious than they look.

The good news, on the other hand, is that this year I’m lucky enough to be living in an  apartment-style dorm with two of my best friends (and one super-friendly new roommate), which happens to have its own little kitchen! We also have four (tiny) bedrooms, two bathrooms, four bathroom sinks, a little living room, a TV, a VCR (yes, those things still exist!), and a fake potted plant featuring our two plastic flamingos, Mushu and Lulu (long story). (As you can tell, my obsession with parenthesis continues.)bbb3

Compared to last year’s standard freshman experience (i.e. living in what felt like a cubicle, carrying a shower kit to and from the bathroom every day, and eating way too much cafeteria food) I’m living a life of luxury. I couldn’t wait to break in our new kitchen, so as soon as my last class was over on Friday I made a quick trip to Safeway for ingredients and got straight to work.

While cookies are my usual go-to, we only have one cookie sheet and zero electric mixers, so I opted instead for cookie bars aka blondies. I knew I could just use melted butter since blondies are baked in a pan and won’t spread like cookies, and I also just really love blondies. Since I was already melting the butter I went ahead and browned it, which is never ever ever a bad decision ever. Browned butter gives whatever it’s in a nutty, caramel-y depth of flavor and it makes your kitchen smell amazing for hours!bbb2

Apart from browning the butter, which really isn’t that hard, this recipe is about as simple as it gets. I used one bowl, one spoon, and one pan, which I lined with parchment paper for easy clean-up. Very do-able for tiny apartments and limited supplies! I chose to add in chocolate chips, butterscotch chips, and a dash of cinnamon, but you can think of this recipe as a base for whatever type of bars you fancy. I’ve made them in the past with shredded coconut, white chocolate chips, and chopped nuts, and in my option the more loaded they are, the better! Hopefully everyone shares this opinion, since I halved the original recipe and forgot to halve the chips, meaning they were very, um, chippy. No one seemed to mind :).

It felt so good to be back in the kitchen after a crazy week! There’s something about the predictability of measuring, mixing, and baking that’s incredibly comforting, which is part of the reason I love to bake so much. It also brings back memories, provides a sense of focus, allows for creativity, and best of all, results in delicious things! Baking addict forever <3.

Enjoy these Butterscotch Browned Butter Blondies, everyone! Say that five times fast.bbb5

Butterscotch Browned Butter Blondies

Makes about 16 bars

1/2 cup (1 stick) butter

3/4 cup brown sugar, packed

1/4 cup granulated sugar

1 large egg

1/2 teaspoon vanilla extract

1 cup all-purpose flour

1/2 teaspoon baking powder

1/4 teaspoon baking soda

1/4 teaspoon salt

1/2 teaspoon ground cinnamon (optional)

1/2 cup butterscotch chips

1/2 cup semisweet chocolate chips

Directions:

Preheat oven to 325 degrees F. Line (or grease) an 8×8″ baking pan with parchment paper, leaving a 2-inch overhang. Set aside.

Place the butter into a small saucepan and melt over medium heat. Let it cook for about 5 minutes, whisking constantly, until it turns dark golden-brown and smells nutty and fragrant. Be careful to stop as soon as the butter is browned, because it can quickly burn! Set the browned butter aside to cool as you prepare the dry ingredients.

In a medium-sized bowl, whisk together the flour, baking powder, baking soda, salt, and cinnamon. Set aside.

Add both sugars to the slightly cooled butter (you can just mix it all in the saucepan), whisking until smooth. Whisk in the egg and vanilla until smooth and glossy. Gently stir in the dry ingredients, mixing just until no flour streaks remain. Stir in the butterscotch and chocolate chips.

Scrape the batter into the prepared pan. Bake for 35-40 minutes, or until an inserted toothpick comes out clean. Cool completely before slicing into bars.

(Recipe adapted from Brown Eyed Baker)


S’mores Blondies

IMG_2114The 4th of July always seems to signify that summer is really here, although this year I feel like it’s been summer for ages! Coming home from school so early (my last day of classes was May 12th!) kind of messed up my internal calendar, and it’s hard to believe that the season officially started less than two weeks ago. I’ve always loved summer’s ability to make me lose track of what day of the week it is, but this year I’m seriously off…I actually looked up from a magazine the other day and asked my dad, in all seriousness, what year it was. I was convinced that it was 2013, but the article I had just finished reading was dated June 20, 2014. For a minute there I was a little worried that I had either gone temporarily crazy or was reading an article from the future. Apparently it was the former, which is a good thing…I think. We won’t even talk about the time at the end of freshman year when I was throwing out all my old biology papers and saw that I had dated them 2006 (as opposed to 2009) for the entire month of October. Should I be worried? Nah. Maybe….

IMG_2127

Regardless, I love summer. I love the giant produce tent outside the grocery store piled high with flats of local berries and live basil; I love sitting on pieces of driftwood around smokey beach fires; I love the salty smell of sunscreen mixed with seaweed and I love how there always seems to be a thin layer of sand at the bottom of my favorite tote bag, no matter how many times I dump it out.

And, of course, I love s’mores. I still remember my very first s’more, which was assembled right in my very own backyard fire pit back in 2000. It took me a while to figure out what my enlighteners (friends of my parents) were trying to give me…some more? Some more what? No, I’ve never heard of a “some more.” Yes, I am aware that my parents have sheltered me from some of the best things in life, including a wide variety of “too violent” Disney movies and the brightly colored Trix yogurt I recently tried at a friend’s house. (Oh my poor, deprived childhood!) But once I was handed a melty creation of graham cracker, Hershey bar, and toasted marshmallow, my innocence was ruined. It didn’t matter what this thing was called. All I knew is that it was sticky, crumbly, utterly messy and utterly delicious. And that I wanted some more.

IMG_2133

Although there’s nothing quite like a fresh, gooey s’more eaten over a campfire, these bars are pretty darn amazing. They manage to skirt around the messiness factor, yet retain the iconic combination of graham cracker, marshmallow, and milk chocolate. A thick, chewy blondie base is loaded with graham cracker crumbs and sandwiched around a layer of creamy marshmallow fluff and chocolate chips. The resulting bars are packed with the flavor of a s’more, yet in the form of a delicious blondie-s’more hybrid. Bring them along to your next summer gathering for a fun s’more alternative, or just bake up a batch to eat anytime, anywhere. Chances are that if you love s’mores, you’ll go crazy over these!

IMG_2125

S’mores Blondies

Makes 24 bars

2 cups all-purpose flour

2 cups finely crushed graham cracker crumbs

1 teaspoon baking powder

1/4 teaspoon salt

1 cup (2 sticks) butter, softened

1 & 1/2 cups brown sugar, packed

2 large eggs

1 teaspoon vanilla

1 7-oz jar marshmallow creme or fluff

2 cups milk chocolate chips

Directions:

Preheat oven to 350 degrees F. Line a 9×13-inch pan with aluminum foil, leaving an overhang on the two shorter sides. Lightly grease the foil and set aside.

In a medium bowl, whisk together the flour, graham cracker crumbs, baking powder, and salt. In a large bowl, beat together the butter and sugar until light and fluffy. Add in the eggs and vanilla, scraping down the sides as needed.

Stir the flour mixture into the wet ingredients until combined. Evenly press half the dough into the bottom of the prepared pan. Drop the marshmallow creme by spoonfuls onto the dough and spread into an even layer. Sprinkle with chocolate chips. Drop the remaining cookie dough onto the surface in clumps, then flatten them slightly. Don’t worry about smoothing the dough over the entire surface; there should be some open areas where the chocolate chips and marshmallow are exposed.

Bake the bars for 30-35 minutes, or until golden-brown. Let them cool in the pan completely, then lift them out by the foil and slice into squares. Enjoy!

(Recipe adapted from Mel’s Kitchen Cafe)


Key Lime Cheesecake Bars with Gingersnap Crust

IMG_9012Today I have two matters of business to discuss with you. Since one of them involves a delicious dessert and the other happens to be a bit of bad news, there’s no question which one comes first. Dessert should always come first.

These Key Lime Cheesecake Bars with Gingersnap Crust are like a cross between key lime pie and key lime cheesecake, but in bar form. In other words, they’re smooth, creamy, and perfectly balanced between sweet and tart. Instead of a traditional graham cracker crust, this crust is made with crushed gingersnaps. I was a little leery of the ginger-lime combo at first, but one bite totally won me over. The crunchy, slightly-spicy cookie crust is an unexpected but delicious partner to the cool, creamy lime filling. Using key lime juice really makes a difference in these. You could use regular lime juice and I’m sure they would still turn out delicious, but the key lime has a more tropical, complex flavor that really takes these over the top. Bottled key lime juice will work perfectly if you don’t have access to fresh key limes (I know I don’t!) and is usually found in the unrefrigerated juice section.

IMG_9013

Celebrate the end of summer with these fantastic little bars. They’re SO much faster and easier than a full-out key lime pie (and most definitely easier than a cheesecake) but they manage to pack in all the same textures and flavors you’d expect from a more elaborate dessert. Crumbly gingersnap crust + creamy, sweet-tart key lime filling = bliss.

Second order of business: Emma’s Baking Addiction. As I’ve mentioned before, I head off to college on Monday, aka my life is going to change A LOT! Unfortunately this means that my blog will be taking the back seat for awhile. I’ll probably check in from time to time, but without access to a real kitchen and baking equipment (and my stellar photographer of a brother), there probably won’t be any new recipes for quite some time. Sad, I know. I can’t imagine that this will be the last of my blogging career, though. Although I’ve just gotten started, I love it too much to quit. Writing and baking are two of my very favorite things in the world, and I wouldn’t be surprised if I come back to food blogging later down the road.

IMG_9017

So for now, please enjoy looking back on all the posts I’ve done in the past year and keep your eyes out for my little updates. A huge thank you to all my readers!

Now to end on a happier note….see recipe below 🙂

IMG_9028

Key Lime Cheesecake Bars with Gingersnap Crust

For the crust:

2 cups finely crushed gingersnap cookies (the crispy kind)

3 tablespoons butter, melted

For the filling:

4 ounces cream cheese, softened to room temperature

4 large egg yolks, at room temperature

1 14-oz can sweetened condensed milk

1/2 cup key lime juice (I used bottled)

2 teaspoons fresh lime zest (from about 1 large lime)

Directions:

Preheat oven to 350 degrees F. Line an 8″x8″ baking pan with aluminum foil, leaving an overhang. Spray lightly with baking spray and set aside.

In a medium bowl, stir together the gingersnap crumbs and melted butter. Firmly press the mixture into the bottom of the prepared pan. Bake for 10 minutes while you make the filling.

In a large bowl, use an electric mixer to beat the cream cheese until smooth. Beat in the egg yolks one at a time, scraping down the bowl as needed. Mix in the sweetened condensed milk, key lime juice, and lime zest until well-combined. Pour the mixture into the hot crust. Bake for 18-20 minutes or until the edges are just beginning to brown and the top is set. Bars will still be slightly jiggly.

Let the bars cool on a wire rack for 1-2 hours, or until they reach room temperature. Chill the bars for at least 2 more hours, then lift them out of the pan and slice into squares. Leftover bars can be stored in an airtight container in the refrigerator.

(Recipe from Sally’s Baking Addiction)

Classic Fudge Brownies

IMG_6573In less than one month, I’m heading off to college. I know it’s cliche to say so, but time really did fly by this past year…more like the past 18 years, for that matter! So much change is about to come my way, which is both exciting and scary. Not mildly exciting and mildly scary, mind you. More like some days I’m busting at the seams to enter college life, ready to make new friends, take new classes, and live it up during my last few years before real adulthood begins. Other days I wish I could stay a kid just a little bit longer and could magically back up a couple years. Like to when I was, say, five. Yep, there are many days when five years old sounds pretty darn good.

On those particular days, nostalgia sets in. While deciding what to bake today, the idea of a new, complicated, or fancy recipe just wasn’t appealing. I wanted a plain, simple, classic something-or-other that I had made a million times in the past. A tried-and-true treat. Chocolate chip cookies definitely fit the bill, but since I made those so recently I went for another oldie-but-goodie: brownies. The kind I used to make before I was even allowed to turn on the oven, when I would secretly try to sneak bites of the unsweetened chocolate squares even though my mom warned me again and again that this won’t taste like chocolate chips, honey. Every time I spit out my sneaky little taste in disgust. And then the next time we made brownies, I tried again. You could say I was a slower learner. I say I was a true optimist, thinking that the chocolate would magically taste good the next time around!

IMG_6590

Not gonna lie, making simple chocolate brownies was a bit of an exercise in suppressing my tendency to make recipes more elaborate. Maybe add a little toasted coconut? A cupful of white chocolate chips? Some chopped pecans? No, no, no, I kept telling myself. I knew I had to resist my foodie urges and stick to the plan: classic, old-fashioned, good old  brownies containing nothing more than rich, fudgey chocolate and a crackly crust. Sometimes simple is all you need.

This recipe from The Joy of Cooking was just what I had imagined. No fancy brands of chocolate, no complex cooking methods, just your standard brownie ingredients, a bowl, and a spoon. I chose to bake these in an 8″x8″ pan, meaning they were incredibly thick and rich rather than thin and chewy. To me, when it comes to thick, cakey brownies vs. dense and chewy it’s like apples and oranges. Today I opted for tall and thick but you can definitely use a 9″x13″ pan if you prefer your brownies chewier. I promise that regardless of pan size they will still be moist, fudgey, and spectacular.

IMG_6593

I must say, this recipe also produced some killer brownie batter. Taking the time to beat the mixture thoroughly before adding in the melted butter/chocolate and flour produces an incredibly thick, silky-smooth batter. It was all I could do to scrape the brownie batter into the pan before it all disappeared into my mouth. I daresay I used up my entire supply of willpower for the day.

These brownies reminded me just how good an old classic can be. No frills, no tricky instructions. Just thick, chewy, chocolatey brownie perfection.

IMG_6596


Classic Fudge Brownies

Yield: 16 large brownies or 24 smaller brownies, depending on pan size

1/2 cup (1 stick) unsalted butter

4 ounces unsweetened chocolate

4 large eggs, at room temperature

1/4 teaspoon salt

2 cups granulated sugar

1 teaspoon vanilla extract

1 cup all-purpose flour

Directions:

Preheat oven to 350 degrees F. Line an 8″x8″ baking pan with foil and spray with baking spray.* Set aside.

Place the butter and chocolate into a shallow bowl. Microwave for 30-second intervals on 50% power, stirring between intervals, until melted and smooth. (Alternately, you could simply melt the chocolate and butter in a small saucepan over low heat.) Let the chocolate mixture cool.

In a medium-sized bowl, beat or whisk the eggs and salt together until light and foamy. Slowly beat in the sugar, followed by the vanilla, until the mixture is thick and smooth.

Using a wooden spoon, stir in the cooled chocolate mixture. Stir in the flour just until no streaks remain. Pour the batter into the prepared pan, smoothing the top with a spatula. Bake for 40-50 minutes (decrease baking time to around 25 minutes if using a 9×13 pan) or until an inserted toothpick comes out with just a few moist crumbs.

Cool the brownies in the pan on a cooling rack. When brownies are completely cool, grasp the foil, lift the brownies out of the pan, and cut into squares. Serve plain or with ice cream, whipped cream, etc.

IMG_6576

*For thinner, chewier brownies, use a 9″x13″ pan.

(Recipe from The 75th Anniversary Joy of Cooking by Irma S. Rombauer, Marion Rombauer Becker, and Ethan Becker)

Chocolate Chip Cookie Dough Billionaire Bars

IMG_4316

Today I have a very special post for you. (And no, I’m not talking about fact that these bars contain shortbread, caramel, cookie dough, and chocolate, although that is pretty special.) I’m pleased to report that this is….drumroll please….the 100th post of Emma’s Baking Addiction! Funny enough, it falls almost exactly on my blog’s one-year birthday. Two landmark events for a baking blog equals two excuses to bake two fabulous, over-the-top celebratory treats. First up are these Chocolate Chip Cookie Dough Billionaire Bars, a worthy candidate for my 100th blog post.

When I first started thinking about what to make for the big 1-0-0, Millionaire Bars came to mind. You know, the shortbread-caramel-chocolate layered bars that are very similar to a homemade Twix? That are apparently so good that they make you feel like a million bucks? Or are worth a million dollars? Make you gain a million ounces? Don’t ask me how they were named. I guess it was something about the fact that “one hundred” and “one million” are both numbers that made me think of baking Millionaire Bars to celebrate the 100th post. An obvious connection, right? Right? Maybe-possibly-not-so-much? It made better sense in my head.

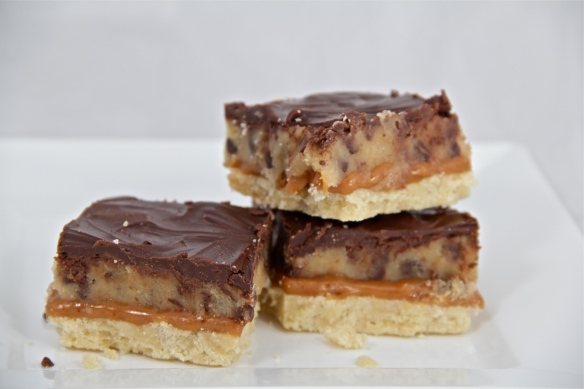
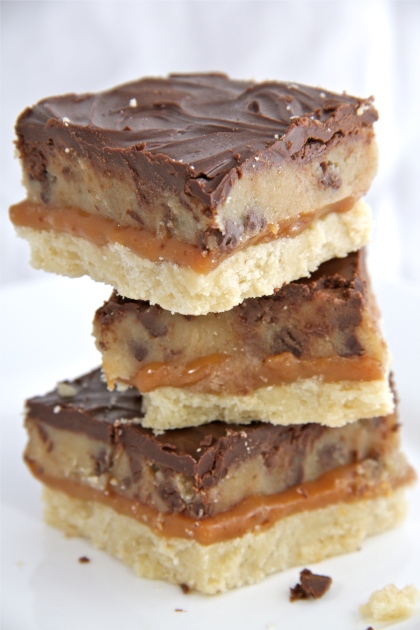
Anyway, upon looking for a great Millionaire Bar recipe to make as my 100th post (which, as we’ve established, makes total sense) I found the recipe for these babies. Not just Millionaire Bars, these are Billionaire Bars. Which means they’ve gotta be good. Not only do they have the buttery shortbread, gooey caramel, and decadent chocolate of their lesser-valued cousin, these bars have the brilliant addition of a chocolate chip cookie dough layer. An eggless chocolate chip cookie dough layer, that is, which means it can be eaten raw with absolutely zero worries or frets. Be still, my cookie-dough-loving heart!

IMG_4328

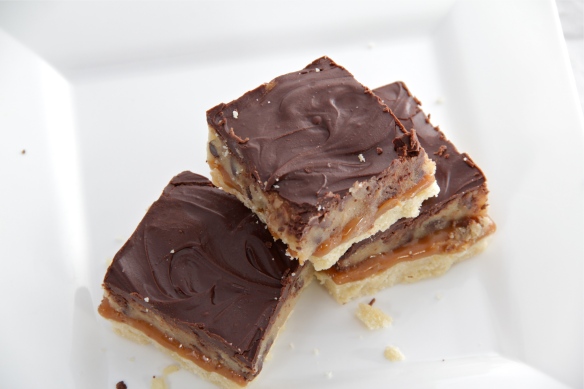
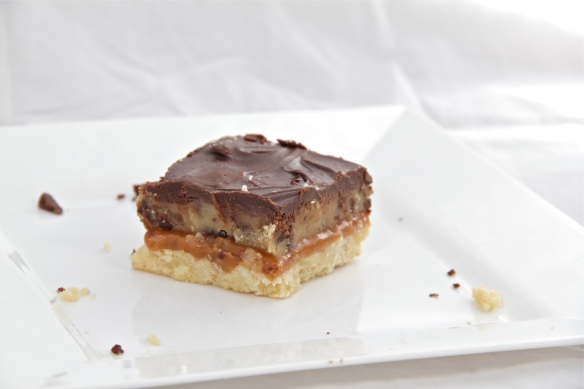
Let’s take a look at what we have here: a bottom layer of crumbly, melt-in-your mouth shortbread; a second layer of sweet, sticky caramel (not from scratch, for those of you who are terrified of caramel-making, like me this one person I know); a third layer of raw chocolate chip cookie dough that will make the bowl-licking-dough-sneaking little kid in all of us cry tears of joy; and a final layer of rich semisweet chocolate. Yes, there’s a lot of patience involved as each layer bakes or chills, and yes, there’s the possibility of a major sugar rush afterward, but it’s all totally worth it when you sink your teeth into one of these. They’re better than a billion dollars!! (Just don’t hold me to that if I’m ever actually given the choice, kay?)

IMG_4323

I hate to say it, but Millionaire Bars have lost a little bit of their luster to me now that I’ve made these Chocolate Chip Cookie Dough Billionaire Bars. It’s not that I wouldn’t satisfied with the original bar, it’s just…a layer of eat-able chocolate chip cookie dough sandwiched between chocolate and caramel? With a shortbread crust, for goodness sake?! Billionaire status indeed.

Happy 100th post, little blog!

IMG_4330

Chocolate Chip Cookie Dough Billionaire Bars

Yield: 16 bars

For the shortbread crust:

1/3 cup unsalted butter, at room temperature

1/3 cup granulated sugar

1/2 teaspoon vanilla extract

1/4 teaspoon salt

3/4 cup all-purpose flour

For the caramel:

7 ounces soft caramels (about 25 candies)

2 tablespoons heavy cream

For the cookie dough:

1/2 cup (1 stick) unsalted butter, at room temperature

1/2 cup light brown sugar, packed

1/4 cup granulated sugar

1/2 teaspoon vanilla extract

2 tablespoons heavy cream

1 cup all-purpose flour

Pinch of salt

1/2 cup mini chocolate chips

For the chocolate layer:

4 ounces good-quality semisweet or bittersweet chocolate, roughly chopped

1 tablespoon unsalted butter

Directions:

Preheat oven to 350 degrees F. Grease an 8″x8″ glass baking pan and set aside.

Make the shortbread: Using an electric mixer, beat together the butter and sugar until light and fluffy, about 2-3 minutes. Beat in the vanilla, then slowly mix in the flour and salt until combined. Mixture will be crumbly. Firmly press the dough into the prepared pan. Poke shallow holes all over the pan using a fork or a toothpick. Bake the shortbread for 18-22 minutes or until edges are lightly browned. Remove from the oven and set on a wire rack.

Make the caramel: Place the unwrapped caramels and heavy cream into a small saucepan. Cook over medium heat, stirring constantly, until the caramels are completely melted. Pour the hot caramel over the warm shortbread crust, spreading it evenly. Refrigerate for 30-60 minutes or until the caramel is set.

Make the cookie dough: Using an electric mixer, beat together the butter and sugars until light and fluffy, about 2-3 minutes. Beat in the vanilla and heavy cream, scraping down the bowl as needed. Stir in the flour and salt until just combined, then stir in the chocolate chips. Spoon the cookie dough onto the chilled bars and spread evenly. Refrigerate the bars while making the chocolate layer.

Make the chocolate layer: Place the semisweet chocolate and butter into a microwave-safe bowl. Microwave for 30-second increments on 50% power, stirring in between, until chocolate is smooth and melted. Pour the chocolate over the bars, spreading evenly.

Refrigerate the bars for an additional 30 minutes or until chocolate is set. Using a sharp knife, cut into bars. The bars can be stored in an airtight container at room temperature for several days.

(Recipe adapted from Brown Eyed Baker, originally from The Cookie Dough Lover’s Cookbook)

Peanut Butter, Honey, and Banana Oat Bars

IMG_4297

Grocery shopping with a brother in the house isn’t always easy. Grocery shopping for an 18-year-old brother is even harder. Grocery shopping for a 6-foot-4, 18-year-old brother who also happens to be training for a triathlon can drive one to insanity. Especially when I’m the one that does most of the shopping. It seems like no matter how much food I buy, it’s inhaled in approximately 48 hours. Which means another trip to the store, followed by another 2-day inhalation period, followed by another empty fridge and of course another trip to the store. It’s a vicious cycle.

Now don’t get me wrong. I love my brother, I do, but his bottomless pit of a stomach can be a little frustrating. I’ve taken to writing my name in Sharpie on every food or drink that I plan on ingesting at some point in the near future, because if I don’t eat it within those two or so days of buying it, it’s long gone. This system has worked quite well for me, with the downside of making me look like an obsessive-compulsive hoarder to all third-party observers. But hey, you’ve gotta do what you’ve gotta do.

This week my brother is off visiting a friend in North Dakota, which means it’s just my parents and me at home. This morning I woke up to find 4 brown bananas in our fruit bowl, and I nearly fell over. Bananas are one of my brother’s favorite foods and they never, ever, ever survive long enough to develop even one lowly brown spot. Since brown bananas (aka perfect-for-baking bananas) are unheard of in our house, I jumped at the chance to finally sift through all the banana-based recipes in my bookmarks file and get baking!

IMG_4299

After much debate, I decided to experiment with a new recipe idea: Peanut Butter, Honey, & Banana Oat Bars. I figured I’d use my go-to and highly adaptable Chewy Granola Bar recipe to start, subbing in mashed banana for the applesauce in the original recipe, using honey for the sweetener, and leaving out the nuts and dried fruit. I wanted the pure flavors of banana, honey, and peanut butter to come through loud and clear, so I kept things simple. Without all the add-ins, this recipe is super minimal when it comes to ingredients and it’s also mega-easy. I just whisked together the mashed banana, peanut butter, and honey, adding in a splash of vanilla and a dash of cinnamon for a little extra flavor. Then I folded in the oats, the last ingredient if you can believe it. (I used quick-cooking oats in these, which make for a more uniform, less chewy texture, but you could totally use old-fashioned rolled oats if you like your bars a little chewier and crumblier.) Next it was into the oven for about half an hour, and the next thing I knew I was pulling out a pan of delicious-smelling Peanut Butter, Honey, Banana and Oat Bars!

Since there weren’t any add-ins in the bars I opted to top them with a glaze for a little something extra. I remembered seeing these Peanut Butter, Banana, and Honey Cookies over at Two Peas and Their Pod, which were topped with a peanut butter-honey glaze, so I dug out that recipe and mixed up the glaze. And I’m so glad I did. I literally wanted to eat the entire bowlful with a spoon; it’s that good. Silky-smooth, sweet but not at all like that powdered-sugary-stick-to-your-teeth kind of sweetness that so many glazes end up having, this glaze brought the bars from delicious to swoon-worthy.

IMG_4300

The bars themselves turned out soft, chewy, and packed with the flavors of peanut butter, honey, and banana. They taste just like a peanut butter-honey-banana sandwich, which is one of my favorite comfort foods of all time. The bananas keep the bars nice and soft, while the oats give them a chewy texture. And wait, it gets better! Not only are these bars super delicious, they’re also sugar-free (minus the glaze), dairy-free (if you use almond milk in the glaze), AND gluten-free if you make sure to use gluten-free oats! Even with all that healthfulness going on they are absolutely not lacking in the taste or texture department. I would never in a million years guess that these are so healthy. Win-win!

A lot of good can come from a couple old bananas. I’m definitely going to have to make these bars again….maybe I can just write my name in Sharpie on the banana skins and they’ll survive to the point of overripeness. Or maybe I can just give my brother one of these bars when he gets home and he’ll see for himself how good they are. Definitely worth leaving the bananas alone for a couple of days. However, considering the vast amount of PB & J he eats in a day, keeping the peanut butter jar full enough for a batch of these bars will be challenge in itself….

IMG_4301

Enjoy, friends! 🙂

Peanut Butter, Honey, and Banana Oat Bars

Yield: 16 two-inch square bars

1/2 cup smooth peanut butter

1/2 cup mashed banana (1 medium banana)

1/3 + 1/4 cup honey

1 teaspoon vanilla extract

1/2 teaspoon ground cinnamon (optional)

2 & 1/2 cups quick-cooking oats

For the glaze:

3 tablespoons creamy peanut butter

1/2 cup powdered sugar

2 tablespoons milk

1 tablespoon honey

Directions:

Preheat oven to 325 degrees F. Grease an 8″x8″ glass pan or line with parchment paper. Set aside.

In a medium bowl, whisk together the peanut butter, mashed banana, honey, vanilla, and cinnamon until smooth. Stir in the oats until the mixture is well-combined.

Spoon the mixture into the prepared pan, pressing it firmly into the bottom. Bake for 25-30 minutes or until the top is golden-brown. Let the bars cool completely. (You can speed this up by placing the bars in the freezer for about 45 minutes.)

Meanwhile, make the glaze. Whisk together the peanut butter, powdered sugar, milk, and honey in a small bowl until smooth. Drizzle the glaze over the cooled bars, then slice into squares. (Note: leftover glaze makes a stellar dip for apples, bananas, pretzels, etc.!) Store leftover bars in an airtight container at room temperature.

(Glaze recipe from Two Peas and Their Pod, Bar recipe from Emma’s Baking Addiction