Fresh Lemon Sorbet

IMG_7845-Edit
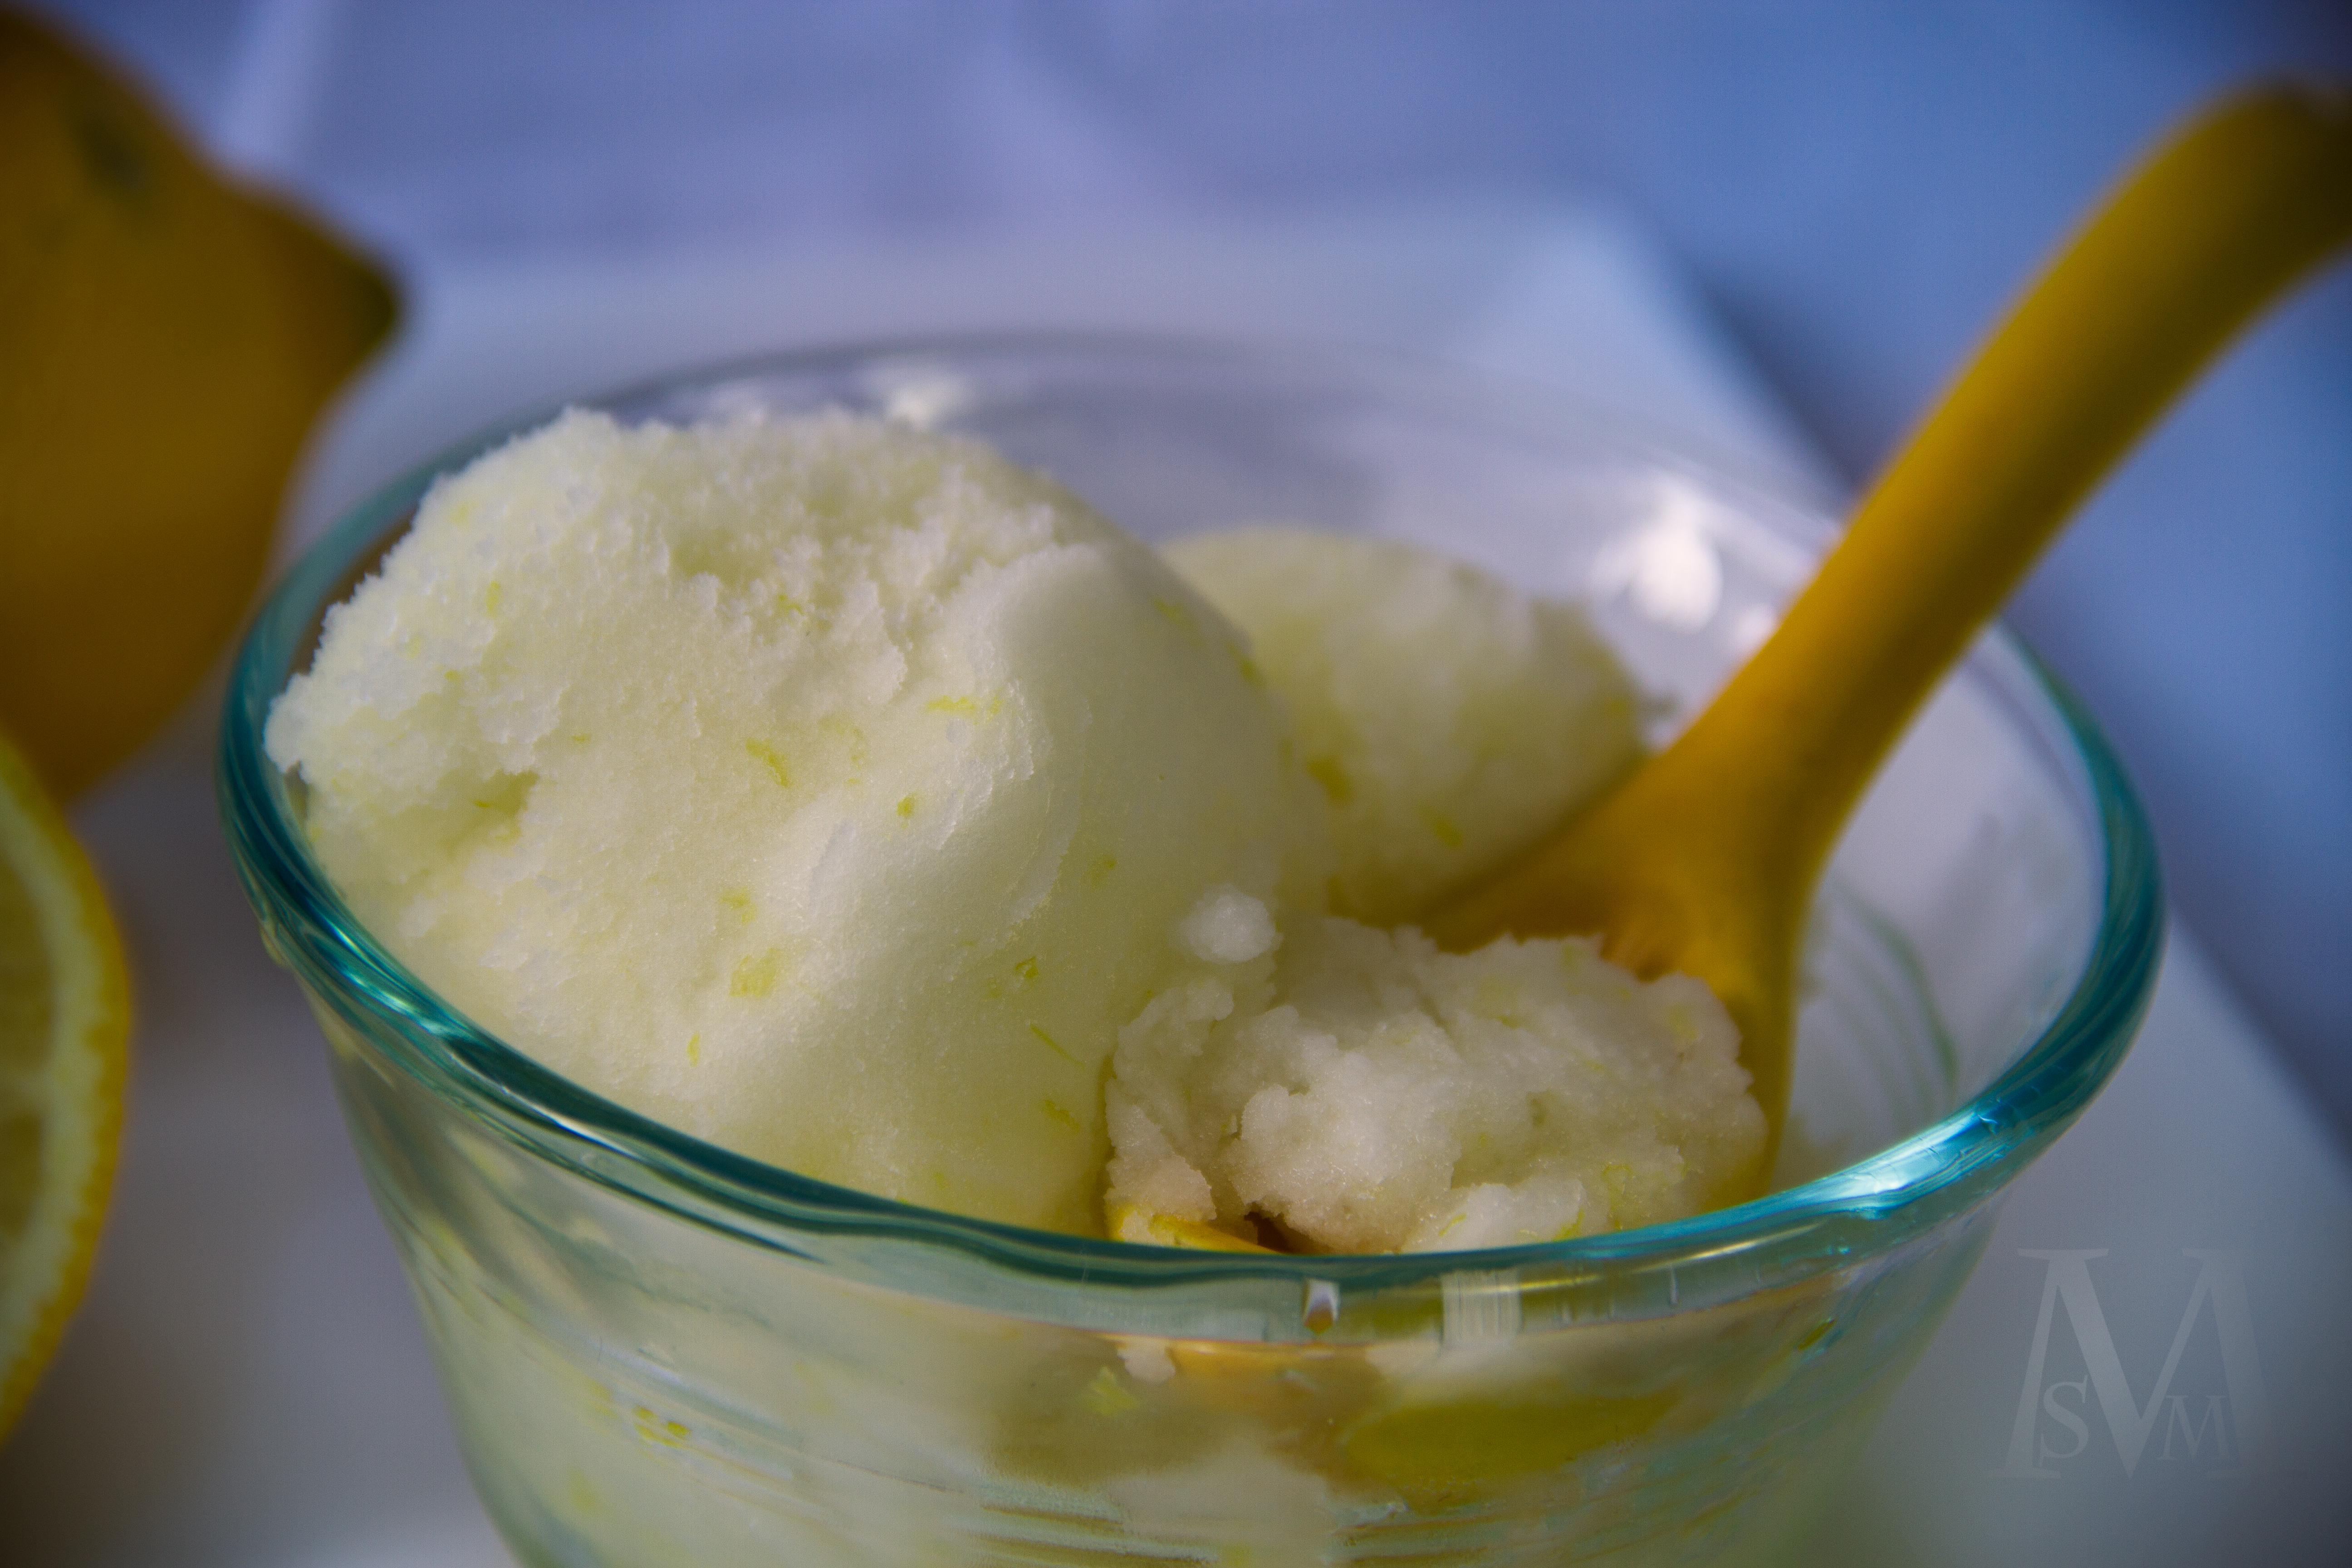
For many years, I always referred to sorbet as “sore-bet” rather than the correct pronunciation “sore-bay.” My dad called it “sore-bet,” my mom called it “sore-bet,” so naturally I thought it was “sore-bet.” Who was I, an innocent and easily corrupted little child, to know the difference? Sadly, “sorbet” is not the only word I’ve pronounced incorrectly for years, only to find out that I’ve been sounding like an idiot for way too long. Like when I used to talk about “ether-real” desserts (ethereal), “super-flouse” amounts of something (superfluous), and what to order for “horse-da-vores” (hors d’oeuvres). Classy.

IMG_7854-Edit

Luckily I’m not the only one who slaughters the English language once in a while. I recently informed my father, a middle school English teacher, that the word disheveled is pronounced “dish-heveled” rather than “diss-heevled.” Whoops-a-daisy. And I can’t tell you how many times in school I’ve heard classmates talk about the “coop” in Afghanistan when its government was taken over, or ask our Lit teacher what exactly a “hyper-bowl” is. *Face-palm*

IMG_7856-Edit

Now that we’ve gotten the pronunciation issue squared away nicely, I can present to you this fabulous recipe for Lemon SorbAY! Its tart, sweet, zesty, icy lemon freshness is the perfect refresher to end any summer meal. Or winter meal. Or fall meal or spring meal for that matter. With only FOUR ingredients (two of them coming from the same fruit and one of them being water) this is one of the simplest recipes out there. Just heat up a simple syrup of water and sugar, let it cool while squeezing and zesting some fresh, juicy lemons, stir it all together, pour it into an ice cream maker, freeze for a couple hours if desired, and voila! Fresh, homemade sorbet ready to be gobbled up at your earliest convenience.

IMG_7858-Edit

I realize that not everyone owns an ice cream maker, and I can’t vouch for the results of making this recipe without one, but I have to say that prior to freezing this recipe is nothing more than wonderful homemade lemonade. I would imagine that if you blended/food-processed the mixture with a handful of ice cubes you’d have a pretty stellar lemon slushy to feast on, too. But if you DO happen to own an ice cream maker, go the sorbet route. You won’t regret it. This cool, creamy, perfectly tart, and fruity sorbet beats anything I’ve ever bought in the frozen food aisle. It’s seriously ethereal, guys. Ether-real indeed. 😉

IMG_7860-Edit

Fresh Lemon Sorbet

1 cup water

1 cup granulated sugar

3/4 cup freshly squeezed lemon juice (from about 3-4 large lemons)

1 tablespoon fresh lemon zest (more or less to taste)

Directions:

Combine the water and sugar in a small saucepan. Place over medium heat, stirring occasionally, until the mixture comes to a boil. Reduce heat to low and simmer for 2 minutes, uncovered. Pour the mixture (called a simple syrup) into a bowl and cool completely.

When the syrup is cool, stir in the lemon juice and lemon zest. Pour the mixture into an ice-cream maker and freeze according to maker’s instructions. (Mine takes about 25-30 minutes.) Sorbet will be soft and slushy. Serve the sorbet immediately or transfer it to a container and freeze for 4 hours or until firm. Makes about 2 cups.

(Recipe adapted from Taste of Home)

The Ultimate Oatmeal-Raisin Cookies

IMG_6940

Back in my early baking days, before Pinterest and food blogs and reasonably fast Internet and a computer that didn’t have a gigantic egg-shaped bulge in the back, I used actual cookbooks. Cookbooks, handwritten recipes scribbled on notecards, and the recipes printed on the back of ingredient bags/boxes were the most common sources of all my recipes. When I had the urge to bake chocolate chip cookies, I simply flipped over the bag of chocolate chips and followed the traditional Tollhouse recipe. The recipe for my favorite soft gingersnaps was found in a homemade, spiral-bound cookbook given to my dad from a past student, and the recipe for my grandma’s famous Crown Jewel Cake (aka Lady Finger Cake) was handed down to me, handwritten of course, from her mother-in-law.

I had it in my head that there was one, maybe two, tried-and-true recipes for whatever I wanted to bake. My little baking world offered fewer choices, fewer variations, and less of an urge to produce the perfect this-or-that. Which was both good and bad, I suppose. Sometimes I think I get a bit carried away with all the spunked-up versions of traditional baked goods that float around the Internet, searching tirelessly for the perfect chocolate chip cookie, the perfect blackberry pie. However, sometimes all that searching, that endless supply of online recipes lying at my beck and call, leads me to a jackpot.

IMG_6942

Oatmeal-raisin cookies have been one of my favorite stand-by cookies since the beginning of my baking career. For years I used the recipe for Vanishing Oatmeal Raisin Cookies conveniently located on the underside of a Quaker Oat canister lid. As my baking skills grew, my cookies changed from dry, slightly-burnt lumps or flat, greasy circles to perfectly tasty, chewy, cookies. I had nothing to complain about, so I never used any other recipe. Until now, that is.

Sadly it seems as though oatmeal-raisin cookies are hardly a favorite of the cookie family. So often they get passed up for chocolate chip, peanut butter, white chocolate macadamia, or other more “exciting” cookies. After coming across a recipe on Annie’s Eats for “The ultimate” oatmeal-raisin cookies, I knew I had to try it. This was definitely a recipe that had been tested over and over, especially since it called for weighted ingredients. I’ve simply listed the measured amounts below, since I don’t happen to be the lucky owner of a food scale, but you can view the original recipe from the link at the bottom if you’d prefer to weigh your ingredients.

IMG_6946

These really may be The Ultimate Oatmeal-Raisin Cookies. With an entire tablespoon of cinnamon, a vanilla bean (which is worth the splurge!) plus a tablespoon of vanilla extract, rehydrated raisins (just soak ’em in some hot water to get them plump and juicy) and carefully proportioned ingredients, this recipe is above and beyond that of the oat box’s. Sorry, Quaker Oat Man.

Though I’m admittedly a lover of thick & chewy cookies, these fall more into the thin & chewy camp. Just as long as you’re careful not to over-bake them they won’t be crunchy, just crisp around the edges and wonderfully chewy in the center. The flavors of cinnamon and vanilla come through, but not too strongly, and the cookies are just a bit saltier than most cookies–a feature that I happen to love, since a hint of saltiness pairs so well with the nutty oats. While I was still scooping the dough balls my dad sniffed the air and asked what I was baking–they’re that aromatic! When they actually were baking, my house smelled heavenly. Like cinnamon-raisin-vanilla-buttery goodness.

IMG_6949

Bring oatmeal-raisin cookies out of the sidelines by baking these ULTIMATE oatmeal-raisin cookies! I still love my trusty old Quaker Oats recipe, but I have to admit that after trying these beauties it will be hard to go back.

IMG_6941

The Ultimate Oatmeal Raisin Cookies

Makes about 2 dozen large cookies

1 cup + 1 teaspoon all-purpose flour

1 tablespoon ground cinnamon

1 & 1/2 teaspoons baking soda

1 teaspoon salt

11 tablespoons unsalted butter, at room temperature

3/4 cup brown sugar, lightly packed

5 & 1/2 tablespoons granulated sugar

1 vanilla bean pod

1 tablespoon vanilla extract

1/4 cup eggs, lightly beaten (about 2 medium eggs)

2 cups old-fashioned oats

1 cup dark raisins (or a mixture of dark and golden raisins)

Directions:

Place the raisins into a bowl and cover with hot water. Let them soak for 20-30 minutes so that they can rehydrate and plump up. Then drain the raisins and spread them onto a clean hand towel, blotting gently to soak up any extra water.

In a medium-sized bowl, whisk together the flour, cinnamon, baking soda, and salt. Set aside.

In a larger bowl, using an electric mixer, beat the butter until smooth and creamy. Add in the sugars and beat for 3-4 minutes or until light and fluffy. Split the vanilla bean pod down the middle and, using a butter knife or a spoon, scrape the seeds into the bowl. Add in the vanilla extract and eggs; mix until smooth.

Add the flour mixture in two additions, mixing just until incorporated. Stir in the oats and raisins. Cover the dough and refrigerate for at least 30 minutes.

When ready to bake, allow the dough to sit at room temperature for 10-15 minutes while you preheat the oven to 325 degrees F. Line two baking sheets with parchment paper or silicon liners. Scoop the cookie dough into balls about 3-tablespoons large and drop onto prepared cookie sheets 2-3 inches apart. Bake for 17-18 minutes, rotating sheets halfway through, or until edges are set but tops are still puffy. Let the cookies cool for 5 minutes on the sheets before transferring to a cooling rack.

(Recipe adapted from Annie’s Eats)

Classic Fudge Brownies

IMG_6573In less than one month, I’m heading off to college. I know it’s cliche to say so, but time really did fly by this past year…more like the past 18 years, for that matter! So much change is about to come my way, which is both exciting and scary. Not mildly exciting and mildly scary, mind you. More like some days I’m busting at the seams to enter college life, ready to make new friends, take new classes, and live it up during my last few years before real adulthood begins. Other days I wish I could stay a kid just a little bit longer and could magically back up a couple years. Like to when I was, say, five. Yep, there are many days when five years old sounds pretty darn good.

On those particular days, nostalgia sets in. While deciding what to bake today, the idea of a new, complicated, or fancy recipe just wasn’t appealing. I wanted a plain, simple, classic something-or-other that I had made a million times in the past. A tried-and-true treat. Chocolate chip cookies definitely fit the bill, but since I made those so recently I went for another oldie-but-goodie: brownies. The kind I used to make before I was even allowed to turn on the oven, when I would secretly try to sneak bites of the unsweetened chocolate squares even though my mom warned me again and again that this won’t taste like chocolate chips, honey. Every time I spit out my sneaky little taste in disgust. And then the next time we made brownies, I tried again. You could say I was a slower learner. I say I was a true optimist, thinking that the chocolate would magically taste good the next time around!

IMG_6590

Not gonna lie, making simple chocolate brownies was a bit of an exercise in suppressing my tendency to make recipes more elaborate. Maybe add a little toasted coconut? A cupful of white chocolate chips? Some chopped pecans? No, no, no, I kept telling myself. I knew I had to resist my foodie urges and stick to the plan: classic, old-fashioned, good old  brownies containing nothing more than rich, fudgey chocolate and a crackly crust. Sometimes simple is all you need.

This recipe from The Joy of Cooking was just what I had imagined. No fancy brands of chocolate, no complex cooking methods, just your standard brownie ingredients, a bowl, and a spoon. I chose to bake these in an 8″x8″ pan, meaning they were incredibly thick and rich rather than thin and chewy. To me, when it comes to thick, cakey brownies vs. dense and chewy it’s like apples and oranges. Today I opted for tall and thick but you can definitely use a 9″x13″ pan if you prefer your brownies chewier. I promise that regardless of pan size they will still be moist, fudgey, and spectacular.

IMG_6593

I must say, this recipe also produced some killer brownie batter. Taking the time to beat the mixture thoroughly before adding in the melted butter/chocolate and flour produces an incredibly thick, silky-smooth batter. It was all I could do to scrape the brownie batter into the pan before it all disappeared into my mouth. I daresay I used up my entire supply of willpower for the day.

These brownies reminded me just how good an old classic can be. No frills, no tricky instructions. Just thick, chewy, chocolatey brownie perfection.

IMG_6596


Classic Fudge Brownies

Yield: 16 large brownies or 24 smaller brownies, depending on pan size

1/2 cup (1 stick) unsalted butter

4 ounces unsweetened chocolate

4 large eggs, at room temperature

1/4 teaspoon salt

2 cups granulated sugar

1 teaspoon vanilla extract

1 cup all-purpose flour

Directions:

Preheat oven to 350 degrees F. Line an 8″x8″ baking pan with foil and spray with baking spray.* Set aside.

Place the butter and chocolate into a shallow bowl. Microwave for 30-second intervals on 50% power, stirring between intervals, until melted and smooth. (Alternately, you could simply melt the chocolate and butter in a small saucepan over low heat.) Let the chocolate mixture cool.

In a medium-sized bowl, beat or whisk the eggs and salt together until light and foamy. Slowly beat in the sugar, followed by the vanilla, until the mixture is thick and smooth.

Using a wooden spoon, stir in the cooled chocolate mixture. Stir in the flour just until no streaks remain. Pour the batter into the prepared pan, smoothing the top with a spatula. Bake for 40-50 minutes (decrease baking time to around 25 minutes if using a 9×13 pan) or until an inserted toothpick comes out with just a few moist crumbs.

Cool the brownies in the pan on a cooling rack. When brownies are completely cool, grasp the foil, lift the brownies out of the pan, and cut into squares. Serve plain or with ice cream, whipped cream, etc.

IMG_6576

*For thinner, chewier brownies, use a 9″x13″ pan.

(Recipe from The 75th Anniversary Joy of Cooking by Irma S. Rombauer, Marion Rombauer Becker, and Ethan Becker)

Blueberry-Almond Crisp

IMG_6478One of my favorite things about summer is the fruit. As fresh strawberries, raspberries, blueberries, peaches, plums, mangoes, cherries, and more start appearing in the produce section I feel much like a kid in a candy store. Since on our tiny island it’s ridiculously expensive (and often impossible) to attain summery fruits throughout most of the year, I always look forward to loading up on all my favorite fruits throughout the spring and summer months.

IMG_6483

Summertime’s surplus of fresh fruit also means some extra-tasty desserts. As convenient as frozen fruit is, there’s nothing like a blackberry pie made with berries picked from the wild tangle of bushes down the lane or a rustic galette filled with sweet, fresh cherries rather than the usual sticky red canned ones. Pies, cobblers, crumbles, etc. are some of my favorite go-to desserts throughout the summer because they allow for sweet, juicy fruits to take center stage.

IMG_6491

This Blueberry-Almond Crisp is the perfect treat for a warm summer evening: plump, sweet blueberries are tucked underneath an oatmeal-almond crumble topping and baked until the top is crisp and golden and the berries are thick and bubbly. I love the combination of blueberries and almond, and this crumb topping packs in just the right amount of almond crunch and flavor to contrast the sweet, juicy blueberries. A warm bowl of Blueberry-Almond Crisp with a scoop of vanilla ice cream tastes like the epitome of summer, at least in my book.

IMG_6488

This recipe has become a summertime favorite in my family. Go pick up a container of fresh blueberries and try out this wonderful crisp for yourself! You don’t want to miss out on this one.

IMG_6494

Blueberry-Almond Crisp

For the fruit filling:

4 cups fresh blueberries (or unthawed frozen blueberries)

1 tablespoon fresh lemon juice

1 teaspoon fresh lemon zest

1/4 teaspoon vanilla extract

1/4 teaspoon almond extract (optional)

1/2 cup granulated sugar

1/4 cup all-purpose flour

For the crumb topping:

1/2 cup all-purpose flour

1/4 cup old-fashioned oats

1/4 cup sliced almonds

1/3 cup light brown sugar, packed

1/4 cup granulated sugar

1/2 teaspoon salt

1/2 teaspoon ground cinnamon

1/4 cup (4 tablespoons) cold butter, cubed

2 tablespoons almond paste

Directions:

Preheat oven to 350 degrees F. Lightly grease an 8″x8″ baking pan; set aside.

Place the blueberries in a large bowl. Add in the lemon juice, lemon zest, vanilla, sugar, and flour. Gently fold the mixture until the blueberries are well-coated. Let the berries sit and macerate while you make the topping.

For the topping, whisk together the flour, oats, almonds, sugars, salt, and cinnamon in a medium-sized bowl. Using two forks or your fingers, cut in the cold butter and almond paste until the mixture holds together into large crumbs.

Spoon the berry mixture into the bottom of the prepared baking dish. Top with the crumb mixture and bake for 40-45 minutes or until the topping is golden-brown and the filling is bubbly. Let the crisp cool slightly. Serve warm or at room temperature with ice cream or whipped cream, if desired.

(Recipe heavily adapted from Two Peas and Their Pod)

Chocolate Chip Cookies with Browned Butter & Toasted Coconut

IMG_6160These cookies started out as an attempt to clean out my pantry. Too many baking whims and enticing recipes in the past few weeks have caused me to accumulate an inordinate amount of ingredients that I rarely use up. This means that a glance into my refrigerator or baking cupboard will reveal items such as half a tube of almond paste, a nearly-full bag of sorghum flour, an opened bag of white chocolate chips, both sweetened and unsweetened coconut flakes, and almost an entire quart of whole milk which I bought for a recipe that only needed 1/3 cup. The day that whole milk becomes available in baking-sized amounts will be a very happy day indeed.

IMG_6161

All that clutter led me to be responsible for once and instead of loading up on more special ingredients of which I would use only a teeny-tiny pinch and then leave to waste away in my black hole of a kitchen, I decided to make do with what I had. I hadn’t made cookies in what seemed like forever (we’re talking way back at the end of June, for goodness sake!) so a cookie fix was definitely in order. An open bag of miniature chocolate chips in the pantry made chocolate chip cookies a logical choice, so that’s where I started.

To add a little something extra to the cookies, I opted for browned butter instead of the melted butter called for in my favorite thick & chewy chocolate chip cookie recipe. I used dark brown sugar (which leads to more depth of flavor and chewiness) to enhance the nutty, caramel-like flavor of browned butter, and added in some toasted coconut for even more nuttiness. The mini chocolate chips provide bits of chocolate in every bite, which is always a good thing, and I used half whole-wheat flour to give the cookies a richer, deeper flavor and texture. The extra egg yolk in the recipe makes the cookies super chewy, and chilling the dough makes them incredibly thick. I’ll take a thick, chewy cookie over a thin, crispy cookie any day!

IMG_6169

Not only did I save a some money (and cupboard space) by not buying new ingredients for today’s recipe, I ended up with an incredible new cookie recipe! If you’re looking for a thick & chewy chocolate chip cookie taken up a notch in flavor and texture, look no further. Who knew that cleaning out the cupboard could result in the birth of such a delicious treat?

IMG_6190

Chocolate Chip Cookies with Browned Butter & Toasted Coconut

1 cup + 2 tbs all-purpose flour

1 cup whole wheat flour

1/2 teaspoon baking soda

1/2 teaspoon salt

1 & 1/2 sticks (12 tbs) unsalted butter

1 cup dark brown sugar, packed

1/2 cup granulated sugar

1 large egg + 1 egg yolk

1 & 1/2 teaspoons vanilla extract

1 cup mini semisweet chocolate chips (or any type of chocolate chip)

1/2 cup sweetened, shredded coconut

Directions:

Preheat oven to 350 degrees F. Line a baking sheet with parchment paper or aluminum foil and spread the shredded coconut onto the sheet. Cook for 8-12 minutes, tossing the coconut halfway through, until coconut is golden-brown. Turn off the oven and let the toasted coconut cool.

Meanwhile, melt the butter in a medium saucepan over medium heat. Cook the butter, whisking frequently, as it bubbles and foams. Continue cooking until the butter turns amber-brown, tiny dark flecks appear, and it develops a rich, nutty aroma. Immediately remove the butter from heat and cool until lukewarm.

In a medium bowl, whisk together the flours, baking soda, and salt. Set aside.

When the browned butter has cooled, pour it into a large mixing bowl. Add the sugars and beat with an electric mixer until well-combined. Add in the egg, egg yolk, and vanilla and beat until smooth. Stir in the flour mixture just until combined. Stir in the chocolate chips and toasted coconut. (Dough will be slightly crumbly.)

Scoop the dough into 2-tablespoon-sized portions and roll into balls. Place the balls on a dinner plate, cover with plastic wrap, and refrigerate for at least one hour.

When ready to bake, preheat oven to 325 degrees F. Place the chilled dough balls onto lined or greased cookie sheets and bake for 12-14 minutes or until edges are set and tops are no longer shiny. Err on the side of under-done! If cookies are too puffy, slightly flatten each warm cookie with the back of a spatula. Let the cookies cool on the sheets for 5 minutes before transferring to a cooling rack. Enjoy!

(Recipe adapted from Brown Eyed Baker)

Thai-Style Chicken Quinoa Salad

IMG_6194I figure it’s about time for some “real food” to appear on this here blog of mine. I mean, there are only so many delicious cookies, cakes, muffins, and bars that one can consume before a desperate longing for wholesome, nutritious meals sets in. Hah! I kid. But seriously, I really do cook actual non-dessert-type food. It’s just that I rarely have the motivation to haul out all my picture-taking paraphernalia and set up a photo shoot right when dinner is ready to be served. And after dinner, whatever I’ve cooked has almost always been devoured. And if there are leftovers, they often aren’t the most photogenic. Or I’m too tired. Or I have somewhere to be. Or I’m just not feeling it. I could throw out excuses all day, but it doesn’t really matter because this time I finally pulled myself together and managed to actually snap photos of this ridiculously delicious Thai Chicken Quinoa Salad, the star of tonight’s dinner. It was just too good not to document.

IMG_6200

My family members are all big-time lovers of quinoa, and it often appears in the form of side dishes, salads, and even entrees in our house. Whether it’s Mango & Black Bean Quinoa Salad, Black Bean & Corn Quinoa Salad, or a simple side to this Spanish Chicken and Kidney Beans, we love our quinoa. It’s healthy, cheap, quick-cooking, gluten-free, a complete protein, and is the perfect “base” for multiple dishes.

Though I’ve tried so many great quinoa recipes that I could never pick a favorite, this Thai Chicken Quinoa Salad definitely comes out near the tip-top. Cubed chicken, crunchy veggies, edamame, dry-roasted peanuts, and fresh cilantro are all loaded into the quinoa and tossed with an amazing Thai-inspired dressing. The dressing has a hint of spice that’s rounded out with a bit of sweetness and is packed with a multitude of flavors from lime juice, coconut milk, peanut butter, garlic, and ginger. The myriad of tastes and textures all come together into a one-dish meal that will leave everyone fighting for leftovers. I had to restrain myself from taking a third helping when I made this for dinner, and everyone in my family loved it. It’s hard not to!

IMG_6209

Thai-Style Chicken Quinoa Salad

Makes 6 servings

For the salad:

1 & 1/2 cups uncooked quinoa

2 cups low-sodium chicken broth

1 cup water

2 cups cooked, cubed chicken (about 1 pound, or 2 medium chicken breasts)

4 scallions, thinly sliced

1/2 cup diced bell pepper

1/2 cup shelled edamame

1/2 cup diced carrots

1/2 cup chopped dry-roasted peanuts

1/2 cup fresh cilantro, chopped

Salt and pepper, to taste

For the dressing:

1/4 cup sweet chili sauce

2 tablespoons fresh lime juice (from about 1 small lime)

2 tablespoons rice vinegar

2 tablespoons canned coconut milk (light is fine)

1 tablespoon brown sugar, packed

2 teaspoons creamy peanut butter

2 garlic cloves, minced

Pinch of ground ginger

Directions:

Combine the quinoa, chicken broth, and water in a medium-sized pot. Bring to a boil, then reduce to a simmer, cover, and cook for 15-20 minutes or until liquid is absorbed and quinoa is tender.

While the quinoa is cooking, whisk together all the dressing ingredients in a small bowl until smooth. Prepare the rest of the salad ingredients if you haven’t already.

Transfer the cooked quinoa to a large bowl and allow to cool for 5 minutes. Then pour the dressing over the quinoa and stir to combine. Add in the chicken, scallions, bell pepper, edamame, carrots, peanuts, and cilantro. Mix well. Serve the salad warm, chilled, or at room temperature.

(Recipe from Mel’s Kitchen Cafe, originally adapted from How Sweet Eats)

Lemon-Berry Muffins with Cream Cheese Filling

IMG_4363

Happy July 5th, everyone! I hope you all had a fun and safe 4th of July yesterday, whether your day was filled with sunshine, parades, picnics, friends, fireworks, or all of the above.

Before heading downtown for our annual parade yesterday, I decided to start the morning off with a sweet treat to celebrate. Lemon-Berry Muffins with Cream Cheese Filling fit the bill nicely: tender, sweet, lemony muffins bursting with fresh juicy berries and containing a surprise pocket of lemon-cream cheese filling. To make the muffins more festive I loaded them with a mixture of blueberries, strawberries, and raspberries and figured that the cream cheese filling qualified as the “white” part of my red-white-and-blue color scheme. Sure, the cream cheese was hidden in the center, so the color scheme was more like red-blue-and-muffiny brown, but who’s complaining? For all intents and purposes, they were red-white-and-blue. Okay? Okay.

IMG_4367

Although the muffins themselves are delicious with a soft, moist crumb; a hint of cinnamon, vanilla, and almond flavors; a fresh citrus zing from the lemon; and a triad of sweet, juicy berries, they’re made even better with the secret filling. One bite in and you’ll encounter a tiny pocket of sweet lemony cream cheese that takes these muffins from good to great!

In my muffins I chose to use half whole-wheat flour and half all-purpose to give them a little more heft and fiber. The recipe below calls for only all-purpose flour, but it’s up to you. Same goes for the type of berries, extracts, spices, etc. Like many of my recipes, this one is highly adaptable!

Bake up a batch of these Lemon-Berry Muffins as a special treat one of these mornings! In no time at all you can be enjoying a warm, fresh-out-of-the-oven muffin for breakfast or brunch. Be sure to watch for people’s reactions as they discover the sweet surprise filling. Some surprises are not so good (like the surprise that would have occurred had I not realized in the nick of time that I was starting to pour peppermint extract into my measuring spoon rather than vanilla) but this surprise is definitely a nice one! Unless of course you happen to dislike sweet lemony cream cheese stuffed inside a tender lemon-berry muffin. But that would be just plain silly.

IMG_4371

Lemon-Berry Muffins with Cream Cheese Filling

Makes 9 standard-sized muffins

1 & 1/2 cups all-purpose flour

2 teaspoons baking powder

1/2 teaspoon salt

1/4 teaspoon ground cinnamon

1/2 cup granulated sugar

Grated zest of 1 large lemon (about 2 teaspoons)

1/3 cup milk

1 large egg

1/4 cup canola oil

1 teaspoon vanilla extract

1/2 teaspoon almond extract (optional)

1 cup fresh berries, rinsed and chopped (I used 1/3 cup each of strawberries, blueberries, and raspberries)

Coarse sugar, for sprinkling

Cream Cheese Filling:

3 tablespoons cream cheese, softened

1 teaspoon grated lemon zest

1 tablespoon granulated sugar

Directions:

Preheat oven to 400 degrees F. Line or grease 9 cups of a 12-cup muffin tin; set aside.

In a medium bowl, whisk together the flour, baking powder, salt, and cinnamon. In a smaller bowl, use your fingers to incorporate the lemon zest into the sugar until fragrant. Whisk the lemon-sugar into the flour mixture.

In another bowl, whisk together the milk, oil, egg, vanilla, and almond extract until smooth. Using a rubber spatula, fold the dry ingredients into the wet ingredients just until incorporated. Be careful not to over-mix. Gently fold the berries into the batter, which will be thick.

To make the cream cheese filling, stir together the cream cheese, lemon zest, and sugar in a small bowl until smooth.

Fill each of the 9 prepared muffin cups about halfway with batter. Drop about 1 teaspoonful of the cream cheese mixture onto the batter in each cup. Then divide the remaining batter among the muffin cups, carefully covering the cream cheese center. Sprinkle the muffin tops with coarse sugar if desired. (I also topped each with a raspberry.)

Bake for 17-20 minutes or until tops are set and edges are golden-brown. Let the muffins cool in the pan for 10 minutes, then remove to a cooling rack.

(Recipe adapted from Two Peas and Their Pod)

Mint Cookie Crunch Ice Cream

ice cream

Growing up, my family regularly vacationed in the very area that we now live in, a group of islands in the Pacific Northwest. The summers before my 4th, 6th, and 9th birthdays were spent camping, kayaking, playing on the beach, and taking the ferry boat over to other harbors. When we ventured over to the island that I now live on, I remember being forced to walk an entire mile (half of which, my mother kindly reminds me, was spent in a stroller) in the blazing sun to the public library, taking actual showers (rather than standing under a bag of heated water in a hidden grove of trees in our camp site), and walking out onto the docks to gaze at all the impressive ships. Best of all though, was the ice cream cart. The ice cream cart, located mere feet from the ocean, always promised a cool, creamy treat at the end of a fun-filled day.

While I always opted for my favorite flavor, rainbow sherbet, I remember my dad consistently choosing mint chocolate chip. Although I loved the trio of flavors that my sherbet provided, sometimes I found myself wishing I’d gone with the mint chip. There’s something about the cool, fresh flavor of mint ice cream studded with decadent chocolate chips that has always held a special place in my heart. Although the mint-chocolate combo is divine, my favorite of the two components (being the mint ice cream and chocolate chips) has always been the mint. For many years I actually found myself wishing that it was easier to find plain old mint ice cream. No chocolate chips, just smooth, sweet, uninterrupted mint. Unfortunately in a chocolate-obsessed world, such an ice cream doesn’t seem to exist. However, sometime ago I discovered an alternative to mint chocolate chip ice cream that made me forget all about wishing for plain old mint: Mint Cookie Crunch.

Dreyer’s Mint Cookie Crunch is mint ice cream swirled with chocolate cookie crumbles. Much like a mint version of cookies and cream, another favorite of mine, this ice cream quickly became a new favorite. The less-intense chocolate flavor of the cookie crumbs seems to meld more nicely with the mint ice cream, not to mention the slight, pleasant crunch that the chocolate crumbs provide in contrast to the creamy ice cream. To sum it up, yum.

ice cream_1

The last day of June brought with it a heat wave that thrust our mild climate into temperatures in the high 80s. I’m sure this is far from impressive to those of you in parts of the country where it tops 100 degrees at the peak of the day, but to our unaccustomed little neck of the woods, anything above 75 is quite drastic. Suddenly it felt like summer for a change, and plans for swimming, beach-going, and barbecuing were in full swing. I had plans to do a little baking last week, but the idea of turning on the oven was less than appealing. Instead I turned to the classic hot-weather necessity–ice cream!

Be warned that this recipe is for real, rich, custard-based, ultra-creamy ice cream that cuts no corners when it comes to ingredients. We’re talking whole milk, heavy cream, and white sugar. You know, all the stuff that your taste buds love but that your skimpy summer clothes–and arteries–loathe. However, my motto has always been everything in moderation, and once in a while it’s okay to go whole-hog and just make the darn ice cream! Let me tell you right now, it’s worth it.

Being the real deal, this ice cream is made with a custard base. That may sound difficult, or time-consuming, or like way too much work, but it’s not! I promise. Nothing even comes to a boil, so there’s no worry about scorching or hardening or curdling or anything as long as you pay attention and stir. A candy thermometer is nice but not necessary–I like to use one just to make sure the mixture has reached a high enough temperature to kill any traces of salmonella in the egg yolks, but I’m a bit paranoid about stuff like that. Not paranoid enough to keep my fingers out of a bowl of cookie dough, but just enough to fret about whether or not my ice cream custard is 100% bacteria-free. It’s a fine line.

ice cream_3

Anyway, the entire ice cream base takes less than 10 minutes to make, and the rest is all chilling/freezing time! Easy-peasy. Though I highly recommend the Mint Cookie Crunch, this recipe is a perfect base for any type of ice cream you may fancy…throw in a scraped vanilla bean and ditch the peppermint extract for old-fashioned vanilla ice cream, stir in some strawberry puree at the end (again, minus the mint) for strawberry ice cream, or have fun experimenting with different flavors and extracts. With a bowl full of cream and sugar, it’s hard to go wrong.

Summer just wouldn’t be summer without a cool scoop of ice cream now and then. Dig out your ice cream maker and churn up a batch of this spectacular Mint Cookie Crunch to enjoy on the next sweltering day. Or on a cool night. Or anything in between. I mean, is there really a wrong time for ice cream? I think not.

ice cream_4

Mint Cookie Crunch Ice Cream

Makes about 1 quart

2 cups heavy cream, divided

1 & 1/2 cups whole milk*

3/4 cup granulated sugar

1/8 teaspoon salt

4 large egg yolks

1 & 1/2 teaspoons peppermint extract

1 teaspoon vanilla extract

4-5 drops green food coloring, if desired

1 & 1/4 cup crushed Oreos, cream filling removed (about 15 cookies)

Directions:

Stir together the whole milk, sugar, and 1 cup heavy cream in a medium saucepan. Heat over medium-low heat, stirring occasionally, until sugar is dissolved. Mixture should be warm but not boiling.

Meanwhile, pour the remaining cup of cream into a large bowl. Place a mesh strainer on top and set the bowl aside.

In a separate medium bowl, whisk together the egg yolks for about 2 minutes or until they are lightened in color. Whisk in 1 cup of the warm milk mixture, then gradually add in the rest, whisking constantly. Pour the egg mixture back into the saucepan and place over medium heat.

Cook the mixture, stirring constantly, until it thickens and coats the back of the spoon. A candy thermometer should reach at least 170 degrees. Then pour the custard through the mesh strainer and stir it into the cream. Continue stirring the mixture until it has slightly cooled.

Cover the bowl with plastic wrap and place in the refrigerator to cool completely, at least 2 hours. Then pour the custard into an ice cream maker and churn according to the ice cream maker’s directions (usually about 30 minutes). Ice cream will be soft. Alternately spoon the ice cream and the crushed Oreos into a quart-sized container, beginning and ending with the ice cream.  Freeze for at least 4 hours or until firm, then serve.

*For a lower-fat option, you can substitute some or all of the whole milk for 2%. Just note that the ice cream will be less creamy and a bit harder to scoop.

(Recipe adapted from Brown Eyed Baker)