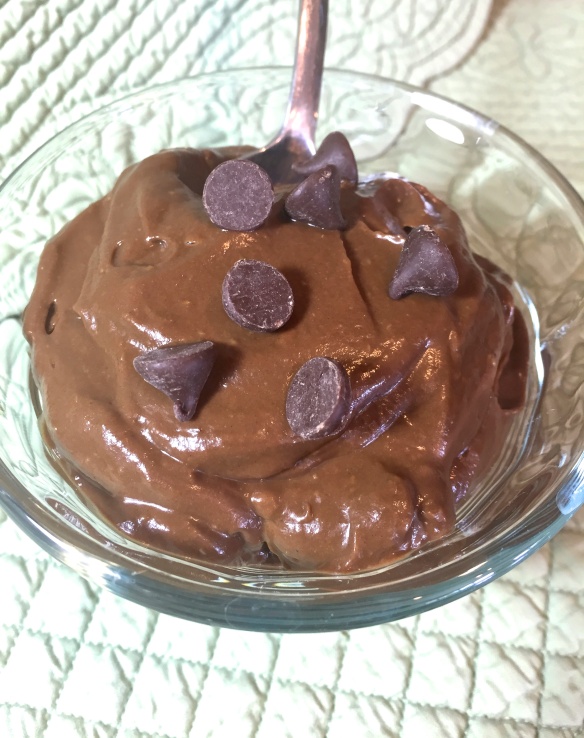
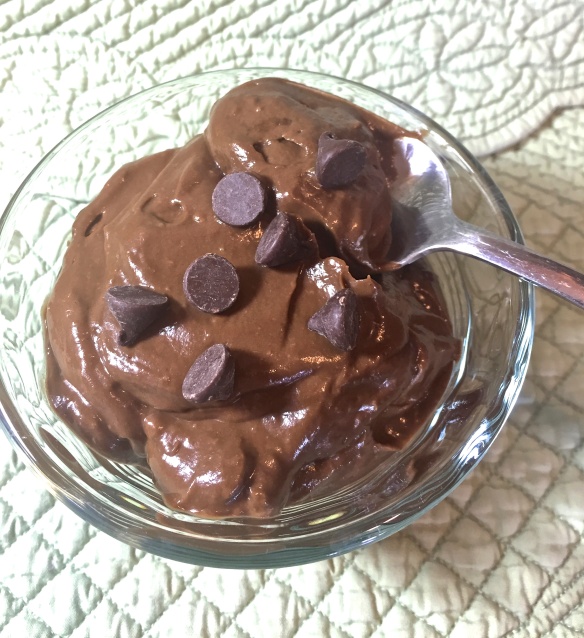
Secret Ingredient Chocolate Pudding

IMG_5634Since I’ve been all about secret ingredients lately (chickpea muffins, anyone?), I figured I’d stick with the trend and post another delicious recipe containing an unlikely ingredient. After undergoing a gingival graft last week (in which a piece of soft tissue from the roof of my mouth was sliced off and sewn onto the gum line of my two front bottom teeth to counteract some recession most likely caused by my orthodontic work in middle school…for those of you who care to know), basically all I’ve been able to eat is yogurt, scrambled eggs, and smoothies. Well, and because I’m me, I’ve been eating blended-up overnight oats, mashed-up turkey meatloaf mixed with zucchini puree, and smashed-up avocado/shredded chicken salad. Hey, I’ve got to keep it interesting!

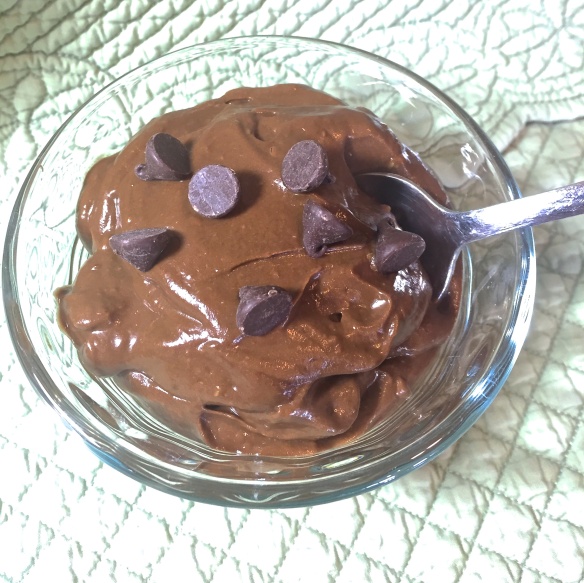
Anyway, lately my best friends have been soft, cold foods to ease my aching mouth. And what better best friend is there than chocolate pudding? I’ll tell you what: chocolate avocado pudding! It’s rich, smooth, chocolatey, full of heart-healthy fats, and doesn’t taste at all like avocados. At least, I don’t think it does–if you have sensitive taste buds, you might be able to detect a slight avocado-y taste, but the dominant flavor is definitely chocolate. Pure, smooth chocolate. Gahhh.IMG_5635

Not only is this pudding (fairly) healthy, easy, and delicious, but it only takes about 5 minutes to whip up! I highly recommend chilling it for 30 minutes or so, but if you’re feeling impatient you can eat it right then and there. I wouldn’t blame you.

Most of the measurements here are just ballpark figures–feel free to add more or less of the cocoa powder, milk, and sweetener until you reach your desired taste and texture. If you like your pudding a little more creamy and a little less intense, add a few extra tablespoons of milk. If you want a super-chocolatey flavor, add a bit more cocoa powder. If you’re trying to cut back on sugar, just use a tablespoon or two of agave or honey. Unlike delicate pastries or baked goods that require exact measurements, this recipe is highly adaptable and pretty darn hard to mess up. In the past I’ve thrown in a banana, left out the milk entirely, added peanut butter, and doubled (okay, tripled) the entire recipe. Each and every time, it was delicious.IMG_5639

Even if you’re not usually an avocado fan, I urge you to blend yourself up some Secret Ingredient Chocolate Pudding! It’s the ideal comfort food whether you’re recovering from a dental surgery like me, or just want to enjoy a no-bake dessert on a warm summer night. Have fun experimenting–and eating!IMG_5638

Secret Ingredient Chocolate Pudding

Makes 4 servings

2 small, ripe avocados

1/4 cup cocoa powder

1/3 cup milk (coconut, almond, cow milk, etc.)

1/4 cup sweetener (brown sugar, honey, agave nectar, etc.)

1 teaspoon vanilla extract

Chocolate chips for topping (optional)

Directions:

Scoop out the avocado flesh into a food processor or blender. Add the rest of the ingredients and blend or process until very smooth. Spoon into bowls or small ramekins  and chill for 30-60 minutes before serving.

Note: this pudding should be served the day it is made for the best texture and flavor!IMG_5629

Recipe from Emma’s Baking Addiction

Better-Than-Boxed-Mix Brownies

IMG_5367In late April, my boyfriend, Kaleb, and I decided to take a Saturday off of homework and instead spend the day shopping in a nearby city. That meant clothing stores for me, an art supply store for Kaleb, and REI for us both. We ate lunch buffet-style at a little Indian restaurant I had heard good things about, and it was delicious. Kaleb bought me a new sundress at Target, I watched him wander around his art store with childlike excitement in his eyes, and we had fun pining over all the incredible REI running clothes we can’t afford. We got back to our university campus in the early evening and ate chicken gyros at the cafeteria, which was a pleasant surprise considering that on weekends it usually features very few, very unexciting options. After dinner, we settled down to watch House M.D., one of the shows that we are currently re-watching. It was a fabulous day…until about 8pm.

To spare you the details, I ended up getting a mild case of food poisoning, which kept me in bed all the next day and unable to attend one of the massive outdoor programs we were putting on as Resident Assistants. Darn. 😦 I moaned to Kaleb that I might never eat at a buffet again, sounding just like my mother. She once had a horrific experience at a buffet in an airport–food poisoning on an airplane=not fun at all–and has refused to come within five feet of so much as a salad bar ever since. Of course, seeing as there was an eight-hour gap between my lunch and my symptoms, the culprit could just as easily have been the gyro I ate in my very own university cafeteria, but there’s no way of knowing. Either way, it might be a while before I will touch chicken curry or Greek tzatziki sauce again. IMG_5369

The kicker is that just that morning I had exclaimed to Kaleb how I hadn’t been sick in over a year, which seemed like quite the triumph. I immediately regretted saying anything that could jinx my healthy streak, and sure enough I paid the price for that moment of gloating with my illness later that night.

“Isn’t it so weird that I got food poisoning on the very day I was bragging about not getting sick?” I asked Kaleb.

“Umm..not really, actually….” he said, much to my disappointment.

“Why?!” I demanded.

“Well, because you worry about getting food poisoning pretty much every day,” he said. I thought about this for a few moments, then begrudgingly agreed. Yeah, okay…that is valid.

The truth is, I am just a teeny bit paranoid about food poisoning, and am constantly asking if it’s okay to eat this turkey sandwich that’s been sitting out for an hour, drink this milk that has a sell-by date of three days ago, or buy sushi from the cooler in our campus store that seemed to be not quite cold enough. My dad patiently texts reassurance from hundreds of miles away, and Kaleb patiently voices reassurance from our kitchen counter or a cafeteria table. It’s not like I question everything I eat–maybe one thing every few days–but I certainly have earned my reputation as a constant food-poisoning-worrier amongst those who know me well.IMG_5377

Surprisingly, one thing I have never worried about is raw eggs–but only if they’re in something I’m baking. I grew up licking mounds of raw cookie dough off my fingers as my mom washed the dishes, and I can never resist taste-testing cake batters, muffin batters, and brownie batters. I once read a book in which a girl’s mother let her mix up an entire bowl of brownie batter and eat it with a spoon when the girl came home from a hard day at school, and I always yearned to re-create that scene in my own kitchen. I don’t think I ever did, but not for lack of want. I realize that salmonella and other food-borne pathogens are potentially very dangerous, but I’m afraid that my cookie-dough-eating days are far from being over. Sometimes I think I am nothing more than a walking contradiction, but I mean, we’re talking about raw chocolate chip cookie dough. Let’s be real.

Anywhoo, enter these fantastic brownies. The title says it all: they really are better than a boxed-mix version, but still have those characteristic crackly tops and chewy, fudgy interiors. These are not, I repeat not, cakey brownies. There is nothing dry, crumbly, or cake-like about them. One of the reasons I love them so much is that it almost seems like you are eating a square of brownie batter…they’re that rich! I had the slight problem of “evening my rows” as I cut these babies, and by the end of the whole ordeal I had probably consumed close to a whole brownie’s worth. I still maintain that I was ensuring that each square had perfectly straight edges and no stray crumbs attached, but I also refused Kaleb’s offer to help me cut them and take some of the “work” off my hands. IMG_5390

All you need to mix up these brownies is one bowl, one whisk, and one rubber spatula. I recommend weighing your ingredients to ensure the perfect texture, but regular measurements are also listed for those of you who don’t own a kitchen scale. Be careful to take these brownies out of the oven as soon as a toothpick comes out clean so that you don’t over-bake them, which could result in dryness. I warn you that they are a little difficult to cut cleanly due to the fudginess (which I declare is a word), but that just means all the more post-cutting “clean up” for you. 🙂 And you don’t even need to worry about consuming raw eggs, since they’ll be all baked up by then! You can have your brownie “batter” and eat it too, without a trace of salmonella paranoia. Yay!

Note: just to be on the safe side for food poisoning, you should probably eat up all these brownies as fast as you can. No point in risking it by letting them sit around, right? 😉IMG_5382

Better-Than-Boxed-Mix Brownies

1/3 cup (28 grams) unsweetened cocoa powder

1/2 cup + 2 tablespoons boiling water

2 ounces unsweetened chocolate, finely chopped

4 tablespoons (57 grams) unsalted butter, melted

1/2 cup + 2 tablespoons (140 grams) vegetable oil

2 eggs + 2 egg yolks

2 teaspoons vanilla extract

2 & 1/2 cups (496 grams) granulated sugar

1 & 3/4 cup (248 grams) all-purpose flour

3/4 teaspoon salt

Directions:

Adjust your oven rack to its lowest position and preheat the oven to 350 degrees F. Line a 9×13″ pan with aluminum foil, leaving a 1″ overhang. Spray with cooking spray and set aside.

In a large bowl, whisk together the cocoa powder and boiling water until smooth. Quickly add in the chopped unsweetened chocolate, and whisk until the chocolate is melted. Add the butter and oil and whisk until combined (the mixture may look separated or curdled, which is fine). Whisk in the eggs, egg yolks, and vanilla until smooth.

Whisk in the sugar until the mixture is homogenous. Using a rubber spatula, fold in the flour and salt until just combined.

Pour the batter into the prepared pan and spread it out evenly. Bake for 30-35 minutes, or until an inserted toothpick comes out clean (or with just a few crumbs attached). Transfer the pan to a wire rack and cool for 1 & 1/2 hours.

Holding onto the foil, lift the brownies out of the pan and place directly on the cooling rack. Cool completely before slicing into squares. Store in an airtight container at room temperature.

Recipe from Brown Eyed Baker, originally from Cook’s Illustrated
Healthy No-Bake Cookies

no-bakecookiesMy first batch of no-bake cookies can only be described as a disaster. I was in middle school at the time, and my friend and I were lounging around her house trying to decide what to do when her mom suggested no-bake cookies. I had never heard of them but was all too willing to try them out. The recipe called for butter, peanut butter, sugar, vanilla, oatmeal, and milk…I’m pretty sure that was it. Total health food! Luckily our pre-teen metabolisms could handle it, and we got right to work.

The standard recipe for no-bake cookies is pretty simple: melt the peanut butter, butter, and sugar; stir in everything else; drop the mixture onto cookie sheets. Let it set up, and you’re done. Fool-proof, right? Not so much…

My friend and I divided the task of measuring ingredients, and peanut butter fell onto my side. “I think there’s a jar of Skippy in the cupboard,” she said, and I obligingly skipped over to the cabinet. Sure enough there were two jars of peanut butter, one farther back than the other. I chose the emptier one in the back, if only to help her family use it up. As soon as I screwed open the jar I noticed a funny smell, but I didn’t say anything. My family always bought natural peanut butter that you had to stir, so I figured Skippy just smelled a little different. That was my first mistake.nobakecookies2

I scooped out the appropriate amount of peanut butter and dumped it into the saucepan along with the other ingredients. Five minutes later we were forming the mixture into little balls and placing them onto a wax-paper-lined cookie sheet. I’ve always been a “taster” when it comes to baking (my justification is that any incorporated germs are killed by the heat of the oven…and let’s just pretend the no-bake thing doesn’t exist) so I definitely snuck a pinch or two of the dough. It tasted…bad. Not a little bad, a lot bad. It’s a taste that I now know can be described as rancid nuts (shocker, right)?! Seeing my expression my friend tried it too, and made the same disgusted face as I had.

“Why didn’t you tell me the peanut butter smelled funny?” she asked. “We could have used the other kind.”

“Well, uh…” I started to reply. “I don’t know.” Satisfying answer for sure.

We threw out the entire batch and sadly resumed our lounging around. But fear not, because we definitely made a successful batch at another point in time! I think I probably put her in charge of the peanut butter…

And now we have reached the end of the road where I stop talking about my crazy life and cut to the chase. THESE no-bake cookies are just about as easy as the originals (if not easier) but they have the benefit of actually being good for you. Yeah, there’s chocolate, but it really doesn’t count since the rest of the ingredients are so healthy. That’s how it works–you heard it from me! They’re pretty darn good too, considering the lack of butter and sugar. They definitely aren’t as sweet as “regular” cookies, so if you aren’t used to that you can definitely add in a couple tablespoons of sugar or additional honey. Also, the riper your banana is, the sweeter the cookies will be. Bananas FTW! Always.

But yeah. These easy-healthy-delicious cookies are winners, at least in my opinion. We’ve got chocolate, peanut butter, honey, AND banana all in the same place, which can only lead to good things. Just make sure your peanut butter’s not rancid, okay? Great. 🙂

nobakecookies3Healthy No-Bake Cookies

1/2 cup creamy peanut butter

1 small ripe banana, mashed (1/3 cup)

1/3 cup honey

1/4 cup cocoa powder

1/4 cup milk (any kind)

3 cups quick-cooking oats

1/2 teaspoon cinnamon (optional)

Pinch of salt

1/3 cup mini chocolate chips

Directions:

Place the peanut butter and mashed banana in a medium saucepan over low heat. Stir until melted and smooth, then remove from heat. Stir in the honey, cocoa powder, milk, oats, cinnamon, and salt until combined. Stir in the chocolate chips.

Scoop the dough into rounded tablespoons and place on a lined cookie sheet. Press each mound of dough down slightly until the desired shape is reached. Chill for at least 2 hours before enjoying. Store covered in the refrigerator for up to 10 days.

(Recipe adapted from Sally’s Baking Addiction)

Gingersnap Kiss Cookies

IMG_2524My mom has a thing for libraries. Ever since I can remember, the library has been presented to me as a much-frequented and much-adored building of worship. Whenever we traveled to another town, my mom gravitated toward the local library. Whenever there was a rainy day during my childhood (or a sunny one, or a snowy one, or a partly-cloudy one) my brother and I were often toted along toward…you guessed it…the library.

I guess all that library-loved rubbed off onto me, because I was an avid reader from an early age. During our library visits my mom would find five-year-old me hidden away at the end of an aisle, legs splayed out in front of me as I flipped through book after book after book. Some of my most favorite children’s books were the Laura Ingalls Wilder stories. I can still remember their colorful gingham covers, the paperbacks soft and smooth on my small lap. I read all about Laura and her family living in the big woods of Wisconsin, moving to the wide-open prairie, and having all sorts of pioneer adventures. I was enthralled with the idea of riding in a covered wagon, churning butter by hand, and having only one bath a week! And of course, I loved their good old bulldog, Jack.IMG_2507

Christmas in the Big Woods was possibly my most treasured Laura Ingalls Wilder book. I was as much a Christmas fanatic as a book fanatic, and I must have read that story a thousand times. The doll I received as a Christmas present in 1999 was named Charlotte after Laura’s own Christmas doll. I remember being disappointed that my candy canes weren’t straight and rectangular like the old-fashioned “peppermint sticks” in the book, and I used my own thimble to trace “frost pictures” on the window just like Laura and her sister, Mary. I was also entranced with the idea of the molasses candy depicted in the book. “Pa” would bring in a giant tub of snow from outside, and the girls would heat up molasses and pour it onto the cold snow to make beautiful, edible shapes. Since then, molasses has been a very “pioneer-y” ingredient to me.

These soft gingersnap cookies seem just like something Laura and Mary would have made. They’re simple, lightly-spiced, not-too-sweet, and full of rich flavor from the key ingredient (molasses). Being me, I couldn’t resist kicking them up a notch by adding a Hershey’s hug to each cookie, and I’m glad that I did. The milk and white chocolate pair wonderfully with the warm spices, and I could never say no to pretty swirls. I made these cookies before Christmas, but they’d be great at any time of the year! You’ll feel just like Laura Ingalls Wilder as you bake them…and whether or not that’s a good thing, I can’t quite say. But it sure was for me. 🙂IMG_2549

Gingersnap Kiss Cookies

Makes about 3 dozen cookies

3/4 cup butter or shortening (I like to use 1/2 cup butter and 1/4 cup shortening)

1 cup brown sugar, packed

1/4 cup molasses

1 large egg

2 & 1/4 cups flour

2 teaspoons baking soda

2 teaspoons ground cinnamon

1 teaspoon ground ginger

1/2 teaspoon ground cloves

1/4 teaspoon salt

Granulated sugar, for sprinkling

3 dozen Hershey’s hugs (or kisses), unwrapped

Directions:

In a large bowl, cream together the butter (or shortening) and sugar until light and fluffy. Beat in the molasses and egg, scraping down the sides as needed.

In a separate bowl, whisk together the flour, baking soda, spices, and salt. Stir the dry ingredients into the wet, mixing just until combined. Cover the dough and chill for at least an hour.

Preheat oven to 375 degrees F. Line two cookie sheets; set aside. Roll the dough into tablespoon-sized balls and coat with granulated sugar. Place 3 inches apart on prepared baking sheets.

Bake the cookies for 10-12 minutes or until the tops are set. Immediately press an unwrapped candy into the center of each cookie. Let the cookies cool for 5 minutes on the sheets before transferring to a wire rack.

(Recipe adapted from Red Checkered Picnics)

2-Ingredient Chocolate Pumpkin Cookies

Chocolate pumpkin1I’m sure I sound like a broken record by now, but lately I’ve been all about simple recipes. My only excuse is that I’m a college student…which is pretty much the best excuse for anything. Caught wearing yoga pants and Ugg boots for five days in a row? I’m just a frazzled college student focused solely on comfort while trying to get through the school week. Seen leaving a $9 tip in nothing but loose change (after a grueling 15-minute process of determining exactly how much each person owes)? We’re just poor, penny-pinching college students. Questioned as to why you’re cutting your cherry tomatoes in half with your teeth instead of using a knife like a normal human being? Actually, that one can only be attributed to nonsensical laziness…I do happen to own several knives, but I decided it would be far too strenuous to actually wash one. Please don’t laugh. Moving along…Chocolate Pumpkin3

I challenge you to find a cookie recipe that’s easier than this one! We’re talking two ingredients, one bowl, one spoon. The most difficult part of the entire process is opening a can of pumpkin (which, if your can opener is anything like my ancient rusted one at home, can actually be kind of difficult). But aside from any incidental can-opening struggles, there’s no reason not to try these! Who would’ve known that a box of chocolate cake mix and a can of pumpkin could come together to produce such soft, moist, chocolatey little cookies? Due to all the pumpkin, these cookies will stay tender for days, and their texture is actually more like a cupcake than a cookie. The combination of chocolate and pumpkin is fabulous, and I like to throw in a dash of pumpkin pie spice for a little extra flavor.Chocolate Pumpkin5

If you’re ever short on time, cash, and/or ingredients yet have a hankering for delicious cookies, these are the perfect solution! They taste way too good to be this embarrassingly easy. Whether or not you’re a lazy busy student, you should definitely try these out! There’s nothing not to like 🙂Chocolate Pumpkin4

2-Ingredient Chocolate Pumpkin Cookies

Makes about 3 dozen cookies

1 box chocolate cake mix

1 15-oz can pure pumpkin

1 teaspoon pumpkin pie spice (optional)

Directions:

Preheat oven to 350 degrees F. Line baking sheets with parchment paper or silicon mats and set aside.

In a large bowl, stir together the cake mix, pumpkin, and pumpkin pie spice (if you like) until well-combined. Drop by rounded tablespoons onto prepared cookie sheets.

Bake for 9-12 minutes, or until the tops of the cookies are no longer glossy. Let the cookies cool for 5 minutes on the baking sheets before removing to a wire rack. Store in an airtight container at room temperature.

Silken Chocolate Fudge Pie

IMG_4553Secret ingredients are my favorites. I love being on either end of the guessing game: the eater or the maker. I know that many people run away screaming when they’re approached with a mystery food and the claim that they’ll “never ever guess what’s in it,” but I’m certainly not one of them. I love finding out that the seemingly innocent chocolate pudding given to me with a sly grin was made out of avocado, cocoa powder, and coconut sugar; on the flip side I find it largely entertaining to watch my family try to guess what gives my black bean chili a certain depth of flavor, never suspecting that the answer is a trio of pumpkin, cinnamon, and cocoa powder. Whether it’s a dash of cinnamon in a homemade cherry pie or a can of black beans in a batch of flour-less brownies, I’m always excited to try out a recipe made with something you’d never expect.IMG_4556

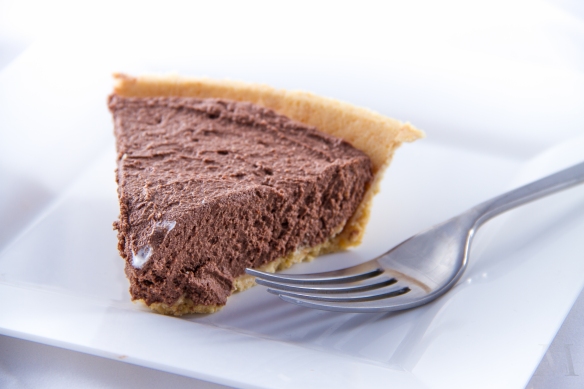
This Silken Chocolate Fudge Pie can easily fool you into thinking it’s sinful. Its smooth, rich chocolatey filling tastes just like (a really good) chocolate cream pie, and it manages to be firm yet airy at the same time. I’m pretty confident that I could have eaten the entire pie if I let myself, especially when topped with a dollop of whipped cream! The best part is that even though this pie may look and taste like a dessert packed with sugar, cream, and butter, it’s surprisingly healthy!IMG_4566

Made with a short list of ingredients that are simply thrown into a food processor and blended, this pie is incredibly quick and easy. It doesn’t even need to bake! There’s no gluten or dairy involved, and in this case the sneaky little wonder ingredient is…tofu! Stick with me here. I know lots of people turn up their noses at tofu, hating on its bland mild taste and unappealing acquired texture, but in this pie it is virtually undetectable. It manages to give the pie its firmness without adding any funky aftertastes so that all you end up tasting is rich, delicious chocolate.IMG_4574

The rest of the ingredients aren’t scary at all: milk, cocoa powder, vanilla, salt, and melted chocolate. I was feeling rebellious and decided to ruin the healthiness of it all by pouring the filling into a store-bought shortbread crust (and possibly going so far as to top it with Cool Whip), but you could definitely make your own pie crust or just pour it into little ramekins and serve as a custard-y dessert. Firm tofu will create a more traditional pie that holds together well, but if you want a more mousse-like pie or  a crustless pudding, just use soft tofu. Ten points to tofu for its versatility….yet another reason it’s such a star in this recipe!IMG_4583

So, the next time you catch yourself with a chocolate craving, go the healthy route and whip up this chocolate pie! It’s guaranteed to satisfy your sweet tooth without the extra baggage of junky ingredients, and it’s also fun to serve to unsuspecting friends. I bet they’ll never guess it’s made with tofu…I know I wouldn’t have!IMG_4576

Silken Chocolate Fudge Pie

10 ounces semisweet chocolate chips

12.3 ounces firm tofu*

2 tablespoons milk (soy, almond, etc. all work fine)

1 teaspoon unsweetened cocoa powder

1 teaspoon vanilla extract

Pinch of salt

2 tablespoons granulated sugar or agave nectar (more or less to taste)

1 pre-baked pie shell

Whipped cream (optional)

Directions:

Melt the chocolate chips in the microwave or in a double boiler, stirring until smooth. Place all the other ingredients into a food processor or high-powered blender and scrape in the melted chocolate. Blend or process until very smooth. Mixture will be thick.

Pour the filling into the prepared crust and refrigerate for at least 2 hours. The longer it chills, the firmer it will be (I chilled mine overnight). Slice and serve, topped with whipped cream if desired.

*For a softer, mousse-like pie, use soft/silken tofu rather than firm

(Recipe adapted from Chocolate Covered Katie)

Double Chocolate Oatmeal Cookies with Dried Cherries & Almonds

IMG_3305One of the things I love about these cookies is how much they have going on. I mean, they aren’t just oatmeal cookies loaded with add-ins…they’re chocolate-oatmeal cookies loaded with add-ins. They’re not just chocolate-oatmeal cookies; they’re chocolate-oatmeal cookies stuffed full of dried cherries, chocolate chips, and almonds. And they’re not just double chocolate-cherry cookies because they have oats (and almonds!) as well!

….This game seems to be called how many times can I type the words chocolate, cherries, oatmeal, and almonds in a single paragraph. Looks like I’m winning, whatever that means.

Because I am me, I couldn’t just leave well enough alone so I ended up with these fabulous flavor-packed cookies. I just kept thinking of new additions that would make them even better and finally made myself stop when the recipe title got to 8 words (not counting my sneaky “&” sign). I was quite pleased with the end product though…we’ve got rich, chocolate-based cookies studded with sweet-tart dried cherries, dark chocolate chips (because, duh), and nutty slivered almonds BUT they’re also full of oatmeal to get that hearty, chewy texture that every oatmeal-cookie-lover adores. With all those different textures and flavors going on, you won’t be able to stop reaching for another.IMG_3298

Lucky for me and my arteries, these cookies were baked for my brother’s fellow EMTs & paramedics (upon his request) and were scooted out of the house before trouble, aka my slightly flawed philosophy that crumb calories don’t count, could ensue. (This zero-calorie philosophy also applies to raw cookie dough, pieces of streusel topping, and the chocolatey bits that stick to the knife while cutting brownies. Just so you know.)

My brother’s pleading text went something like this: “If you baked something for the EMS people I’m sure they would all be eternally grateful…They just get short on food this time of the month.”  What was I supposed to do, ignore a bunch of life-saving selfless people who also happened to be working on empty stomachs? Guilt-trip galore…and it worked, of course.

Feel free to play around with this recipe, substituting some add-ins for others, but make sure you try them! The chocolate-oatmeal combination is fabulous, and filling them with dried fruit, nuts, and chocolate takes these cookies to an even higher level of deliciousness!IMG_3316

Double Chocolate Oatmeal Cookies with Dried Cherries & Almonds

Makes about 18 large cookies

1/2 cup (1 stick) butter, at room temperature

1/2 cup light brown sugar, packed

1/2 cup granulated sugar

1 large egg

1 teaspoon vanilla extract

3/4 cup all-purpose flour

1/4 cup unsweetened cocoa powder

1/2 teaspoon baking soda

1/4 teaspoon salt

1 & 1/2 cups old-fashioned oats

1/2 cup chocolate chips

1/2 cup dried cherries

1/2 cup chopped almonds

Directions:

Using an electric mixer, cream together the butter and sugars until light and fluffy. Add in the egg and vanilla, mixing until smooth.

In a separate bowl, whisk together the flour, cocoa powder, baking soda, salt, and oats. Stir the dry ingredients into the wet, mixing just until combined. Stir in the chocolate chips, dried cherries, and chopped almonds. Chill the dough for at least 30 minutes (you can bake right away, but the chilling will prevent spreading and keep the cookies nice and thick).

When ready to bake, preheat the oven to 350 degrees F. Line two baking sheets with parchment paper or silicon mats. Scoop the dough into balls about 2 tablespoons large and place on cookie sheets, spaced at least 2 inches apart.

Bake for 12-14 minutes, or until edges are set and centers are no longer shiny. They may look slightly underdone but will firm up as they cool. Let the cookies cool on the sheets for 5 minutes, then remove to a cooling rack. Enjoy!

No-Bake Chocolate Peanut Butter Bites

IMG_2440I’m sitting here in shorts and a tank top, the thermometer reads 78.4 degrees, and I have an awesome tan line on my neck/shoulder from wearing a side ponytail all day while out in the sun (<—fail). So basically, for all us Pacific Northwest wussies, it’s a sweltering summer day. Sorry if you happen to live in Phoenix or something and would give up an arm and a leg to have a 78.4-degree day right about now, but up here in the land of clouds and drizzle we consider this a hot day indeed. Or at least I do. But I still love it!

IMG_2453

Even though I really do enjoy the warmer weather, it certainly doesn’t make me too excited to turn on the oven for a baking project in the middle of the day. Instead I turn toward no-bake desserts like these awesome little energy bites. The good news about these treats is that they aren’t full of fat and sugar to weigh you down. They’re made with a super short list of fresh, healthy ingredients and are gluten-free, vegan, and contain only natural sugars. (If you’re making them gluten-free, be sure to use gf oats!) You do need a food processor for these, but if you don’t have one don’t worry. Just try these other wonderful energy balls instead!IMG_2451

My family went nuts over these cookie-dough-like bites. They’re perfect as an after-dinner treat or as a little snack to pick you up from an afternoon slump. You could even grab a few for breakfast! I love how in a matter of minutes I can be eating these delicious, nutritious little balls in a house that hasn’t turned into a sauna from a 350-degree oven. It’s almost like eating chunks of oatmeal-chocolate-peanut butter cookie dough, but the ingredients are actually good for you…summer eating at its finest!IMG_2444

No-Bake Chocolate Peanut Butter Bites

Makes about 24 small bites

1/2 cup peanut butter

1/2 cup quick-cook oats

2 tablespoons unsweetened cocoa powder

1/2 teaspoon vanilla extract

1/2 cup dates (about 12 dates, or 86 grams)

2 tablespoons water*

Shredded coconut, mini chocolate chips, or extra cocoa powder for rolling (optional)

Directions:

In a food processor, combine all ingredients except for the water. Process until the mixture clumps together. Add in the water and pulse until incorporated. Pinch off pieces of the mixture and form into small balls (I ended up with about 2 dozen). Roll in shredded coconut, chocolate chips, or cocoa powder if desired. Store the bites in the refrigerator.

*To make the bites a little sweeter, substitute 1 tablespoon agave nectar, honey, or maple syrup for 1 tablespoon of the water

(Recipe adapted from Chocolate Covered Katie)

Soft and Chewy M&M Cookies

IMG_1370I once read an article that smell is the most powerful sense when it comes to triggering memories. While this surprised me initially, as I thought about it it seemed to be somewhat true. Even though sights and sounds appear to dominate our everyday experiences, smell sure does have a strong connection to memories. I’m sure I’m not the only one who breathes in the scent of fresh pumpkin and is taken back to early days of trick-or-treating, or who takes a whiff of salty, seaweed-y ocean air and remembers long summer afternoons spent at the beach.

Taking it one step further, specific foods always bring to mind certain places for me. Cinnamon rolls, for instance, always remind me of the bakery around the corner from my grandparents’ house. Rainier cherries take me back to the tiny general store near one of the campgrounds I frequented as a child, and tomato-cheddar bagels will always be reminiscent of Bagelopolis, a long-gone favorite breakfast joint. M&M cookies go hand-in-hand with Subway in my tangled repertoire of memories.IMG_1368

Whenever I went to Subway as a child I always ordered the exact same sandwich: Italian bread with yellow mustard and extra American cheese. No meat, no veggies. Just mustard and extra cheese, emphasis on the extra. Two tiny triangles of that delicious plastic-y white stuff just wouldn’t cut it. I used to get so frustrated at answering the same questions over and over: “I’m sorry, what kind of meat?” “No meat?” “Are you sure?” “No veggies at all?” “That’s it?” No meat. That is correct. Yes, I’m sure. No, no veggies. YES, that’s IT. Since eating at Subway was a special occasion anyway, my parents just went along with it, standing patiently as their children’s sandwiches of choice were wrapped up: mustard and (extra) cheese for their little girl and tuna (no cheese, no veggies, no sauce, JUST TUNA) for their little boy.

I always chose Ruffles cheddar & sour cream chips to go with my sandwich, and if my brother and I were lucky we each got to pick out a giant cookie from the tempting glass case next to the cash register. For years, my cookie of choice was always M&M. Who could resist those bright dots of color? Certainly not me! Those soft, chewy, M&M-studded cookies were always the perfect ending to my special lunch (or, if my parents weren’t paying attention, the perfect beginning!) muahaha.IMG_1365

I haven’t had a cookie from Subway in years (nowadays I’m one of those boring whole wheat-turkey-every-veggie-you’ve-got-hold-the-cheese people), but making these homemade M&M cookies brought me back to Subway visits long ago, back when I still got a toy thrown into the bag and extra cheese on my white bread with mustard. If I do say so myself, these cookies are even better than the Subway version. They’re much less dry, and stay amazingly soft for several days due to the pudding mix hidden in the batter. They also have the same great chewy texture as their Subway counterparts, especially around the edges. And of course, they’re packed full of M&Ms–the best part!

These fun (and delicious!) M&M cookies will make you feel like a little kid again, whether you’ve gotten them from Subway or not. (I’ve been told that M&M cookies can, in fact, be found in other places ;).) Enjoy!

IMG_1372IMG_1371


Soft and Chewy M&M Cookies

1 cup unsalted butter, at room temperature

3/4 cup light brown sugar, packed

1/4 cup granulated sugar

3.4 oz package instant vanilla pudding mix

2 large eggs, at room temperature

1 teaspoon vanilla extract

2 & 1/4 cups all-purpose flour

1 teaspoon baking soda

1/2 teaspoon salt

2 cups M&Ms (about 1 medium-sized bag)

Directions:

In a large bowl, beat together the butter and sugars until light and fluffy. Add in the eggs one at a time, scraping down the bowl as needed. Mix in the vanilla.

In a smaller bowl, whisk together the flour, baking soda, and salt. Gradually stir the flour mixture into the wet ingredients, mixing just until incorporated. Stir in 1 & 1/2 cups of M&Ms, reserving the last 1/2 cup. Chill the dough for at least 30 minutes to prevent spreading.

When ready to bake, remove the cookie dough from the refrigerator and preheat the oven to 350 degrees F. Line baking sheets with parchment paper or a silicon mat. Scoop the cookie dough into balls (mine were about 1.5 tablespoons each) and place onto prepared cookie sheets. Bake for 10-14 minutes, depending on the size of your cookies, or until the edges are slightly golden and the tops are set. Keeping them on the under-done side will ensure soft and chewy cookies.

Let the cookies cool on the baking sheets for 5 minutes, then remove to a cooling rack. Store in an airtight container at room temperature for up to a week.

(Recipe adapted from Two Peas and Their Pod)

Flourless Chocolate-Peanut Butter-Banana Muffins

IMG_0388First of all…Happy 2nd Anniversary to Emma’s Baking Addiction! I can’t believe that two years ago I sat down and created a WordPress account with no idea what I was doing. Sometimes I still feel like I have no idea what I’m doing, but it’s been fun 🙂

These muffins were made with my mother in mind. My poor gluten-free, dairy-free mother, who has to watch as piles of cookies, ice cream, brownies and other taboo treats fill our kitchen, knowing she can’t have them. She never complains, not once, but I try to make sure that I create a fair share of gluten-free, dairy-free baked goods as well.

IMG_0392

The last mom-friendly treats I made were these awesome little energy balls, but they were eaten up in approximately 12 seconds, give or take a couple days. The problem with gluten-free treats is that they are also accessible and perfectly acceptable to the gluten-eaters in the house, and unless I clearly label treats as being “FOR MOM” (or hide them), they disappear way too quickly. Which is why, after the last three blog posts centered around cookies and ice cream, it was time to make these muffins.

IMG_0387

What these muffins do have: peanut butter, chocolate, & banana (one of the ULTIMATE flavor trios), heart-healthy flaxseed, and a handful of other healthy ingredients. What these muffins do not have: FLOUR, gluten, dairy, or more than two tablespoons of refined sugar. What these muffins require: a bowl, a spoon, a muffin tin, and some measuring cups. That’s it! They don’t require worrying about over-mixing (which can create tough muffins, but ONLY if there’s gluten involved) or dirtying up a million little bowls and spoons. Easy as cake muffins!

IMG_0398

IMG_0395


The best part is that, despite their considerably healthy list of ingredients and their lack of flour, these muffins are not lacking in flavor or texture! They have a wonderful soft, dense-yet-springy texture and are smooth and rich. The peanut butter/chocolate/banana flavors really shine through, and the muffins are full of flavor but not overly sweet. They were a huge hit in our house for both the gluten-free eater (my mom) and all the other eaters. They were so popular, in fact, that I had to take my mother aside and let her in on my little secret: I had snatched a few muffins from the communal container and hidden them away in a tupperware in the freezer. That way she could snack on them whenever she saw fit, safe from all other muffin-eaters. If you feel the need to hide away a few of these muffins for yourself, you won’t see me judging you!!

IMG_0398

Flourless Chocolate-Peanut Butter-Banana Muffins

1 cup mashed banana (from about 2 medium-large bananas)

1 cup creamy peanut butter

1/4 cup honey or agave nectar

2 tablespoons brown sugar

1/3 cup unsweetened cocoa powder

2 large eggs

1 tablespoon ground flaxseed (optional)

2 teaspoons vanilla extract

1 teaspoon baking soda

1/4 teaspoon salt

1/2 cup chocolate chips (optional)

Directions:

Preheat oven to 425 degrees F. Grease or line a 12-cup muffin tin.

Mix together all of the ingredients in a large bowl until well-combined. Divide evenly among muffin cups, filling about 3/4 of the way. Bake for 5 minutes, then decrease oven temperature to 350 degrees. Bake for an additional 10-15 minutes, or until the muffin tops spring back when lightly touched and an inserted toothpick comes out clean.

Cool in the muffin tins for 15 minutes, then run a knife around the edges of each muffin and carefully remove to a cooling rack. Store the muffins in an airtight container for up to 5 days.

(Recipe inspired by Averie Cooks and Detoxinista)