Wild Blackberry Pie

IMG_4054When my brother and I were about seven years old, my parents decided to convert our backyard sandbox into a miniature strawberry patch. Considering that no one in my immediate family was (or is) much of a gardener, this was a pretty big deal. At that point, the closest I’d ever come to home-grown food was the handful of gnarly apples that our ancient little tree managed to produce every other year and the crazy mass of rhubarb that grew around our sandbox-turned-strawberry-patch. Compared to our across-the-street neighbors’ perfectly trim, maintained vegetable garden, our 3’x5′ strawberry box wasn’t exactly impressive, but that didn’t stop my brother and me from running out to the yard every day to check on our strawberries’ progress.

The first few years were pretty disappointing…only a couple of teeny-tiny (yet sweet!) berries appeared among the leaves, which we quickly gobbled up. Each year seemed to be a bit better, though, and by the time we put our house up for sale in 2003 our strawberry patch had quite a few juicy red berries to boast. Of course it happened that just when our little plant was starting to thrive we had to pack up and leave….but isn’t that the way it always seems to go? Sigh.

Still, even those tiny red sandbox strawberries taught me an important lesson…garden-grown produce is not in the same league as store-bought. Not even close. It goes for anything: berries, tomatoes, lettuce, beans, carrots, you name it! I love this time of year when the farmer’s market is in full swing and our green-thumbed friends and neighbors gift our family with “real” fruits and veggies. It’s also the time of year for blackberry picking, one of my favorite parts of summer!IMG_4069

When we first moved to the area and discovered it teeming with wild blackberry bushes I was beside myself with the excitement of berry-picking. I loved the rustic feeling of heading down the driveway with a bucket swinging from my hand, plunking in berry after berry to the point of near-overflow. I never minded all the scratches that covered my wrists and shins after a session of blackberry picking; it was all worth it to get that perfect patch of berries tucked among the thorns. I always felt a little like Laura Ingalls Wilder, collecting a bounty of wild blackberries to bake into pies and eat over porridge (aka oatmeal).

To this day I’m still a berry-picking fanatic. I often venture down to the best bushes on our road after dinner and fill a bowl or two with ripe, gigantic blackberries. Secretly I love to close my eyes and just breathe in the smell of them. It brings back a flood of memories of hot summer days at our county fair, pie-baking with my friends, and squeezing in one last trip to the bushes on the night before the first day of school. This year I went a little crazy and had to fill three gallon-size ziplock bags with blackberries to freeze since there’s only so many that my family can eat up while they’re fresh. I also made sure to bake a blackberry pie, which my dad has deemed his favorite pie in the world.

The quality of a pie is largely determined by the quality of the fruit inside it, and that’s what makes my wild blackberry pie extra-delicious. I never buy blackberries from the store since they grow so plentifully around here, but earlier this year I had store-bought blackberries at a friend’s house and was shocked by the difference in flavor. All I can say is that those seedy little berries in the plastic containers are not real blackberries. Wild blackberries are so much sweeter, softer, juicier, and more fragrant that I can’t even think of them as the same fruit. Sorry to diss the store-boughts, but it’s the cold hard truth!IMG_4071

While I’ll never say no to a fresh blackberry straight off the bush, sprinkled into a fruit salad, or served over vanilla ice cream (gah), they really shine in this pie. The filling is kept simple to let the blackberries dominate, but the flavors of bright lemon and warm vanilla add a perfect little enhancement to the sweet berries. This recipe also uses tapioca starch (tapioca flour) to thicken the filling. I like the mild, slightly-sweet flavor of tapioca better than cornstarch, which has a more “starchy” taste, but you could always substitute it in a pinch. I’ve never been a pro at making pie crust (far from it, in fact), but this crust was surprisingly easy to work with. It’s an all-butter crust (yay for flavor!), and as long as you make sure that your ingredients are extremely cold and you’re careful not to add more water than necessary, you’ll end up with tender, flaky crust. I used to take the shortcut of buying a pre-made Pillsbury pie crust, but homemade is so much better. If you’re willing to brave making your own crust, I promise the end result will be worth the time and effort!

So…it just occurred to me that I’ve suggested that this recipe is unattainable to anyone who doesn’t happen to have blackberries growing out their back door. You know, since wild berries are so superior. While this is true, I hate to alienate all of you poor wild blackberry-less souls, so I’ll let you know that you could make this pie with store-bought blackberries. Fresh or frozen. I can’t say your pie will be the same, but it will probably still taste pretty good. It might even taste really good. You could also use any type of berry you like (blueberries, raspberries, loganberries, etc.) and I’m guessing you’d still end up with a darn delicious pie. So go ahead! I’ll shut up about the superiority of wild berries. But before I shut up, if you do have access to the wild ones, your pie will be even more amazing. Just keepin it honest! 😉

IMG_4078Wild Blackberry Pie

Makes one 9-inch double-crust pie

For the crust:

2 & 1/2 cups all-purpose flour

1 teaspoon salt

1 teaspoon sugar

1 cup (2 sticks) cold butter, cut into small cubes

1/3-1/2 cup ice water

For the filling:

6 cups blackberries

1/4 cup tapioca starch

1/2 cup sugar (add more to taste if your berries aren’t super sweet)

1 tablespoon fresh lemon juice

1 teaspoon fresh lemon zest

1 teaspoon vanilla extract

For assembling:

1 egg, beaten

Extra sugar, for sprinkling

Directions:

Place the flour, salt, and 1 tsp sugar into a food processor* and pulse once or twice to combine. Add in the chopped butter and process for about 10 seconds, or until the mixture resembles coarse crumbs. Pour the water through the food chute 1 tablespoon at a time, pulsing 2-3 times after each addition. As soon as the dough starts to stick together, pat it into a ball.

*If you don’t have a food processor, simply whisk together the dry ingredients and then cut in the butter using a pastry cutter or two forks. Sprinkle the water in 1 tablespoon at a time, tossing with a fork after each addition. When the dough sticks together, pat it into a ball.

Divide the dough ball in half and flatten each half into a thick disc. Wrap in plastic wrap and chill for at least 1 hour.

When ready to make the pie, preheat the oven to 425 degrees F. On a floured surface, roll out one of the pie dough discs into an 11-inch circle, then carefully transfer to a 9-inch pie plate. Gently press the crust into the pan and refrigerate while you prepare the filling.

Place the blackberries in a large bowl and sprinkle with the tapioca starch, sugar, lemon juice, lemon zest, and vanilla. Gently fold or toss the mixture until the berries are coated. Let the berries macerate (release their juices) while you roll out the second pie crust. If desired, cut the dough into 1/4-1/2″ strips for a lattice crust.

Take the pie plate out of the fridge and brush the bottom crust with beaten egg. Spoon in the berry filling and top with the second crust. If you’re making a lattice crust, weave the strips of dough onto the pie and smooth out the edges with your fingers. Cut off any excess pie dough around the sides, leaving enough overhang to crimp the edges. Brush the top crust with the remaining egg and sprinkle with sugar if desired.

Bake the pie for 15 minutes, then reduce the oven temperature to 375 degrees and bake for an additional 20-30 minutes. When the crust is golden-brown and the filling is bubbly, remove from the oven. If the edges are browning too fast, loosely cover with aluminum foil. Cool the pie for at least an hour before slicing.

(Crust and filling recipes adapted from The Baker Chic)

Sweet Cherry Galette with Almond Streusel

IMG_0679What you see here is our Father’s Day dessert from the other week. My dad has always been a “pie guy,” and cherry pie just might be his favorite dessert in all the world. It is not an unusual occurrence for us all to be sitting around the living room after dinner when my dad moans out that he “neeeds pie.” Since nine times out of ten he’s the one who jumps up and out the door the minute anyone mentions a needed grocery item, oil change, package mailed, etc., we all try to satisfy his pie cravings now and then.

Of course, a sudden “neeeed” for pie doesn’t leave a lot of any time for homemade pie, so we often have to resort to Marie Callender or those horrid plastic-containered grocery store pies found in the bakery section. Since I’m the only one in my family who bakes, my year away from home resulted in far too many of those pre-packaged pies making their way into our refrigerator. Like many bakers, it pierces my heart to see someone eat a slice of that scary-bright-red cherry “pie” with glee and complete ignorance of what they’re missing. Not that people shouldn’t be satisfied with anything other than homemade, but….they’re just different species, store-bought pie and pie from scratch. Not only is the list of ingredients on the back of those packages far too long and scary-sounding for my liking, but the taste of real buttery crust and fresh fruit just can’t compare. No offense if you happen to love pre-made pies (I’ve certainly eaten my fair share), but my heart will always belong to homemade.IMG_0702

Anyway, it saddened me to think that that my poor father had forgotten what real pie tastes like. So for Father’s Day, there was no doubt in my mind that homemade cherry pie (or in this case, galette) would be gracing our table.

This cherry galette is made with sweet, fresh bing cherries rather than jarred or frozen sour cherries, so it has a rather different taste than “regular” cherry pie. I wouldn’t say it’s better or worse; it’s like comparing apples and oranges. While sour cherry pies have that distinct tart flavor and a syrupy filling, this sweet cherry galette is more mild and fresh-tasting. I love both, but I’m partial to fresh, sweet cherries in the spring and summer, so I bought a bag of beautiful bing cherries and got to work. Naturally, as I was in the middle of pitting the cherries (using a hard plastic straw as a makeshift cherry-pitter) I looked down and realized I was wearing a white shirt. I swear, every.single.time I pit cherries I happen to be wearing white. It’s ridiculous, I tell you!

The crust of this galette is tender and flaky, and the secret addition of cornmeal adds a little somethin’-somethin’ to the texture and the flavor. However, in my mind the real star of the show is the cherries, which are combined with minimal ingredients to really let their flavor shine through. I topped the galette with a generous sprinkle of almond streusel, and the almond flavor marries perfectly with the cherry. Each bite of buttery crust, juicy cherries, and crumbly topping will leave you wanting another…and another. I added a scoop of vanilla bean gelato to each piece as well, which only made it more swoon-worthy. The entire galette was eaten up in less than 48 hours (by 4 people, I might add–and I only had a sliver)!

IMG_0711

Being a fruit girl (as opposed to a crust girl), one of the reasons I love galettes is for their greater ratio of filling-to-crust, since a galette is basically an open-faced pie. Another reason I make them more often than pies is for their simplicity: they’re supposed to look rustic (read: messy), and you don’t have to worry about perfectly crimped edges or smooth tops. All you do is roll out a single crust, plop the fruit filling in the center, and fold up the extra crust toward the center. In this case, folds and creases are what you’re going for, which is a total dream-come-true for anyone who tends to avoid making finicky pie crust. Not that I have any personal experience with fears of pie crust, but you know…

Yet another beauty of galettes is their adaptability–you can substitute the cherries for virtually any fruit, and the streusel can be played with as well. You can use all butter instead of the almond paste, use a different type of nut, or leave out the almonds all together and sub in some oats. Still, I must say that we certainly loved this combination of cherries and almond streusel, and it made for one very happy father on his special day!

IMG_0695

Sweet Cherry Galette with Almond Streusel

For the crust:

1 & 3/4 cups all-purpose flour

1/3 cup granulated sugar

1/4 cup yellow cornmeal

1/4 teaspoon salt

1/2 cup very cold butter, cut into small chunks

1/3 cup cold buttermilk*

For the fruit filling:

1.5 pounds (about 3.5 cups) fresh bing cherries, pitted and halved

1/3 cup granulated sugar

1 tablespoon + 1 teaspoon cornstarch

1 tablespoon fresh lemon juice

1/2 teaspoon salt

1/2 teaspoon vanilla extract (optional)

1/4 teaspoon almond extract (optional)

For the streusel:

2 tablespoons all-purpose flour

2 tablespoons brown sugar, packed

1 tablespoon almond paste (you can substitute with butter)

1 tablespoon butter

2 tablespoons sliced or slivered almonds

For assembling:

1 egg beaten with 1 tablespoon warm water

Extra sugar, for sprinkling

*You can make your own buttermilk by putting 1/4 teaspoon of vinegar or lemon juice into a 1/3 cup measure, and then filling the cup with regular milk. Let sit for 5 minutes or so, until the milk curdles, then proceed to use.

Directions:

For the crust, whisk together the flour, sugar, cornmeal, and salt in a large bowl. Using a pastry cutter or a fork, cut in the cold butter until the mixture is coarse and crumbly. Slowly pour in the buttermilk, tossing with a fork until the dough holds together. Then pat it into a ball, wrap in plastic wrap, and chill for at least 45 minutes.

When ready to bake, preheat the oven to 375 degrees F. Let the dough stand at room temperature for 5-10 minutes, then turn out onto a floured surface and roll it into a 14-inch round. Carefully transfer the crust onto a cookie sheet lined with parchment paper or a silicon mat, then place in the refrigerator for 15 minutes.

While the oven is preheating and the crust is chilling, make the cherry filling. In a large bowl toss together the pitted cherries, sugar, lemon juice, cornstarch, salt, vanilla, and almond extract. In a smaller bowl, use a fork (or your fingers) to combine the streusel ingredients until they clump together.

Remove the crust dough from the refrigerator and pile the cherries into the center, leaving a 1.5-2 inch border around the edges. Fold the excess dough toward the center, smoothing down the creases where the dough overlaps. Sprinkle the streusel over the top of the cherries. Brush the egg mixture onto the crust and sprinkle the crust with granulated sugar.

Bake the galette for 45-60 minutes, or until the crust is golden and the filling is bubbly. Place the cookie sheet on a wire rack to cool for 15 minutes, then slide the galette directly onto the rack to cool completely.

Slice and serve with vanilla ice cream or whipped cream, if desired.

(Recipe adapted from Two Peas and Their Pod and Kitchenette)


Blueberry-Almond Crisp

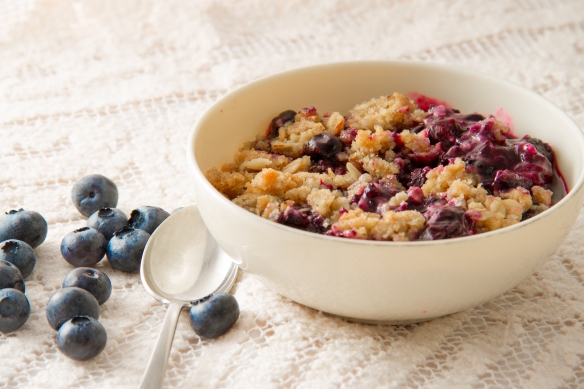
IMG_6478One of my favorite things about summer is the fruit. As fresh strawberries, raspberries, blueberries, peaches, plums, mangoes, cherries, and more start appearing in the produce section I feel much like a kid in a candy store. Since on our tiny island it’s ridiculously expensive (and often impossible) to attain summery fruits throughout most of the year, I always look forward to loading up on all my favorite fruits throughout the spring and summer months.

IMG_6483

Summertime’s surplus of fresh fruit also means some extra-tasty desserts. As convenient as frozen fruit is, there’s nothing like a blackberry pie made with berries picked from the wild tangle of bushes down the lane or a rustic galette filled with sweet, fresh cherries rather than the usual sticky red canned ones. Pies, cobblers, crumbles, etc. are some of my favorite go-to desserts throughout the summer because they allow for sweet, juicy fruits to take center stage.

IMG_6491

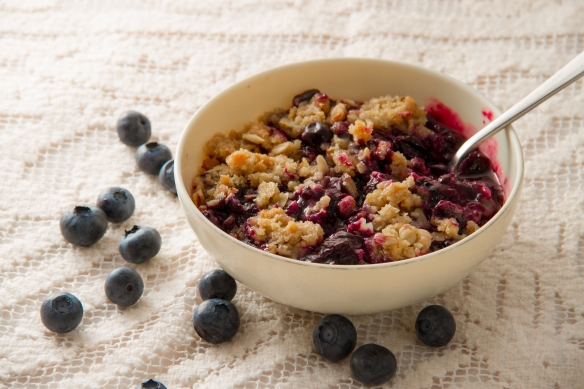
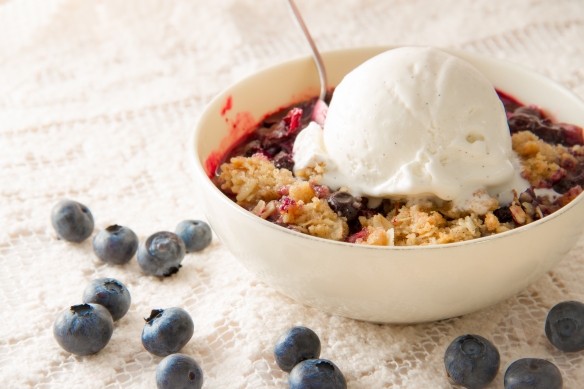
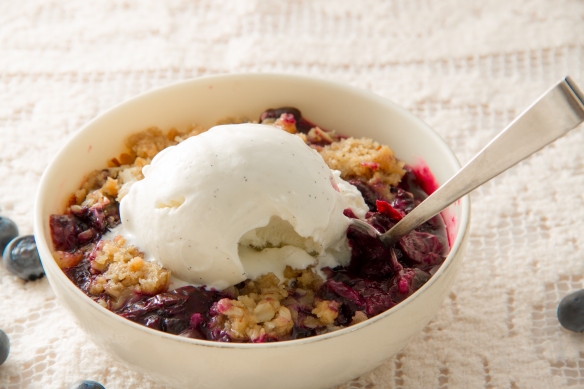
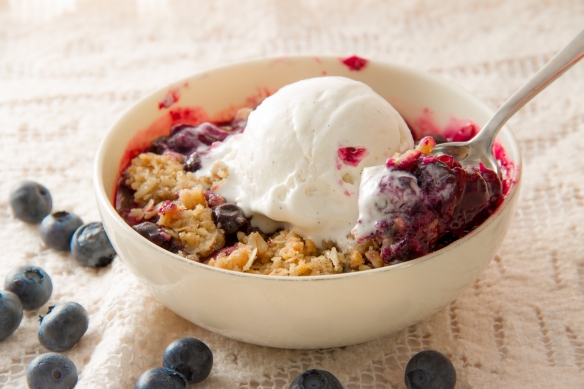
This Blueberry-Almond Crisp is the perfect treat for a warm summer evening: plump, sweet blueberries are tucked underneath an oatmeal-almond crumble topping and baked until the top is crisp and golden and the berries are thick and bubbly. I love the combination of blueberries and almond, and this crumb topping packs in just the right amount of almond crunch and flavor to contrast the sweet, juicy blueberries. A warm bowl of Blueberry-Almond Crisp with a scoop of vanilla ice cream tastes like the epitome of summer, at least in my book.

IMG_6488

This recipe has become a summertime favorite in my family. Go pick up a container of fresh blueberries and try out this wonderful crisp for yourself! You don’t want to miss out on this one.

IMG_6494

Blueberry-Almond Crisp

For the fruit filling:

4 cups fresh blueberries (or unthawed frozen blueberries)

1 tablespoon fresh lemon juice

1 teaspoon fresh lemon zest

1/4 teaspoon vanilla extract

1/4 teaspoon almond extract (optional)

1/2 cup granulated sugar

1/4 cup all-purpose flour

For the crumb topping:

1/2 cup all-purpose flour

1/4 cup old-fashioned oats

1/4 cup sliced almonds

1/3 cup light brown sugar, packed

1/4 cup granulated sugar

1/2 teaspoon salt

1/2 teaspoon ground cinnamon

1/4 cup (4 tablespoons) cold butter, cubed

2 tablespoons almond paste

Directions:

Preheat oven to 350 degrees F. Lightly grease an 8″x8″ baking pan; set aside.

Place the blueberries in a large bowl. Add in the lemon juice, lemon zest, vanilla, sugar, and flour. Gently fold the mixture until the blueberries are well-coated. Let the berries sit and macerate while you make the topping.

For the topping, whisk together the flour, oats, almonds, sugars, salt, and cinnamon in a medium-sized bowl. Using two forks or your fingers, cut in the cold butter and almond paste until the mixture holds together into large crumbs.

Spoon the berry mixture into the bottom of the prepared baking dish. Top with the crumb mixture and bake for 40-45 minutes or until the topping is golden-brown and the filling is bubbly. Let the crisp cool slightly. Serve warm or at room temperature with ice cream or whipped cream, if desired.

(Recipe heavily adapted from Two Peas and Their Pod)

Miniature Tarts with Cream Cheese Crust

tarts_2I still vividly remember the day I got my mini tart pan. It was one of those dreaded days for a 6-year-old where my dad had to work, my brother had some sort of play date, and my mom had a meeting to attend at a friend’s house. I, of course, had no choice but to go to the meeting as well. Lucky for me, one of my mom’s friends was selling products from a baking company, and as we sat in the living room a catalog was passed around. Of course while sitting in a circle of friends, one of whom is presenting merchandise, there’s naturally some pressure to buy something. It’s one of those things, such as spending 45 minutes talking after having your plates cleared at a restaurant or knowing to never wear black socks with brown shoes, that my dad will never understand but is basically written into my mom’s genes.

Since I was with her at this little marketing spiel, my mom told me that I could pick one thing out of the catalog to order. After much debate, I selected the miniature tart pan, which looked to be perfect for making adorable, tiny little tarts and muffins. I loved the nursery rhyme The Queen of Hearts (who made some tarts, all on a summer’s day….any pre-90’s kids out there?) which probably contributed to my decision as well. Back then the main character of one of my favorite nursery rhymes was definitely a major idol of mine, right after MLK, Lindsay Lohan–who I thought was two different people thanks to the incredibly deceiving movie The Parent Trap–and Santa Claus. Only one of those idols still remains on the list. Can you guess who?

A few weeks of excruciating patience later, my pan finally arrived! I remember slipping it out of its tight plastic wrapping (which required scissors and the closest available parent) and running my hands down its dark, smooth surface. The pan also came with a little recipe booklet and a wooden tart tamper, which I felt so sophisticated using.

I can’t remember making any crust other than the Cream Cheese Crust recipe featured in the recipe booklet, which was about as simple as it gets: 1 cup flour, 1/2 cup butter, and 1/2 cup cream cheese. (I’ve adapted it a little in the recipe below.) Over the years I made mini tarts again and again for tea parties, neighborhood gatherings, and on the occasional mid-morning whim. I experimented with different fillings, which included strawberry jam, chocolate kisses, lemon pudding, and my favorite, cherry preserves. For a while it was a 3-person project between my mom, my brother, and I. We would make the dough, roll it into little balls, squish the tart tamper into each cup (my favorite part), bake the shells, and fill the tarts. I learned the hard way that you should never be stingy when it comes to greasing the pan, that having a container of flour on hand for dusting the tamper in between squishes is an absolute necessity, and the charcoal-y flavor of burnt tarts can be nicely masked by an extra-large spoonful of lemon pudding placed in the center. What can I say…practice makes perfect!

If you happen to be a proud owner of a miniature tart (aka mini-muffin) pan, try these! The crust is flakey, delicate, and has an extra-rich flavor from the cream cheese, and the lemon curd filling is thick, sweet, and just a bit tart. Not to mention that these itty bitty baby pies are so freaking cute! That said, if you want to make these in a regular muffin pan you totally can. They just won’t be as cute. Yes, I realize that some people don’t care about the cuteness factor of their baked goods but I’m just saying…

I just now realized that I was going to center this post around the fact that yesterday was Pi Day (3/14, get it?), which is why I made the tarts in the first place (to bring to my Calculus class). Being me, of course I got sidetracked with my reminiscence of the good ole tart-making days. Whoops.tarts_5

tarts_4


Cream Cheese Crust

1 cup all-purpose flour

1/4 tsp salt

1/2 cup (1 stick) cold unsalted butter, cut into small cubes

4.5 oz cold cream cheese, cut into small pieces

Directions:

Combine the flour and salt in a large bowl. Using a pastry cutter or two knives, cut in the butter and cream cheese until the mixture is crumbly. Pat the dough into a ball, wrap in plastic wrap, and refrigerate for at least 1 hour.

When ready to bake, preheat oven to 400 degrees F. Grease and flour a 24-cup mini muffin pan or a regular 12-cup muffin pan. Divide dough into 24 pieces and roll into balls. Place each ball into a muffin cup and press into the bottom and sides. Bake for 10-15 minutes or until tarts are golden. (If using a 12-cup muffin tin, bake for about 20 minutes.) Cool for 5 minutes in the pan and then gently remove onto a wire rack. Cool completely before filling.

Lemon Tarts: After baked tart shells have cooled, fill each shell with store-bought or homemade lemon curd (recipe below).

Chocolate Kiss Tarts: After the shells have baked for 5 minutes, remove from oven and press a chocolate kiss into each tart. Continue baking for 5-10 minutes or until crust is golden. Cool tarts for at least 30 minutes before serving so that the chocolate can re-harden.

Cherry, Strawberry, or Raspberry Tarts: Fill the baked, cooled tart shells with fruit preserves.

Lemon Filling

3/4 cup granulated sugar

2 Tbs cornstarch

1/8 tsp salt

1/2 cup water

1/4 cup freshly squeezed lemon juice (from about 1 large lemon)

Zest of 1/2 a lemon

3 large egg yolks or 1 whole egg + 1 yolk

1 Tbs unsalted butter

Directions:

In a small saucepan, whisk together the sugar, cornstarch, salt, water, lemon juice, zest, and egg yolks. Add in the butter and place pan over medium heat. Cook, whisking constantly and scraping along the bottom and sides, until the mixture comes to a boil and thickens. Let it boil for about 30 seconds, stirring constantly, and the pour the mixture into a medium-mesh strainer placed over a bowl. When all the lemon filling has drained into the bowl and only the zest and large particles remain in the strainer, remove the strainer and let the filling cool to room temperature. Then place a sheet of plastic wrap directly onto the filling and store in the refrigerator. The filling can be refrigerated for up to 2 days.

tarts_1

(Lemon Filling and Cream Cheese Crust adapted from the 75th Anniversary Edition of The Joy of Cooking)

Deep-Dish Apple Pie with Cheddar Crust

IMG_3167

For Christmas, my dad received a homemade coupon in his stocking good for one pie of your choice. It didn’t take any guessing to know that it was from me! Being the pie-lover that he is, he put a lot of thought into his choice. Originally my dad asked if I would make him a blackberry pie with the wild blackberries we had stashed in the freezer, leftover from late summer pickings, but unfortunately there weren’t quite enough. And it’s not like store-bought frozen blackberries would do, since after tasting a pie made with wild ones there is no. going. back. Back to the drawing board it was. One of my Christmas presents was a copy of the 75th edition The Joy of Cooking, and upon leafing through it I spied a recipe for Deep-Dish Apple Pie with Cheddar Crust.

The savory-sweet combination was intriguing, especially since I LOVE the combo of cheddar cheese on apple slices. I’d never made a deep-dish pie before, which is essentially a pie without the bottom crust. I was a little worried that it would be too runny, more cobbler-esque, but it ended up slicing beautifully. When I suggested this pie to my dad he immediately consented, which is no surprise considering the fact that apple pie and extra-sharp cheddar cheese are two of his favorite things. After a quick trip to the store I was ready to go.

I baked the pie on a Saturday afternoon, then went off to babysit that evening. When I got home later that night I found the pie, half-eaten, with this sticky-note attached:

227713_514618971912041_2108368586_n

(FYI, Sam is my brother and Victor is his good friend)

I think that pretty much says it all! This pie is perfect for apple-lovers, cheddar-lovers, and pie-lovers alike. I know for a fact that this won’t be the last time an Apple Pie with Cheddar Crust appears at our house!

IMG_3172

Deep-Dish Apple Pie with Cheddar Crust

Crust:

1 1/4 cups all-purpose flour

1/2 tsp salt

1 stick cold butter, cut into chunks

2 Tbs chilled vegetable shortening

3/4 cup shredded sharp cheddar cheese

3 Tbs ice water

Filling:

2 lbs apples (about 4 medium-large) peeled, cored, and cut into 1/4″ slices

6 Tbs butter

1 cup dark raisins (optional)

1/2 cup chopped pecans

1/2 cup granulated sugar

1/4 cup apple cider

Zest and juice from 1 large lemon

1/2 tsp ground nutmeg

1/4 tsp ground cinnamon

1/4 tsp ground cloves

1/2 tsp salt

Directions:

For the crust, whisk together the flour and salt. Using a pastry blender or two knives, cut half the butter into the flour until the mixture resembles cornmeal. Add in the cheddar cheese and the rest of the butter and shortening and cut in until it is pea-sized. Sprinkle in the water, one tablespoon at a time, tossing with a fork until the dough sticks together. If necessary, add in an additional 1 tsp to 1 Tbs water.

Turn the dough out onto a lightly floured sheet of waxed paper, plastic wrap, or a silicon mat. Lightly flour the top of the dough, place another sheet on top and roll into a 10-inch round. Slide the dough onto a cookie sheet and refrigerate for at least 30 minutes.

For the pie, preheat oven to 375 degrees F.  In a wide skillet, heat the 6 Tbs butter over medium-high heat until sizzling and fragrant. Add the apple slices and cook until tender, 5-7 minutes. Then stir in the raisins, pecans, sugar, apple cider, lemon zest, lemon juice, nutmeg, cinnamon, cloves, and salt. Bring to a boil and cook, stirring occasionally, until the juices thicken to the consistency of maple syrup.

Pour the mixture into a 9- or 10-inch pie pan (a shallower pan works best in this recipe so the crust:filling ratio is more even). Peel the top sheet of waxed paper off the pie dough, then place the dough onto the filling and peel off the bottom sheet. Let the dough soften for a minute or two, then tuck the edges inside the rim of the pan. Cut 4 steam vents into the top crust.

Place the pie on a baking sheet in the center rack of the oven and bake for 30-40 minutes, or until crust is golden and filling is bubbly. Serve warm.

(Recipe from 75th Anniversary Joy of Cooking by Irma S. Rombauer, Marion Rombauer Becker, and Ethan Becker)

Blackberry Apple Pie

Even though fall doesn’t technically start for about three weeks, August 31st always feels like the last day of summer.  This is the time of year when I start buying apples instead of peaches, trade my flip-flops for my corduroy TOMS, throw an extra blanket on my bed, and make the transition from summer to school.  I’m a stickler when it comes to dressing, eating, and decorating appropriately for the seasons, so it makes me cringe when I walk through Michael’s in August and see scarecrows, hay bales, and pumpkins everywhere I go or when a Christmas song comes onto my iPod shuffle in the middle of July.  My parents have learned that if they do things like wear reindeer sweatshirts in the spring or bring home a strawberry-rhubarb pie in the dead of winter, I may have a mental breakdown.  Not that they let that stop them.  Sigh.

Anyway, yesterday I had the urge to make a pie.  And because we’re currently in this weird transition-from-summer-to-fall stage I couldn’t decide between baking a summery pie, such as peach or blueberry, or a autumny (I feel like I make up a lot of words in this blog) pie such as apple or pecan.  On one hand, I wanted to savor every last bit of summer that I could, but on the other hand I wanted to usher in my favorite season, fall, with a delicious pie.  Yes, I know, you must be wondering how I manage to cope with the emotional distress of such weighty decision-making.  It’s a wonder I can sleep at night.

Well, I slept like a baby last night because I found the perfect solution to my pie-making ordeal.  Instead of choosing between summer and fall, I chose summer and fall.  In the form of blackberry-apple pie.  It’s full of wild summer blackberries as well as tart, crisp apples and a myriad of fall spices.  The best of both worlds.  And it was especially fun to make since I picked the blackberries from bushes right down the road and the apples from our scrawny little apple tree.  I love how this recipe uses a cinnamon-spiked crust, which is part of why I picked it out of the gazillion hits for “blackberry apple pie,” and I couldn’t be happier with my choice.  The sweet blackberries perfectly complement the tart apples, and a healthy dose of cinnamon pulls it all together.  And a nice scoop of vanilla ice cream never hurts 🙂  This is the perfect transition pie to give a fond farewell to summer and a big hello to fall!

Blackberry Apple Pie

Crust:

2 cups all-purpose flour

1 tsp granulated sugar

1 tsp salt

1 tsp cinnamon

2/3 cup cold butter, cut into small cubes

4-6 Tbs ice water

Filling:

5 cups peeled, thinly sliced tart apples (I used 4 large Granny Smiths)

2 cups fresh blackberries

1/2 cup light brown sugar, packed

4 1/2 tsp cornstarch

1 tsp cinnamon

1/2 tsp nutmeg

1/4 tsp allspice

Topping:

1 large egg

1 Tbs warm water

coarse sugar, for sprinkling

Directions:

In a large bowl, whisk together the flour, sugar, salt, and cinnamon.  Using a pastry cutter or two forks, cut in the cold butter until mixture contains coarse crumbs.  Add the ice water 1 Tbs at a time, tossing with a fork, until mixture begins to hold together when pressed.  Form the dough into a ball, and divide into 2 equal pieces.  Place one of the pieces in the refrigerator.

On a lightly floured surface or between two pieces of waxed paper, roll out the remaining half of the pie dough into a disc large enough to line a 9-inch pie pan.  Loosely roll the dough onto the rolling pin, and carefully transfer it to the pie dish.  Unroll the dough and press it into the pan, trimming the edges so that there is about a 1/2-inch overhang.

In a small bowl, combine the brown sugar, cornstarch, cinnamon, nutmeg, and allspice.  Place the apple slices and blackberries in a large bowl and sprinkle the brown sugar mixture over the fruit.  Fold gently with a rubber spatula until the apples and berries begin to release their juices.  Pour the filling onto the crust.

Roll out the chilled half of the pie dough and place it on top of the pie.  Trim, seal, and crimp the edges.

In a small bowl, whisk together the egg and warm water.  Brush the egg mixture onto the top of the pie.  (This will result in a crisp, golden crust.)  Sprinkle sugar onto the crust if desired.  Cover the edges of the crust loosely with aluminum foil.

Bake in a 450 F oven for 10 minutes.  Decrease temperature to 350 degrees and remove foil.  Bake for an additional 40-50 minutes or until crust is golden-brown and filling is bubbly.  Store leftovers in the refrigerator, loosely covered.

(Recipe adapted from Taste of Home)

Blackberry Cobbler


I once read an article proclaiming that memories can be triggered most easily not by sight or sound, but by smell.  This surprised me at first, as I thought that familiar sights would cause the most remembrance, but as I thought about it I realized that scents have an uncanny way of bringing back memories.

Whenever I carve into a fresh pumpkin in the fall, I’m immediately taken back in time to Halloweens of the past where I worked so long and so hard to scoop out all the membranes from my pumpkin because I wanted to do it myself; I’m taken back to the bone-chilling Halloween nights in Colorado where I’d stay up way past my bedtime and thrill at the satisfying thud as candy after candy was dropped into my plastic pumpkin basket.  The same thing happens every Christmas when I inhale the scent of fresh pine needles and feel the nostalgia of Christmases come and gone, and again in the spring when I rub the season’s first dandelion between my fingers and smell the sticky nectar which brings back memories of weaving necklaces out of the yellow weeds as I sat in my old backyard.  Being a person who possesses a strong aversion to change (which I’m working on 😉 ), I find a certain comfort in knowing that no matter how much time passes or how many miles I travel, there will always be the familiar scent of pumpkins, pine trees, and dandelions, among many other things, to make me feel at home.

When I moved to my home in Washington nine years ago, I was ecstatic to find that our island is home to dozens upon dozens of wild blackberry bushes.  At the end of each summer, when the sunsets are gradually coming earlier, the nights are starting to get cooler, and the beginning of school is just around the corner, the blackberries reach their peak.  Along nearly every street there are tangles of blackberry bushes studded with dark berries in varying degrees of ripeness.  One of my favorite ways to spend the last few nights of summer is to go blackberry-picking along my road.  I tend to be a little too self-sacrificial when it comes to getting every ripe berry I see.  I always wind up with scratches up and down my arms, a handful of lost hairs, and several minutes lost to extricating myself from a cage of thorns.  But it’s all worth it when I end up with a bucketful of sweet, juicy berries!

I can never resist the temptation to stick my nose over a bucket full of fresh-picked berries and inhale their sweet scent.  Memories of warm summer days are dredged up from the past, and I can recall baking numerous blackberry pies, picking berries with friends, and savoring a bowl of blackberries over vanilla ice cream on the night before the first day of school.  The smell of wild blackberries will forever be equivalent to end-of-the-summer activities on my little island.

While I love blackberry pie, sometimes a cobbler just hits the spot.  Cobbler is much easier and faster than making a pie, and you get a higher ratio of berries-to-topping (whether it’s crust or biscuit) in a cobbler.  The other night I served this blackberry cobbler for dessert and savored every bite of its tender biscuit topping and sweet blackberry filling, made complete with a scoop of creamy vanilla ice cream.  The transition between summer and fall is always bittersweet, but this cobbler will tip the balance closer to the sweet side!


Blackberry Cobbler

Fruit filling:

4 cups blackberries, fresh or frozen

1/3 cup granulated sugar (more or less to taste)

1 1/2 tsp lemon zest (from about 1 lemon)

1 Tbs fresh lemon juice

pinch of cinnamon

1 1/2 Tbs cornstarch

Biscuit topping:

1 cup all-purpose flour

3 Tbs granulated sugar

1 1/2 tsp baking powder

1/4 tsp salt

1/4 cup (1/2 a stick) unsalted butter, cut into small cubes

1/4 cup milk or buttermilk

1 large egg

Directions:

Stir together sugar, lemon zest, lemon juice, cinnamon, and cornstarch in an 8″x8″ baking dish.  Gently fold in the blackberries (if using frozen, make sure they’re thawed and drained) until berries are coated with the sugar mixture.  Allow to sit at room temperature for 30 minutes so the blackberries can release their juices.

Preheat oven to 350 degrees Fahrenheit.  In a medium-sized bowl, whisk together flour, 3 Tbs sugar, baking powder, and salt.  Drop the cubes of cold butter on top of the flour mixture and cut in using a pastry blender or two forks.  When the mixture resembles coarse crumbs, make a well in the center.  Crack the egg into the center and whisk it slightly.  Add the milk to the well and stir until moistened.

Drop the biscuit mixture by large spoonfuls on top of the berries.  (I like to divide it into 9 pieces to make serving easy.)  Bake for 30-35 minutes or until biscuits are light golden and berry filling is bubbling.

This is best served with a big scoop of vanilla ice cream!

(Recipe adapted from Simply Recipes)

Cherry Galette

When it comes to pie, there are crust people and there are filling people.  I, for one, have always been on Team Filling.  To me, nothing tastes more like summer than a blackberry pie fresh from the oven, bursting with berries picked from the bushes down the road. During apple season in the fall, there’s nothing like a piece of hot apple pie, filled to the brim with tart, tender apples and the sharp bite of cinnamon.  Blueberry, cherry, strawberry rhubarb, coconut cream, lemon meringue, peach, pecan, I love them all.  I rate pie by the quality of its filling, and have always been pretty “meh” about the crust.

That’s why, though it bruises my baker ego to say it, I tend to cheat a little when it comes to making pie.  Or a lot.  Several years back, after a particularly unsuccessful attempt at a pie crust that simply refused to stay together, I dumped out the crumbly mess, wiped my tears of frustration, and headed to the store for a pre-made pie crust.  As I peeled off the packaging to expose the perfectly smooth, uniformly thick pie crust, I took a moment to give thanks to the brilliant individual who came up with the idea of refrigerated pie crust.  And, shameful as it is, I never looked back.  I made dozens of pies over the years, and though I put lots of time and care into creating delicious, homemade fillings, I always relied on that handy-dandy pre-made crust.

Looking back, my apathy towards pie crust isn’t too surprising: I’d been eating pie crust that was made from vegetable oil, not butter, crust that was pumped full of preservatives and emptied of flavor.  Then came a busy day, a need for a dessert, and a recipe that promised to produce a quick, delicious, homemade treat that would bring success to even the most hopeless pie-crust-makers.  A galette, which I’d never tried before, is basically a pie without the top crust.  And the feature it’s best known for is its “rustic” (aka, justifiably messy) appearance.  Perfect.

I took advantage of the fresh bing cherries brought over by a neighbor and put together the quick, 4-ingredient crust in about 5 minutes.  After refrigerating, you just have to roll the dough out, trim it into a circle, dump the fruit into the middle, and fold the crust around the edges.  Best of all, the goal is to look rustic (read: messy).  An hour later, you have a golden-brown, bubbling, open-face pie without the trouble of making the crusts look pretty and perfectly crimped.  The plump, juicy cherries were delicious, yet they didn’t steal the thunder from the second star of the show: the flaky, buttery crust.  I still have a soft spot for pie filling, but after my eye-opening galette experience I just may be open to making a little room in my foodie heart for crust, too.

Cherry Galette

Crust:

2 cups all-purpose flour

1/4 tsp salt

11 Tbs cold butter

4-6 Tbs ice water

Filling:

4 cups fresh pitted cherries (or any other fruit you may desire)

3 Tbs flour

1/3 cup white sugar (more or less to taste)

2 Tbs cold butter

1/2 tsp almond extract (omit, or use lemon juice instead, if using a fruit other than cherries)

Directions:

Stir together flour and salt.  Cut butter into small cubes and toss onto flour mixture.  Cut in the butter with a pastry cutter or two forks.  When butter is in pea-sized chunks, drizzle in ice water one tablespoon at a time, tossing with a fork as you go.  When the dough seems to be moist enough, pat it all together into a ball, wrap in plastic wrap, and refrigerate for at least an hour.

Preheat oven to 375 F.  Put cherries into a large bowl and sprinkle with flour and sugar.  Add almond extract and stir it all together.  Turn out the dough onto a floured surface and roll into a disc at least 12 inches by 12 inches (there will be leftover dough).  If desired, trim the edges to make the crust more circular.  Then fold the dough in half, then in half again, and transfer to a large, un-greased cookie sheet.  Unfold the dough.  Dump the cherries into the middle and dot with 1 Tbs of butter cut into little pieces.  Take the edges of the dough and pull them into the center, pleating as you go.  If needed, moisten your fingers with a little water and smooth over the pleated areas to make it all stick together.  Melt the last tablespoon of butter and brush it over the crust.  Sprinkle with a little sugar, place on the oven’s middle rack, and bake for 50-60 minutes, or until crust is golden-brown and filling is bubbling.  Let cool on the sheet for at least 15 minutes before serving.  Enjoy!

(Recipe adapted from Our Best Bites)