Banana Flaxseed Muffins

muffins1At the beginning of each October, my university has a so-called “fall break” which is actually nothing more than a 3-day weekend. I’m totally on board with the idea of this mini-vacation, but its actual application seems pretty half-hearted. If you’re going to call it a break, make it a break! Three days was just long enough for me to make the 7-hour journey home, collapse into relaxing familiarity for 40-some hours, and then tear myself away to drive all the way back to school. It felt more like a teaser than anything else, especially for a homebody like myself. Still, I’m grateful for my brief recharge at home, and I need to keep reminding myself that relaxation often morphs into boredom after too many days. Okay, maybe not 2 measly days, but let’s stay positive!

One of my projects during my time at home was to re-stock the freezer with easy grab-and-go breakfasts for my mom. She’s not exactly a morning person, and I know for a fact that breakfast is virtually the last thing on her mind as she gets ready for work. You know someone like that, too? Good. Make them these muffins!muffins2

These Banana Flaxseed Muffins are perfect for a quick, healthy breakfast. I like to make a full batch ahead of time and store them in the freezer for those busy mornings. They can be made gluten-free, but you can also use a mixture of whole wheat and all-purpose flour if gluten isn’t an issue. Unlike so many muffins that are basically frosting-less cupcakes, these are full of healthy ingredients to give you an energy boost without the crash. Bananas serve as the main sweetener, and they also lend the muffins a soft, moist texture. Flaxseed brings in some heart-healthy fat, and warm spices give the muffins extra flavor. You can even make them vegan by using agave nectar and soy or almond milk!

I love knowing that my mom now has a few weeks’ supply of muffins for breakfast, settled right next to the chili I made for my dad (which he will most likely not eat for breakfast, just so we’re clear). I’m sure they’re capable of fending for themselves (after all, they managed just fine until I came along) but I also know how much they miss my cooking and baking! Make your own friends and family happy by baking them a batch of these Banana Flaxseed Muffins. There’s nothing like a pre-made, homemade, healthy, on-hand breakfast to show them that you care!muffins4

Banana Flaxseed Muffins

Makes one dozen standard-size muffins

1 & 3/4 cups gluten-free flour blend (or all-purpose flour)

1/2 teaspoon xanthan gum (if using gf flour)

2 teaspoons baking powder

1/2 teaspoon baking soda

1/2 teaspoon salt

1 teaspoon ground cinnamon

1/4 teaspoon ground nutmeg

2 medium ripe bananas, mashed

1/2 cup milk (I used soy milk)

1/4 cup vegetable oil

1/4 cup agave nectar or honey

1 teaspoon vanilla extract

3 tablespoons ground flaxseed

Directions:

Preheat oven to 400 degrees F. Line or grease a 12-cup muffin tin and set aside.

In a large bowl, whisk together the flour, xanthan gum, baking powder, baking soda, salt, cinnamon, and nutmeg. Set aside.

In a smaller bowl, whisk together the mashed bananas, milk, oil, agave, vanilla, and flaxseed. Using a rubber spatula, fold the wet ingredients into the dry ingredients just until no flour streaks remain. Scoop the batter evenly into the muffin tins.

Bake for 5 minutes, then reduce the oven temperature to 350 degrees and bake for an additional 13-17 minutes, or until an inserted toothpick comes out clean. Let the muffins cool in the pan for 5 minutes before removing to a wire rack.

(Recipe adapted from Anecdotes and Apples)
Oatmeal-Raisin Energy Balls (No-Bake!)

IMG_6974I’ve only been home from college for two weeks, but I’m already in full-on summer mode. The weather was particularly cooperative when I first got home, with sunny days and temperatures in the 70s, and although our island has now succumbed to its more usual May weather (overcast skies and temperatures in the low 60s) I’m still in a summery mood. I’ve started back up with my summer jobs, taken long runs in the (sometimes) sun, bought tons of fresh summer fruit that finally doesn’t cost an arm and a leg, and carried out a considerably admirable attempt at purging my closet of STUFF. Since coming home I’ve been somewhat overwhelmed at the amount of STUFF cluttering up our entire house, and I’m trying to do a bit of summer cleaning. I can never decide which is stronger: the hatred I have of the actual cleaning, or the wonderful freeing feeling of a de-cluttered house. It’s an ongoing dilemma.

IMG_6961

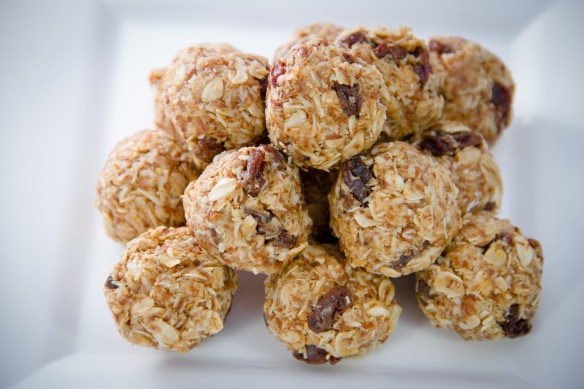
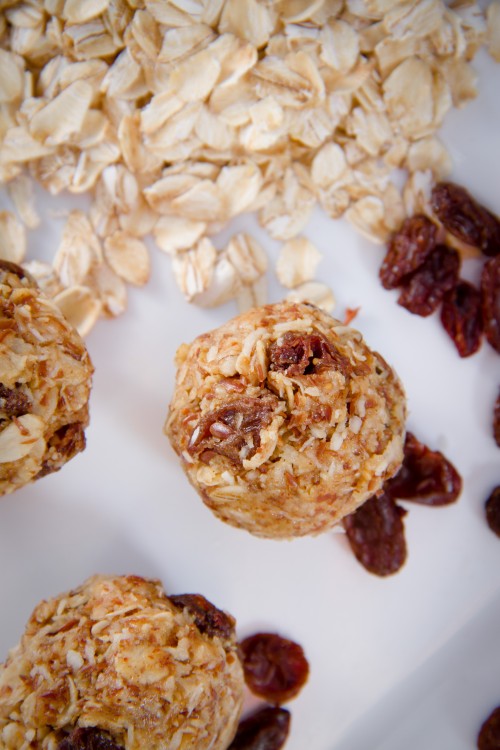
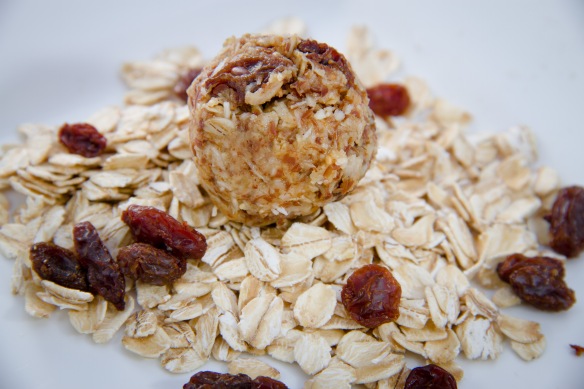
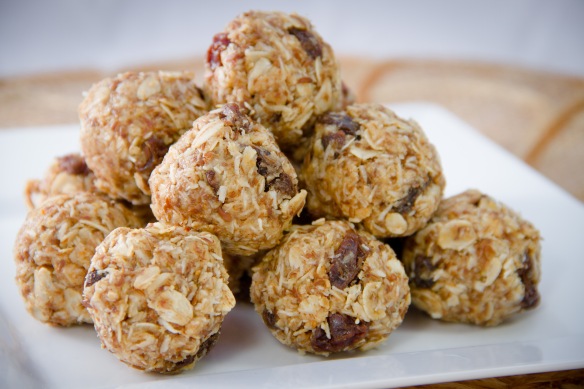
One of my favorite parts of summer is more time for cooking and baking, and it’s been so nice to be back in a real kitchen. Ice cream sandwiches, Greek-themed dinners, chickpea curry, lemon-poppy seed bars and energy bites are just a few of the things that have emerged from my kitchen in the past two weeks. Today I’m sharing a recipe for some of the quickest, easiest, and healthiest little treats you can find. These Oatmeal-Raisin Energy Bites are gluten-free (if you use gf oats), dairy-free, low-sugar, and packed full of fiber, protein, and healthy fats. They’re made in one bowl with one spoon, and you don’t even have to turn on your oven! Sounds pretty fool-proof to me.

IMG_6994

The other morning I woke up to an email from my mom (yes, we live in the same house and see each other multiple times a day yet she still gets a kick out of emailing me), saying that the little energy balls were so, so delicious and she hopes I’ll make them “again and again.” I just had to chuckle. Especially considering the fact that she was in the next room when I read it. I won’t even pretend to understand her logic, but there’s no doubt about it that these energy bites really do taste amazing! They’re full of flavor, are sweet but not too sweet, and have a wonderful chewy texture from the softened oats. I think the balls are quite reminiscent of oatmeal-peanut butter cookie dough, but they’re so much better for you!

This recipe is also super adaptable. Use whatever nut butter you like in place of the peanut butter, sub in maple syrup or agave nectar for the honey, use cocoa powder or oat flour instead of ground flaxseed, and use your favorite add-ins if you don’t like raisins. Chocolate chips, dried cranberries, or nuts would all be delicious. I promised my mom (via email, just to humor her) that I would be more than happy to make them again and again! I can’t wait to play around with other combos, and these simple balls are the perfect solution to an 8pm snack craving. Hope you enjoy these as much as we do!

IMG_6999

No-Bake Oatmeal-Raisin Energy Balls

Yield: about 20-24 balls

1 cup old-fashioned oats

1/2 cup creamy peanut butter

1/2 cup ground flaxseed

3/4 cup unsweetened coconut flakes

1/3 cup honey

1 teaspoon vanilla

1 teaspoon ground cinnamon

1/2 cup raisins

Directions:

Combine all ingredients in a large bowl and stir well. If the mixture is too dry, add in an extra tablespoon or so of honey. If it’s too wet, add in a bit more oats.

Chill for 30 minutes, then form the dough into tablespoon-sized balls. The energy bites can be stored in an airtight container in the refrigerator for up to 1 week.

(Recipe adapted from Smashed Peas and Carrots)


Thick & Fluffy Gluten-Free Pancakes

IMG_3897

Growing up, pancakes were a frequent occurrence in our house, especially on weekend mornings. I vividly recall standing on my little stool next to the stove, taking on the oh-so-important task of placing frozen blueberries onto each round circle of batter and trying to exercise patience as they cooked for what seemed like a million years. My dad must have listened to my shrill little voice asking “Are they ready now? Now, dad? Now?” about a gazillion times. While my mom was always the chef behind our morning oatmeal, waffles, and scrambled eggs, I remember my dad being in charge of pancakes, boiled or fried eggs, omelets, and french toast. It’s funny what memories a young brain holds on to: which parent cooked what breakfast, how many times I sneakily attempted (unsuccessfully) to eat all the cheese out of my omelets and get away with leaving the egg part untouched, and the painful shock of burning my index finger on a hot pancake skillet the one time I broke all headed warnings and gingerly “tested” the pan to affirm that yes, indeed, it really does get HOT! Lesson learned.

It’s been literally years since my family has all had a pancake breakfast together, and to be honest I’m no longer a huge fan of pancakes themselves, but this weekend I decided to dredge pancakes up from the forgotten breakfast arsenal and cook up some gluten-free pancakes that everyone (since my mom is gluten-free) could eat.

This recipe for Fluffy Gluten-Free Pancakes was a jackpot! Contrary to my fears of gluten-free pancakes ending up gummy, grainy, or just plain gross, this recipe yielded soft, tender, dense-yet-fluffy, delicious pancakes. Made with a combination of oat flour and coconut flour, the pancakes are hearty and thick with a wonderful slightly-sweet coconut aroma, and with a few tablespoons of honey and a dash of vanilla they’re plenty sweet as-is. That said, they’re also delicious drenched in pure maple syrup! The Greek yogurt gives the pancakes moisture and fluffiness, and the eggs counteract coconut flour’s tendency to make finished products dense and gummy rather than tender and moist. Kudos to Honey and Brie for an awesome recipe!

IMG_3901

While these pancakes are fabulous without any add-ins or extra flavors, I imagine they would be a perfect template for blueberry pancakes, chocolate-chip pancakes, banana-nut pancakes, or some other variation. I know I’ll be making these again since everyone in my family (even my pancake-neutral self) loved them! In fact, they were our breakfast Saturday AND Sunday morning. Gluten-free doesn’t have to mean pancake-free! These are super tasty, my friends, whether you’re gluten-free or not. Enjoy!

IMG_3899

Fluffy Gluten-Free Pancakes

Makes about 6 (thick!) 4-inch pancakes

1/2 cup + 1 tablespoon oat flour

2 tablespoons coconut flour

1/2 teaspoon baking soda

Pinch of salt

1 teaspoon vanilla extract

2 large eggs

1/2 cup Greek yogurt (or any type of plain yogurt)

2 tablespoons honey, pure maple syrup, or agave nectar

Butter, maple syrup, fresh fruit, etc. to serve

Directions:

In a medium bowl, whisk together the oat flour, coconut flour, baking soda, and salt. Whisk in the vanilla, eggs, yogurt, and honey until smooth. If the batter is too thick, add in about 1-2 tablespoons of milk.

Melt a little butter into a skillet (or spray with nonstick cooking spray) over medium heat. When the pan has heated, pour 4 circles of batter onto the pan, about 1/4-cup each. When bubbles form on the tops and the edges look set, flip each pancake. Cook for 2-3 more minutes or until bottoms are golden-brown, then serve. Repeat with remaining batter.

Top pancakes with butter, syrup, fresh fruit, peanut butter, etc. and enjoy!

(Recipe adapted from Honey and Brie)

Roasted Vegetable & Asiago Frittata and Lemon-Roasted Potatoes

IMG_0284I’m not a big magazine or newspaper reader, but my family subscribes to the weekly magazine The Week, which I read religiously every week…if that wasn’t clear enough, I read the weekly magazine The Week every week. Hah. What makes it one of the few magazines I actually like is the fact that it has a nice variety of articles, not just boring news or endless celebrity gossip. I love reading through sections such as People, Film Reviews, Best Properties on the Market, Health and Science, and It Must Be True…I Read it in the Tabloids. One of my favorite sections is a tiny, quarter-page column entitled Only in America. It often features the most ludicrous lawsuits that make one’s faith in humanity fade just a leeetle bit.

Last week’s edition of The Week brought quite a stunner in the Only in America section. Apparently an Ohio prosecutor has filed an indictment against Punxsutawney Phil, who allegedly misled the entire nation by predicting an early spring that has yet to appear. Yes, that’s correct. Phil the Groundhog is facing the death penalty. While seeking punishment for our weather-predicting groundhog seems a bit over the top, to say the least, I have to admit that spring is certainly taking its sweet time to appear. Temperatures are still dropping into the 30s at night where I live, and the past few days have been gray and drizzly. If one more person utters the incredibly annoying phrase “April showers bring May flowers,” I just might lose it. I want spring, and I want it now! (But I’m not mad at you, little Phil.)

To make matters worse, last weekend we had a short-lived bout of beautiful spring weather. I’m talking sunshine, cloudless skies, 60+ degree days, and dandelions bursting up everywhere. I spent as much time outside as possible, running on the beach and sitting on my deck trying to make up for a long, sun-less winter. I should have known it was too good to last, because according to my favorite weather station the next predicted day of sunshine is a week from Tuesday. The weather gods are just plain cruel, tantalizing us this way.

I guess Dr. Seuss would say, “Don’t cry because it’s over. Smile because it happened.” Easter really was wonderful, from the beautiful weather to spending time with family. I cooked brunch for my family in the morning, which consisted of a Roasted Vegetable & Asiago Frittata, Lemon-Roasted Potatoes, and fruit salad. Everything was delicious, if I do say so myself. By the time everything was out of the oven and on the table we were all too ravenous to wait for me to take pictures, but luckily my brother whipped out his iPhone and took a couple screenshots. Good enough!

This really was the perfect meal for Easter Brunch. The baked frittata was amazingly quick, easy, healthy, and delicious, filled with fresh roasted veggies that can be made ahead to save time. The possible variations for this frittata are endless: you can use different types of veggies, more cheese, less cheese, crumbled bacon, cubed ham or chicken, etc. That said, I have to say that this combination of roasted red pepper, zucchini, red onion, garlic, and asiago cheese hit the spot…by the end of the day my family of four had eaten up every last morsel.

I’d never thought to roast lemon slices along with potatoes, but they ended up caramelizing a bit and bringing a big boost of flavor to the roasted potatoes. To make these extra-special, use Meyer lemons if you can find them!

Well, aside from last weekend’s sunshine it looks like you were wrong, Phil….spring has not sprung. At least not yet. Still, I hardly think the solution is to punish our groundhog. After all, he has to live with this nation-wide ugly weather, too!

IMG_0287

IMG_0286

Roasted Vegetable & Asiago Frittata

Serves 8

1 Tbs extra-virgin olive oil

3 red bell peppers, seeded and cut into fourths

4 unpeeled garlic cloves

1 large zucchini, cut into 3″ x 1/2″ slices

1 small red onion, cut into strips

1 tsp salt

1/4 tsp black pepper

8 large eggs

1/4 cup shredded asiago cheese

Directions:

Arrange oven racks on lower and middle sections of the oven, and preheat to 425 degrees F. Line two baking sheets with aluminum foil.

Place the bell peppers and garlic onto one of the sheets and the zucchini and onion onto the other. Drizzle about half a tablespoon of olive oil onto each of the sheets and toss to coat. Roast the zucchini and onion on the lower oven rack and the peppers and garlic on the middle rack for 15 minutes, or until zucchini and onions are tender. Remove the zucchini and onions from the oven and switch the peppers and garlic to the bottom rack. Roast the peppers and garlic for another 10-15 minutes or until peppers are charred.

Let the vegetables cool slightly, then peel the garlic and chop all the vegetables into coarse pieces. Reduce oven temperature to 350 degrees.

Spray a 9-inch cake pan with baking spray. Whisk together the eggs, salt, and pepper, and pour into the pan. Add in the roasted vegetables. Bake the frittata for 40 minutes, then sprinkle the asiago cheese onto the top and bake for another 10-15 minutes, or until the center is set. Let the frittata cool in its pan for 5 minutes, then slice into 8 wedges and serve.

(Recipe adapted from Ladies’ Home Journal)

Lemon-Roasted Potatoes

1.5 pounds small yellow potatoes

1 small lemon

1 Tbs extra-virgin olive oil

Salt and pepper

Directions:

Preheat oven to 375 degrees Fahrenheit.

Wash the potatoes and slice into quarters lengthwise. Place the potatoes into a 9″x13″ glass pan and drizzle with olive oil. Toss the potatoes to coat them with the oil and sprinkle with salt and pepper. Cut the lemon into 8 thin slices, removing any seeds. Place the lemon slices among the potatoes. Roast for 30 minutes or until potatoes are tender and browned, stirring halfway through to ensure even roasting. Serve warm.

(Recipe adapted from Simple Bites)