Date Balls

IMG_1246One of the perks of being born and raised in Colorado for the first nine years of my life was the access to incredible skiing. The town my family lived in was only about 40 minutes from Vail, one of the most stunning ski towns in the United States, and during the winter we frequented various other ski slopes. I had my first skiing lesson when I was six, and quickly graduated from the conveyor belt of the kiddie slopes to the real white powder of the “grown-up” slopes. I loved the thrill that came with riding the chair lift up to the top of the peaks, my skis swinging below me as I gazed down at the busy white world below. Sure, there were several occasions where I failed to smoothly glide off the chair lift at the top of the mountain and ended up in a heap on the snowbank beside the operator station, skis twisted and snowsuit dampened, but I loved those cold, quiet rides.

Even better was the whoosh of icy air as I pointed my toes downward and took off, refusing to wait for my brother and dad…or to turn. I preferred to go straight down the slope, hoping that others would make room for me as I whizzed by, a tiny figure in a pink-and-purple snowsuit. This fearlessness clashed with my usual shy, conscientious demeanor, and I nearly gave my dad a heart attack on several occasions.IMG_1254

My favorite part of each ski slope was the “camel humps,” which were essentially a roller-coaster of carefully molded snow. Sometimes I tripped and lost a ski (or a boot), but I loved the sensation of flying and falling, flying and falling, over and over. After several runs, when my feet, nose, and hands were pink and numb, my dad would lead my brother and me back into the lodge. We would shuffle in our awkward ski boots to a table in the darkened room, where we would drink something hot and rest our tired legs.

Long gone are the days where I clomped around in ski gear across the cobblestones of Vail Resort, but I still hold those memories tightly. In a moment of happy nostalgia this summer, I stumbled across a spiral-bound cookbook given to my family many years ago, compiled by the mothers of two of my dad’s ex-students. It is entitled Red Checkered Picnics, and features recipes that were created for gourmet ski tours across Colorado. I can’t say I’ve ever packed a gourmet picnic to take on a cross-country ski trip, but I have tried out many recipes from Red Checkered Picnics over the years.IMG_1247

This summer, as I flipped past the molasses-and-flour stained pages of the cookie section, a recipe popped out at me. Date Balls, which I probably would have gagged at as a picky eight-year-old, suddenly sounded perfect. As much as I love the tranquil predictability that comes with making “regular” cookies (cream the butter and sugar, add eggs and vanilla, stir in the flour…), I was up for something a little different. This recipe looked fast, easy, delicious, and somewhat healthier than your typical cookie fare. Feeling like my young, aspiring-baker self from back in the days of camel humps and chair lifts, I spread open the familiar cookbook on the counter and rolled up my sleeves.IMG_1251

Whether or not you pack up these Date Balls to take on a long day of outdoor adventures, they’ll provide you with a most delicious source of energy! They are packed full of crunchy sunflower seeds, chewy dates, and a sweet honey-butter reduction, all rolled in flaky coconut. Make them as big (or as small) as you want, and store them in the fridge for the best results. And is it just me, or do things always taste better when they’re made from a cookbook you know and love? I mean, the internet is great (for goodness sake, I’m writing on a blog here), but there’s nothing like flipping through the well-worn pages of a favorite cookbook. It’s like gliding onto a ski slope after years and years of absence. Can you tell I’m a little nostalgic sometimes all the time? Haha. Even though these Date Balls triggered a trip down memory lane for me, they can still trigger some delicious enjoyment for all of you! They really are fast, tasty, and super easy. No skiing experience required.IMG_1257

Date Balls

Makes 2-3 dozen balls

2 cups chopped, pitted dates

1/2 cup (1 stick) unsalted butter

1/2 cup honey

1 egg, beaten

1 teaspoon vanilla extract

1/4 teaspoon salt

2 cups sunflower seeds, chopped

1/2 cup unsweetened shredded coconut

Directions:

In a medium-sized saucepan, stir together the honey, egg, vanilla, and salt. Add the stick of butter and place over medium-low heat, stirring often, until the butter is melted. Add in the chopped dates, increase the heat to medium-high, and bring the mixture to a rolling boil. Boil for 1 minute, stirring constantly, then remove from heat and transfer to a mixing bowl.

Stir in the sunflower seeds and place the bowl in the refrigerator for about an hour, or until cold. Form the mixture into balls and roll in shredded coconut. Store in an airtight container in the refrigerator.

Recipe adapted from Red Checkered Picnics

Monster Cookies (Flourless!)

IMG_1239
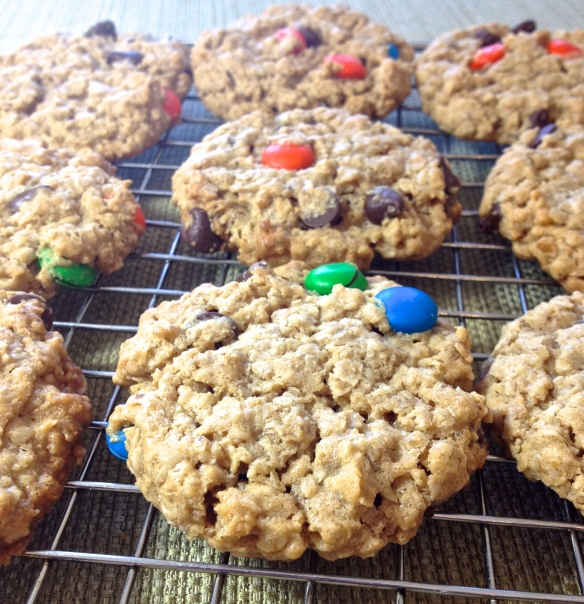
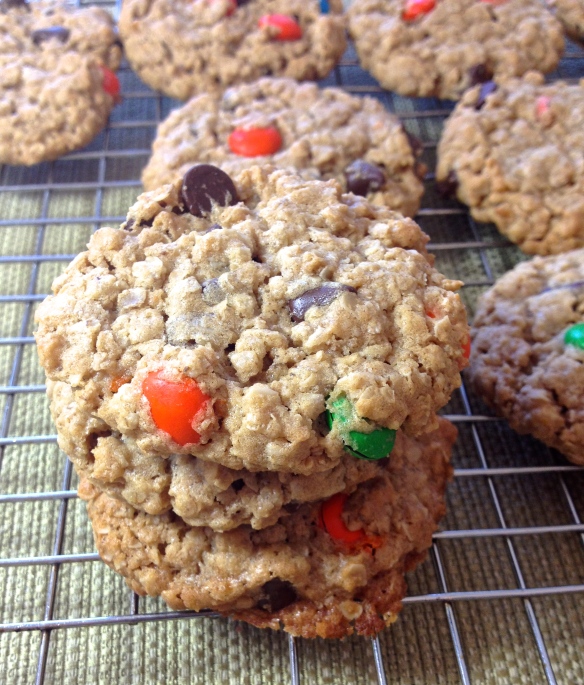
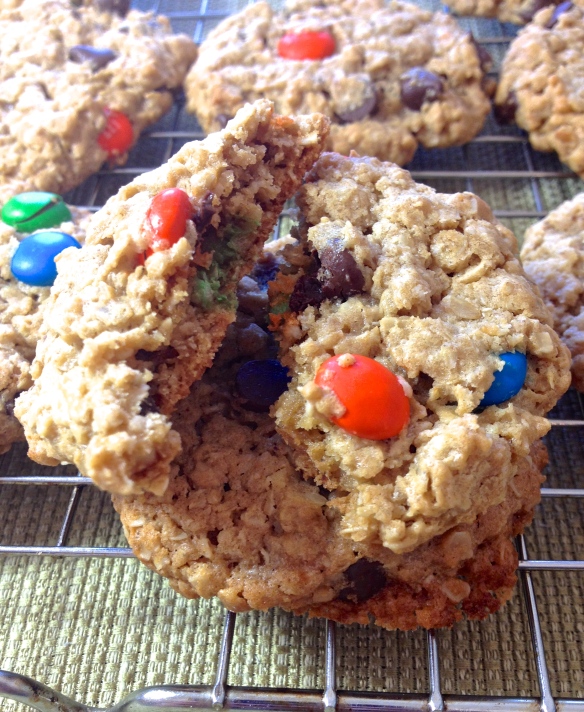
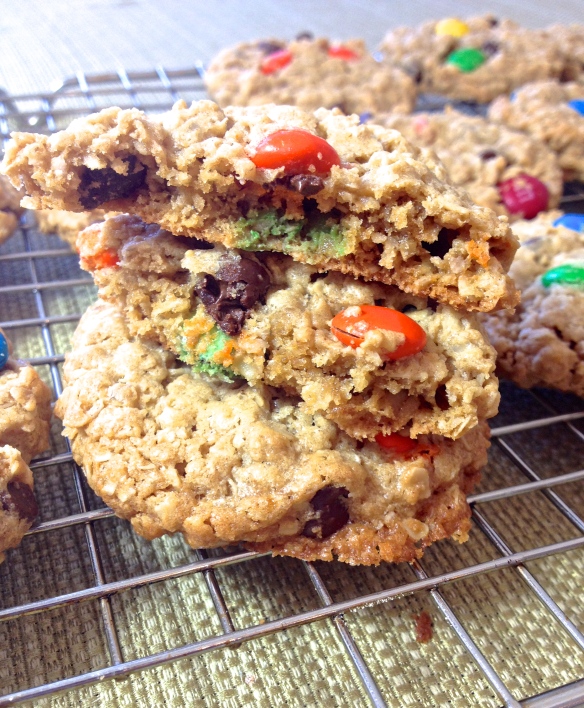
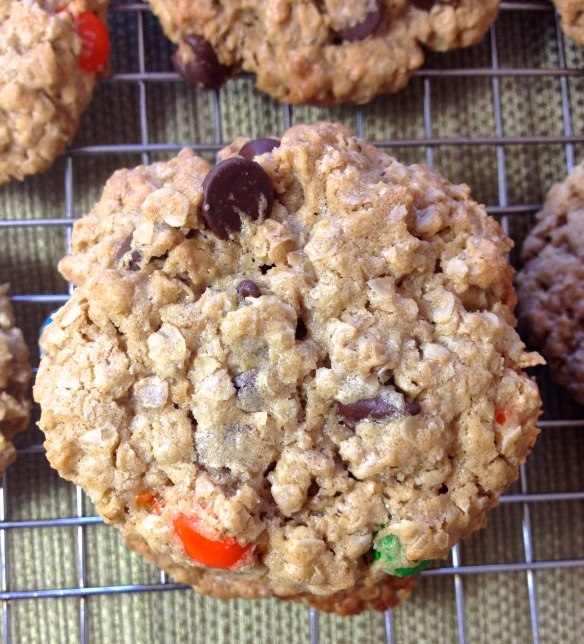
Let me introduce to you the ultimate cookie mash-up: oatmeal cookie meets peanut butter cookie meets chocolate chip cookie…meets M&M cookie! Phew. It’s no wonder they’re called monster cookies with all that goodness loaded in (although I’ve heard rumors that the name actually comes from a bakery that made mass–monster–quantities of these cookies). While my past few posts have featured recipes with some considerably strange ingredients, these monster cookies feature the exact opposite. Most of their ingredients are pretty typical for cookies–sugar, eggs, butter, vanilla, salt, baking soda–but there’s one common cookie ingredient missing…flour!IMG_1234

That’s right. The quick-cooking oats and three whole eggs hold these monster cookies together just fine, and they have the best chewy texture. I was worried that the lack of flour might result in flat pancake cookies, but they also stay tall and thick. In fact, you’d be wise to pat them down a little before baking, because their shape holds up really well in the oven. I made them extra-large because no way was I making regular-sized MONSTER cookies, and seriously, each cookie is like a meal in itself! The peanut butter and oats offer such a fantastic texture and flavor, and the chocolate chips and M&Ms bring in a nice dose of richness. IMG_1232

For those of you gluten-free folks out there, here is a cookie that you can eat too! Just make sure to use gluten-free oats, and you should be all set. My gluten-free mother, who has long since resigned herself to forgoing homemade cookies, was astounded to hear that she could actually eat these. At first she thought I was teasing her! Nothing like a pleasant surprise in the form of a monster cookie. 🙂 IMG_1236

Ditch the flour and make yourself a batch of these overloaded monster cookies. You’ll never have to decide between peanut butter, oatmeal, and chocolate chip cookies again!IMG_1241

Monster Cookies

Makes about 3 dozen cookies

1 & 1/4 cup light brown sugar, packed

1 cup granulated sugar

3 large eggs

1/2 cup (1 stick) unsalted butter, softened

1 & 1/2 cups creamy peanut butter

1 teaspoon vanilla extract

1/2 teaspoon salt

2 teaspoons baking soda

4 & 1/2 cups quick-cooking oats

1 cup chocolate chips

1 cup M&Ms

Directions:

Preheat oven to 350 degrees F. Line or grease two cookie sheets and set aside.

In a large bowl, beat together the sugars and eggs until smooth. Mix in the butter, peanut butter, vanilla, and salt until well-combined. Stir in the baking soda, oats, chocolate chips, and M&Ms.

Roll the dough into balls (mine were about 1.5 tablespoons each) and place 2 inches apart on prepared cookie sheets. Slightly flatten each ball with the back of a spoon or the palm of your hand.

Bake for 10-12 minutes, or until the tops are set and the edges are light golden-brown. Don’t overbake! Cool the cookies for 2 minutes on the cookie sheets before transferring to a wire rack. Store in an airtight container at room temperature.

*Note: the dough balls can also be frozen and baked for 12-14 minutes (without thawing!) as desired.IMG_1244

Recipe adapted from Mel’s Kitchen Cafe

Soft and Chewy Chocolate Chip Cookies

IMG_5297
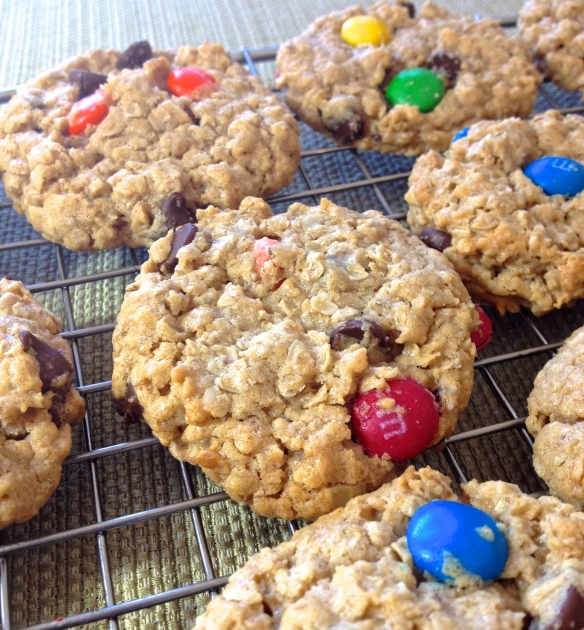
You guys, I finally did it!! I made regular, typical, standard, good old-fashioned chocolate chip cookies. No browned butter this time. No special caramel-filled chocolate chips. No toasted coconut, fancy sea salt, pretzels, or Oreos. And you know what? They were amazing. They reminded me that sometimes, you don’t need all the bells and whistles. There’s a reason that chocolate chip cookies are so iconic, holding their place as America’s #1 favorite cookie (at least according to The Huffington Post). I mean, chocolate chip cookies are essentially little balls of flour, sugar, butter, and chocolate…what more do you need?

<Psst…don’t worry; I am only capable of making about one “normal” batch of cookies every five years. Knowing me, browned butter/pretzels/m&ms/caramel bits/the contents of my baking cupboard will be back inside my cookies soon.>IMG_5305

On an entirely different note…I finally did it!! I decided to haul this little blog away from the back burner and onto my plate again. I won’t give you all the excuses I have about being an extremely busy third-year college student trying to balance classes, psychology research, being a resident assistant, and re-training after a long running injury. Oh yeah, and I didn’t have a kitchen of my own during the school year. But if I were to give those excuses, it would end with me apologizing for being M.I.A. for so long and hoping that there are still people out there who love reading recipes for ridiculously soft and chewy chocolate chip cookies. And the occasional quinoa salad…because balance.

As to the future of Emma’s Baking Addiction, we’ll just see how this summer goes. I’ll do my best to keep adding to the blog, but life might take over again in its pesky way. For now, you should at least make a batch of these incredible chocolate chip cookies. The addition of cornstarch makes them soooo soft, and if you’re careful not to over-bake them, they’ll stay soft and chewy for up to a week! My poor brother, who has been begging me to make “regular” chocolate chip cookies for over a year now, will be thrilled to find a box of these in his Montana mailbox. I can’t mail you all cookies, but I really hope you will make them yourself. The fact that I refrained from making a thousand adjustments to this recipe should tell you something….yes, they’re that good. Enjoy! 🙂 IMG_5286

Soft and Chewy Chocolate Chip Cookies

Yield: 2.5-3 dozen cookies

3/4 cup (1.5 sticks) unsalted butter, softened to room temperature

3/4 cup brown sugar, packed

1/4 cup granulated sugar

1 large egg, at room temperature

2 teaspoons vanilla extract

2 cups all-purpose flour

2 teaspoons cornstarch

1 teaspoon baking soda

1/2 teaspoon salt

1 & 1/4 cup chocolate chips

Directions:

Using an electric mixer, beat together the butter and sugars until light and fluffy. Mix in the egg and vanilla until combined. In a separate bowl, whisk together the flour, cornstarch, baking soda, and salt. On low speed or with a wooden spoon, add the flour mixture into the wet ingredients and mix just until combined. Stir in the chocolate chips. Cover the dough with plastic wrap or foil, and chill for at least 1 hour and up to 2 days.

When ready to bake, preheat the oven to 350 degrees F. Line two baking sheets with parchment paper or a baking mat. Scoop the chilled cookie dough into 1-tablespoon-sized balls and place on the prepared cookie sheets. Bake for 8-10 minutes, or until edges are set and slightly golden (be careful not to over-bake!). Let the cookies cool on the sheets for 5 minutes before moving to a cooling rack.

Recipe from Sally’s Baking Addiction

Healthy No-Bake Cookies

no-bakecookiesMy first batch of no-bake cookies can only be described as a disaster. I was in middle school at the time, and my friend and I were lounging around her house trying to decide what to do when her mom suggested no-bake cookies. I had never heard of them but was all too willing to try them out. The recipe called for butter, peanut butter, sugar, vanilla, oatmeal, and milk…I’m pretty sure that was it. Total health food! Luckily our pre-teen metabolisms could handle it, and we got right to work.

The standard recipe for no-bake cookies is pretty simple: melt the peanut butter, butter, and sugar; stir in everything else; drop the mixture onto cookie sheets. Let it set up, and you’re done. Fool-proof, right? Not so much…

My friend and I divided the task of measuring ingredients, and peanut butter fell onto my side. “I think there’s a jar of Skippy in the cupboard,” she said, and I obligingly skipped over to the cabinet. Sure enough there were two jars of peanut butter, one farther back than the other. I chose the emptier one in the back, if only to help her family use it up. As soon as I screwed open the jar I noticed a funny smell, but I didn’t say anything. My family always bought natural peanut butter that you had to stir, so I figured Skippy just smelled a little different. That was my first mistake.nobakecookies2

I scooped out the appropriate amount of peanut butter and dumped it into the saucepan along with the other ingredients. Five minutes later we were forming the mixture into little balls and placing them onto a wax-paper-lined cookie sheet. I’ve always been a “taster” when it comes to baking (my justification is that any incorporated germs are killed by the heat of the oven…and let’s just pretend the no-bake thing doesn’t exist) so I definitely snuck a pinch or two of the dough. It tasted…bad. Not a little bad, a lot bad. It’s a taste that I now know can be described as rancid nuts (shocker, right)?! Seeing my expression my friend tried it too, and made the same disgusted face as I had.

“Why didn’t you tell me the peanut butter smelled funny?” she asked. “We could have used the other kind.”

“Well, uh…” I started to reply. “I don’t know.” Satisfying answer for sure.

We threw out the entire batch and sadly resumed our lounging around. But fear not, because we definitely made a successful batch at another point in time! I think I probably put her in charge of the peanut butter…

And now we have reached the end of the road where I stop talking about my crazy life and cut to the chase. THESE no-bake cookies are just about as easy as the originals (if not easier) but they have the benefit of actually being good for you. Yeah, there’s chocolate, but it really doesn’t count since the rest of the ingredients are so healthy. That’s how it works–you heard it from me! They’re pretty darn good too, considering the lack of butter and sugar. They definitely aren’t as sweet as “regular” cookies, so if you aren’t used to that you can definitely add in a couple tablespoons of sugar or additional honey. Also, the riper your banana is, the sweeter the cookies will be. Bananas FTW! Always.

But yeah. These easy-healthy-delicious cookies are winners, at least in my opinion. We’ve got chocolate, peanut butter, honey, AND banana all in the same place, which can only lead to good things. Just make sure your peanut butter’s not rancid, okay? Great. 🙂

nobakecookies3Healthy No-Bake Cookies

1/2 cup creamy peanut butter

1 small ripe banana, mashed (1/3 cup)

1/3 cup honey

1/4 cup cocoa powder

1/4 cup milk (any kind)

3 cups quick-cooking oats

1/2 teaspoon cinnamon (optional)

Pinch of salt

1/3 cup mini chocolate chips

Directions:

Place the peanut butter and mashed banana in a medium saucepan over low heat. Stir until melted and smooth, then remove from heat. Stir in the honey, cocoa powder, milk, oats, cinnamon, and salt until combined. Stir in the chocolate chips.

Scoop the dough into rounded tablespoons and place on a lined cookie sheet. Press each mound of dough down slightly until the desired shape is reached. Chill for at least 2 hours before enjoying. Store covered in the refrigerator for up to 10 days.

(Recipe adapted from Sally’s Baking Addiction)

Gingersnap Kiss Cookies

IMG_2524My mom has a thing for libraries. Ever since I can remember, the library has been presented to me as a much-frequented and much-adored building of worship. Whenever we traveled to another town, my mom gravitated toward the local library. Whenever there was a rainy day during my childhood (or a sunny one, or a snowy one, or a partly-cloudy one) my brother and I were often toted along toward…you guessed it…the library.

I guess all that library-loved rubbed off onto me, because I was an avid reader from an early age. During our library visits my mom would find five-year-old me hidden away at the end of an aisle, legs splayed out in front of me as I flipped through book after book after book. Some of my most favorite children’s books were the Laura Ingalls Wilder stories. I can still remember their colorful gingham covers, the paperbacks soft and smooth on my small lap. I read all about Laura and her family living in the big woods of Wisconsin, moving to the wide-open prairie, and having all sorts of pioneer adventures. I was enthralled with the idea of riding in a covered wagon, churning butter by hand, and having only one bath a week! And of course, I loved their good old bulldog, Jack.IMG_2507

Christmas in the Big Woods was possibly my most treasured Laura Ingalls Wilder book. I was as much a Christmas fanatic as a book fanatic, and I must have read that story a thousand times. The doll I received as a Christmas present in 1999 was named Charlotte after Laura’s own Christmas doll. I remember being disappointed that my candy canes weren’t straight and rectangular like the old-fashioned “peppermint sticks” in the book, and I used my own thimble to trace “frost pictures” on the window just like Laura and her sister, Mary. I was also entranced with the idea of the molasses candy depicted in the book. “Pa” would bring in a giant tub of snow from outside, and the girls would heat up molasses and pour it onto the cold snow to make beautiful, edible shapes. Since then, molasses has been a very “pioneer-y” ingredient to me.

These soft gingersnap cookies seem just like something Laura and Mary would have made. They’re simple, lightly-spiced, not-too-sweet, and full of rich flavor from the key ingredient (molasses). Being me, I couldn’t resist kicking them up a notch by adding a Hershey’s hug to each cookie, and I’m glad that I did. The milk and white chocolate pair wonderfully with the warm spices, and I could never say no to pretty swirls. I made these cookies before Christmas, but they’d be great at any time of the year! You’ll feel just like Laura Ingalls Wilder as you bake them…and whether or not that’s a good thing, I can’t quite say. But it sure was for me. 🙂IMG_2549

Gingersnap Kiss Cookies

Makes about 3 dozen cookies

3/4 cup butter or shortening (I like to use 1/2 cup butter and 1/4 cup shortening)

1 cup brown sugar, packed

1/4 cup molasses

1 large egg

2 & 1/4 cups flour

2 teaspoons baking soda

2 teaspoons ground cinnamon

1 teaspoon ground ginger

1/2 teaspoon ground cloves

1/4 teaspoon salt

Granulated sugar, for sprinkling

3 dozen Hershey’s hugs (or kisses), unwrapped

Directions:

In a large bowl, cream together the butter (or shortening) and sugar until light and fluffy. Beat in the molasses and egg, scraping down the sides as needed.

In a separate bowl, whisk together the flour, baking soda, spices, and salt. Stir the dry ingredients into the wet, mixing just until combined. Cover the dough and chill for at least an hour.

Preheat oven to 375 degrees F. Line two cookie sheets; set aside. Roll the dough into tablespoon-sized balls and coat with granulated sugar. Place 3 inches apart on prepared baking sheets.

Bake the cookies for 10-12 minutes or until the tops are set. Immediately press an unwrapped candy into the center of each cookie. Let the cookies cool for 5 minutes on the sheets before transferring to a wire rack.

(Recipe adapted from Red Checkered Picnics)

Easy Peanut Butter Blossoms

IMG_2257So I gained some important new knowledge this week. I babysat for two of my favorites on Thursday (I’m home for the holidays!), and as I played chauffeur from school to dance practice the backseat conversation shifted to Santa Claus.

“An elf called us,” I was told. Moonbeam, I believe his name was, had some very important information to relay. “Santa is gluten-free this year. The elf told us this, and elves know everything about Santa…because they are tiny.”IMG_2259

I was fascinated to learn not only that Santa Claus is now gluten-free (although should I really be surprised, given the explosion of gluten-free in the western world?) but that elves are knowledgeable because of their size. Not because they are magical, not because they are mythical, not because they live in the North Pole or have pointy ears or are master toy makers…no. Elves know everything because they are tiny. Makes total sense…or at least, it probably would if I had the ability to experience logic as a five-year-old does. I kinda miss those days.IMG_2261

Regardless of how Moonbeam got his information, I think we had better pay heed. I bet there are lots and lots of gluten-free Santas out there this year who would be more than happy to receive a plate of cookies that he (or, um, she) can actually eat! Luckily, I have the perfect solution! These peanut butter blossoms are some of the easiest cookies I know how to make…and the recipe might possibly be sneakily listed in about four of my other blog posts, in slight variations. It goes like this: 1 cup of peanut butter. 1 cup of sugar. 1 egg. Stir. Scoop. Bake. I like to add a little baking powder and vanilla just because I can’t stand leaving a good recipe alone (and it adds a little lift and flavor), but you don’t necessarily have to if you want to go with the 1-2-3 easy approach. I’m willing to bet that Santa won’t care either way ;).IMG_2266

Of course, it never hurts to add chocolate to a peanut butter cookie! Am I right, or am I right? I turned these into peanut butter blossoms (one of the quintessential Christmas cookies!) simply by pressing a chocolate kiss into each cookie. The chocolate definitely takes them to the next level, and it makes them look pretty, too. If you know a gluten-free Santa (or are one yourself!) I would definitely share Moonbeam’s knowledge with the little bakers in your family. Even if you don’t think Santa will be stopping by your house next week, you should still make a batch of these peanut butter blossoms! They’re soft, chewy, full of peanut butter flavor…and are gluten-free! Elf-approved for sure. 🙂IMG_2268

Easy Peanut Butter Blossoms

Makes about 2 dozen cookies

1 cup creamy peanut butter

1 cup granulated sugar

1 large egg

1 teaspoon baking powder

1 teaspoon vanilla extract (optional)

2 dozen chocolate kisses, unwrapped

Directions:

Preheat oven to 350 degrees F. Line two baking sheets with parchment paper or silicon mats. Set aside.

In a large bowl, stir together the peanut butter, sugar, egg, baking powder, and vanilla. Scoop the dough into tablespoon-size balls and drop onto prepared cookie sheets.

Bake for 8-10 minutes, or until tops are set. Be careful not to over-bake, because the cookies will continue cooking as they cool on the sheets. Immediately press a chocolate kiss into the top of each cookie. Cool on the sheets for 5 minutes, then move to a wire rack to cool completely. Store in an airtight container at room temperature.

Classic Snickerdoodles

(You might notice a small ginormous change in the quality of these photos…I was home for Thanksgiving and able to utilize my brother once again 🙂 )

snickerdoodles1Those who know me well know that I’m just a teensy bit neurotic when it comes to holidays. For instance, I happen to be one of the hugest Christmas freaks that I know of, but nothing can begin until the day after Thanksgiving. No Christmas carols, no Christmas baking, no Christmas movies, nada. Apparently our consumer culture has different plans, of course, with Christmas decorations cropping up everywhere on November 1st! It’s ridiculous, I tell you. Can’t even handle it. Earlier in November I might have possibly sat in the JC Penney shoe section with my phone pressed to my ear for 45 minutes as I waited for my mother to try on shoe after shoe. They were playing Christmas music, you see, thus forcing me to turn on my own Pandora station and jam my iPhone up to my eardrum. TOO FREAKING EARLY, JC Penney! Please get your act together.

Luckily, we’re now in the safe zone. Thanksgiving has come and gone, today I opened the first little window on my advent calendar, and I can fully embrace my favorite season! I decided to kick it off with some baking last weekend. Since I’m a poor, penniless college student I opted to be a little more frugal this year when it comes to gifts, and I knew that my friends would all enjoy some homemade cookies. If there’s anything you can assume about 99% of college kids, it’s that they are low on cash and highly motivated by food. Truth!snickerdoodles2

I’ve always loved snickerdoodles, and most people I know love them too. They’re basically soft mounds of butter, sugar, and white flour coated in cinnamon-sugar. What’s not to love? Although I consider snickerdoodles a year-round kind of cookie, they seem to work especially well at Christmas. Maybe it’s all that cinnamon!

I ended up making a triple batch of these incredible snickerdoodles from Sally’s Baking Addiction, and I was quite pleased with the results! I wanted my snickerdoodles to be soft, thick, chewy, cinnamony (it’s a word if I say so), and full of that sweet-with-the-tiniest-bit-of-sour snickerdoodle flavor that comes from the cream of tartar. They delivered on all levels, and although I was up to my eyeballs in cookie dough (6 dozen cookies is a LOT of cookies) it was definitely worth it. Plus I figure I got in a pretty good arm workout with all the stirring, so any cookie-dough eating was completely justified. Not that I eat raw cookie dough or anything…

Start off your holiday baking (if you haven’t already) with a batch or three of these awesome snickerdoodles! They may not be packed full of fancy add-ins or crazy flavor combinations, but you can’t beat a classic. Plus they’ll make your house smell like Christmas, which is now totally appropriate. 🙂snickerdoodles3

Classic Snickerdoodles

Makes about 2 dozen cookies

1 cup (2 sticks) unsalted butter, softened

1 & 1/3 cups granulated sugar

1 large egg

2 teaspoons vanilla extract

3 cups all-purpose flour

2 teaspoons cream of tartar

1 teaspoon baking soda

2 & 1/2 teaspoons ground cinnamon

1/2 teaspoon salt

For rolling:

1/4 cup granulated sugar

1 teaspoon ground cinnamon

Directions:

Preheat oven to 375 degrees F. Line two cookie sheets with parchment paper or silicon mats and set aside.

In a medium bowl, whisk together the flour, cream of tartar, baking soda, cinnamon, and salt. Set aside.

In a large bowl, beat the butter until soft and smooth. Beat in the sugar until the mixture is light and fluffy. Add in the egg and vanilla, scraping down the sides as needed. Slowly stir in the flour mixture, stirring just until combined.

In a shallow dish, combine the additional sugar and cinnamon. Form the cookie dough into 1.5-tablespoon balls and roll in the cinnamon-sugar. Place 3 inches apart on prepared cookie sheets.

Bake for 10-12 minutes or until edges are barely golden and tops are set. Let the cookies cool on the sheets for 5 minutes before removing to a cooling rack.

(Recipe from Sally’s Baking Addiction)

“Extra-Special” Chocolate Chip Cookies

cookies1“What’s your favorite cookie?” is a question that will always get a mixed response. It seems as though there are a lot of die-hard peanut butter cookie lovers, a fair share of oatmeal-raisin fanatics, and a handful of sugar cookie devotees. Then there are those with the more unusual responses such as snickerdoodles, molasses crinkles, white chocolate-macadamia, and shortbread. And of course there is the chocolate chip cookie crowd, which may be the largest of them all.

Personally, chocolate chip cookies are several spaces down on my list of favorites, but I have lots of friends and family members who love nothing more than a “really good chocolate chip cookie.” That may mean thin and crunchy, thick and chewy, soft and cakey, or crisp-around-the-edges-chewy-in-the-middle depending on the person. Believe me, some people are pretttty darn specific when it comes to their cookies.cookies2

After my last class on Friday, as I stared out the window at sheets of rain, I deemed it the perfect afternoon to bake cookies. Knowing that many of my friends love good ole’ chocolate chip cookies, I set out to make just those. But then…stuff happened. It’s becoming clear to me that I am basically incapable of baking “good ole’ chocolate chip cookies” with no bells and whistles. I certainly have nothing against regular (delicious!) chocolate chip cookies, but because this is a baking blog and because I like to experiment, I had to add in my own little touches. And so commenced these “Extra-Special” Chocolate Chip Cookies.”

First of all, I found a recipe that used browned butter as the base. My obsession with browned butter is becoming somewhat comical–I honestly can’t remember the last time I made a recipe with regular butter. It’s just so easy to make browned butter, and the flavor is so phenomenal! Since browned butter+cinnamon=amazing, I spiced things up even further with a pinch of cinnamon. (<–Pun alert! Spice…cinnamon…ha.ha.ha?) And finally, instead of using normal chocolate chips like semisweet or milk chocolate, I pulled out the big guns, aka Milk Chocolate Morsels with Caramel Filling. Browned butter and cinnamon is fantastic enough, but adding caramel to the mix? Gah.cookies5

I was also quite impressed with the recipe I used for the base of these cookies. The extra egg yolk, extra vanilla, high brown sugar:white sugar ratio, and precise amount of flour made for super-thick, super-chewy cookies. I chose to make them a bit larger than your average cookie (think in between bakery-sized and mom-made sized) which was a good life decision. They ended up with that great crisp-around-the-edges-chewy-in-the-middle texture that seems to please almost everyone. The trick is to take the cookies out of the oven when they’re just barely done, so they can finish cooking on the baking sheets. That way the centers stay nice and soft!cookies3

If you’re like me and enjoy adding a little something extra to old-fashioned favorites, try out these Extra Special Chocolate Chip Cookies. They’re kicked up a notch in flavor and were loved by everyone who tried them! Maybe someday I’ll be brave enough to bake a good old fashioned batch of chocolate chip cookies, but today is not that day. And honestly…who’s complaining?cookies4

“Extra-Special” Chocolate Chip Cookies

Makes about 2 dozen cookies

1.5 sticks (12 tablespoons) unsalted butter

1 cup brown sugar, packed

1/2 cup granulated sugar

1 large egg + 1 egg yolk

2 teaspoons vanilla extract

2 cups + 2 tablespoons all-purpose flour

1/2 teaspoon baking powder

1/2 teaspoon salt

1/2 teaspoon cinnamon

10 ounces chocolate chips (I used caramel-stuffed milk chocolate chips)

Directions:

Preheat oven to 350 degrees F. Line cookie sheets with parchment paper or silicon mats.

Melt the butter in a saucepan over medium heat. Cook, whisking constantly, until the butter is amber-brown and fragrant (about 5 minutes). Be careful not to cook for too long, or the butter will burn!

Pour the browned butter into a large mixing bowl and let cool slightly. Meanwhile, in a separate bowl, whisk together the flour, baking powder, salt, and cinnamon.

After the butter has cooled for a few minutes, beat in the sugars until smooth. Add in the egg, egg yolk, and vanilla, beating until well-combined. Gently stir the flour mixture into the wet ingredients, mixing just until combined. Fold in the chocolate chips.

Scoop the dough into 2-tablespoon sized balls. Place on the prepared cookie sheets 2 inches apart. Bake for 14-16 minutes or until edges are slightly golden and centers are set. (If making smaller cookies, decrease baking time.) Let the cookies cool for 5 minutes on the cookie sheets before transferring to a wire rack.

(Recipe adapted from Take a Megabite)

2-Ingredient Chocolate Pumpkin Cookies

Chocolate pumpkin1I’m sure I sound like a broken record by now, but lately I’ve been all about simple recipes. My only excuse is that I’m a college student…which is pretty much the best excuse for anything. Caught wearing yoga pants and Ugg boots for five days in a row? I’m just a frazzled college student focused solely on comfort while trying to get through the school week. Seen leaving a $9 tip in nothing but loose change (after a grueling 15-minute process of determining exactly how much each person owes)? We’re just poor, penny-pinching college students. Questioned as to why you’re cutting your cherry tomatoes in half with your teeth instead of using a knife like a normal human being? Actually, that one can only be attributed to nonsensical laziness…I do happen to own several knives, but I decided it would be far too strenuous to actually wash one. Please don’t laugh. Moving along…Chocolate Pumpkin3

I challenge you to find a cookie recipe that’s easier than this one! We’re talking two ingredients, one bowl, one spoon. The most difficult part of the entire process is opening a can of pumpkin (which, if your can opener is anything like my ancient rusted one at home, can actually be kind of difficult). But aside from any incidental can-opening struggles, there’s no reason not to try these! Who would’ve known that a box of chocolate cake mix and a can of pumpkin could come together to produce such soft, moist, chocolatey little cookies? Due to all the pumpkin, these cookies will stay tender for days, and their texture is actually more like a cupcake than a cookie. The combination of chocolate and pumpkin is fabulous, and I like to throw in a dash of pumpkin pie spice for a little extra flavor.Chocolate Pumpkin5

If you’re ever short on time, cash, and/or ingredients yet have a hankering for delicious cookies, these are the perfect solution! They taste way too good to be this embarrassingly easy. Whether or not you’re a lazy busy student, you should definitely try these out! There’s nothing not to like 🙂Chocolate Pumpkin4

2-Ingredient Chocolate Pumpkin Cookies

Makes about 3 dozen cookies

1 box chocolate cake mix

1 15-oz can pure pumpkin

1 teaspoon pumpkin pie spice (optional)

Directions:

Preheat oven to 350 degrees F. Line baking sheets with parchment paper or silicon mats and set aside.

In a large bowl, stir together the cake mix, pumpkin, and pumpkin pie spice (if you like) until well-combined. Drop by rounded tablespoons onto prepared cookie sheets.

Bake for 9-12 minutes, or until the tops of the cookies are no longer glossy. Let the cookies cool for 5 minutes on the baking sheets before removing to a wire rack. Store in an airtight container at room temperature.

Flourless Peanut Butter-Chocolate Chip Cookies

IMG_0245So. Let’s overlook the fact that this recipe might possibly be interpreted as cheating, since I already have two variations of these cookies here on the blog, and just roll with it. Because seriously, guys, these cookies are good enough to be posted three times! They’ve always been one of my go-to recipes for their a) minimal ingredients, b) quickness, c) easiness, and d) gluten-freedom (I was gonna say “freeness,” but “freedom” has the upper hand of actually being a word.)

While you can stick to my original 3-ingredient recipe and make these with 1 cup of peanut butter, 1 cup of sugar, and 1 egg (yes, that’s all!!!), I prefer to use this recipe with its little adjustments. It goes against my nature as a baking addict to just leave a good recipe alone, so naturally I’ve come up with some tweaks. First of all, using half brown sugar and half white makes the cookies especially chewy and flavorful. Brown sugar FTW! Secondly, I add vanilla to pretty much everything (including my oatmeal while it’s cooking–if you haven’t tried it, DO!), so of course I had to include it in these cookies. The baking powder is just for a little extra lift, and I’m sure the chocolate chips need no explanation. Chocolate should never need an explanation–remember that.IMG_0242

These cookies are the perfect recipe for a college student with a limited budget, limited time, and a limited kitchen (namely myself), or anyone else who wants cookies that are fast, easy, don’t require a grocery store trip, and/or are gluten-free. Despite their lack of flour (and other usual cookie ingredients), they’re some of the best cookies I make. In fact, they’re the only peanut butter cookies I ever make! What more could you want than a perfectly chewy, slightly-crisp-around-the-edges, ultra-peanut buttery cookie with chocolate chips? Actually, I can think of quite a few things, but for all intents and purposes the proper answer here is “nothing.”IMG_0250

Flourless Peanut Butter-Chocolate Chip Cookies

Makes about 2 dozen cookies

1 cup creamy peanut butter

1 large egg

1/2 cup granulated sugar

1/2 cup light brown sugar, packed

1 teaspoon baking powder

1 teaspoon vanilla extract

1/2 cup chocolate chips

Directions:

Preheat oven to 350 degrees F. Line two baking sheets with parchment paper or baking mats and set aside.

In a large bowl, stir together all ingredients except for the chocolate chips until well-combined. Fold in the chocolate chips. Drop by rounded tablespoons onto prepared cookie sheets. (At this point, if you like thinner cookies, you can slightly flatten each ball of dough or make a criss-cross pattern with a fork.)

Bake for 8-10 minutes, or until the cookies are set around the edges and the tops are no longer shiny. Err on the side of underdone! Let the cookies cool for 5 minutes on the sheets before transferring to a wire rack. Store in an airtight container at room temperature.