Date Balls

IMG_1246One of the perks of being born and raised in Colorado for the first nine years of my life was the access to incredible skiing. The town my family lived in was only about 40 minutes from Vail, one of the most stunning ski towns in the United States, and during the winter we frequented various other ski slopes. I had my first skiing lesson when I was six, and quickly graduated from the conveyor belt of the kiddie slopes to the real white powder of the “grown-up” slopes. I loved the thrill that came with riding the chair lift up to the top of the peaks, my skis swinging below me as I gazed down at the busy white world below. Sure, there were several occasions where I failed to smoothly glide off the chair lift at the top of the mountain and ended up in a heap on the snowbank beside the operator station, skis twisted and snowsuit dampened, but I loved those cold, quiet rides.

Even better was the whoosh of icy air as I pointed my toes downward and took off, refusing to wait for my brother and dad…or to turn. I preferred to go straight down the slope, hoping that others would make room for me as I whizzed by, a tiny figure in a pink-and-purple snowsuit. This fearlessness clashed with my usual shy, conscientious demeanor, and I nearly gave my dad a heart attack on several occasions.IMG_1254

My favorite part of each ski slope was the “camel humps,” which were essentially a roller-coaster of carefully molded snow. Sometimes I tripped and lost a ski (or a boot), but I loved the sensation of flying and falling, flying and falling, over and over. After several runs, when my feet, nose, and hands were pink and numb, my dad would lead my brother and me back into the lodge. We would shuffle in our awkward ski boots to a table in the darkened room, where we would drink something hot and rest our tired legs.

Long gone are the days where I clomped around in ski gear across the cobblestones of Vail Resort, but I still hold those memories tightly. In a moment of happy nostalgia this summer, I stumbled across a spiral-bound cookbook given to my family many years ago, compiled by the mothers of two of my dad’s ex-students. It is entitled Red Checkered Picnics, and features recipes that were created for gourmet ski tours across Colorado. I can’t say I’ve ever packed a gourmet picnic to take on a cross-country ski trip, but I have tried out many recipes from Red Checkered Picnics over the years.IMG_1247

This summer, as I flipped past the molasses-and-flour stained pages of the cookie section, a recipe popped out at me. Date Balls, which I probably would have gagged at as a picky eight-year-old, suddenly sounded perfect. As much as I love the tranquil predictability that comes with making “regular” cookies (cream the butter and sugar, add eggs and vanilla, stir in the flour…), I was up for something a little different. This recipe looked fast, easy, delicious, and somewhat healthier than your typical cookie fare. Feeling like my young, aspiring-baker self from back in the days of camel humps and chair lifts, I spread open the familiar cookbook on the counter and rolled up my sleeves.IMG_1251

Whether or not you pack up these Date Balls to take on a long day of outdoor adventures, they’ll provide you with a most delicious source of energy! They are packed full of crunchy sunflower seeds, chewy dates, and a sweet honey-butter reduction, all rolled in flaky coconut. Make them as big (or as small) as you want, and store them in the fridge for the best results. And is it just me, or do things always taste better when they’re made from a cookbook you know and love? I mean, the internet is great (for goodness sake, I’m writing on a blog here), but there’s nothing like flipping through the well-worn pages of a favorite cookbook. It’s like gliding onto a ski slope after years and years of absence. Can you tell I’m a little nostalgic sometimes all the time? Haha. Even though these Date Balls triggered a trip down memory lane for me, they can still trigger some delicious enjoyment for all of you! They really are fast, tasty, and super easy. No skiing experience required.IMG_1257

Date Balls

Makes 2-3 dozen balls

2 cups chopped, pitted dates

1/2 cup (1 stick) unsalted butter

1/2 cup honey

1 egg, beaten

1 teaspoon vanilla extract

1/4 teaspoon salt

2 cups sunflower seeds, chopped

1/2 cup unsweetened shredded coconut

Directions:

In a medium-sized saucepan, stir together the honey, egg, vanilla, and salt. Add the stick of butter and place over medium-low heat, stirring often, until the butter is melted. Add in the chopped dates, increase the heat to medium-high, and bring the mixture to a rolling boil. Boil for 1 minute, stirring constantly, then remove from heat and transfer to a mixing bowl.

Stir in the sunflower seeds and place the bowl in the refrigerator for about an hour, or until cold. Form the mixture into balls and roll in shredded coconut. Store in an airtight container in the refrigerator.

Recipe adapted from Red Checkered Picnics
Monster Cookies (Flourless!)

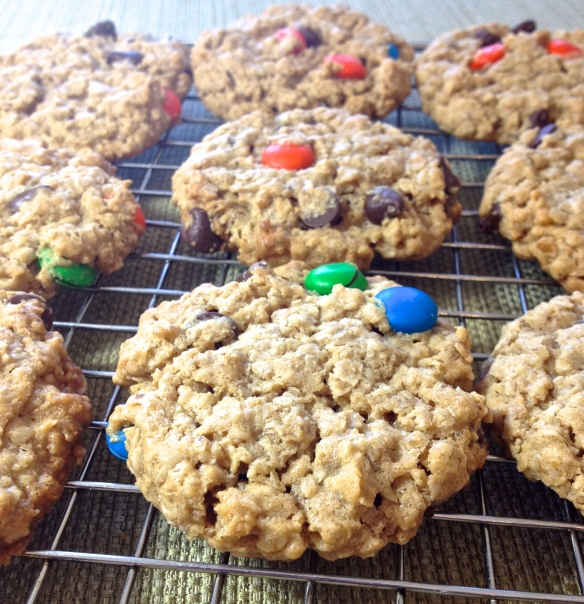
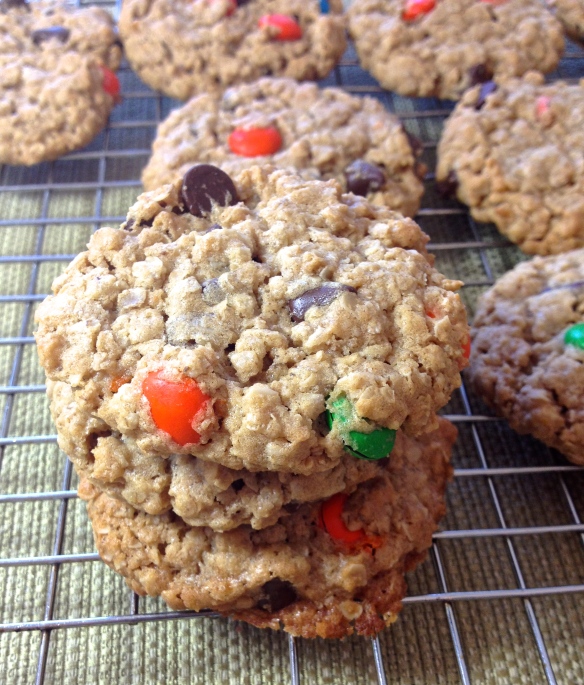
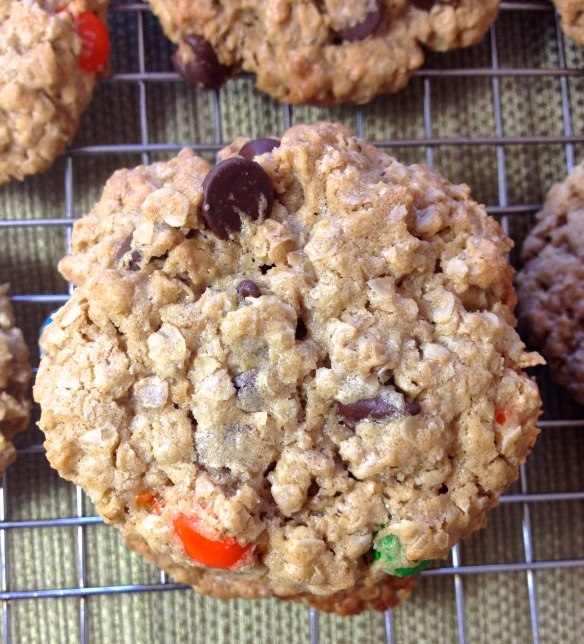
IMG_1239Let me introduce to you the ultimate cookie mash-up: oatmeal cookie meets peanut butter cookie meets chocolate chip cookie…meets M&M cookie! Phew. It’s no wonder they’re called monster cookies with all that goodness loaded in (although I’ve heard rumors that the name actually comes from a bakery that made mass–monster–quantities of these cookies). While my past few posts have featured recipes with some considerably strange ingredients, these monster cookies feature the exact opposite. Most of their ingredients are pretty typical for cookies–sugar, eggs, butter, vanilla, salt, baking soda–but there’s one common cookie ingredient missing…flour!IMG_1234
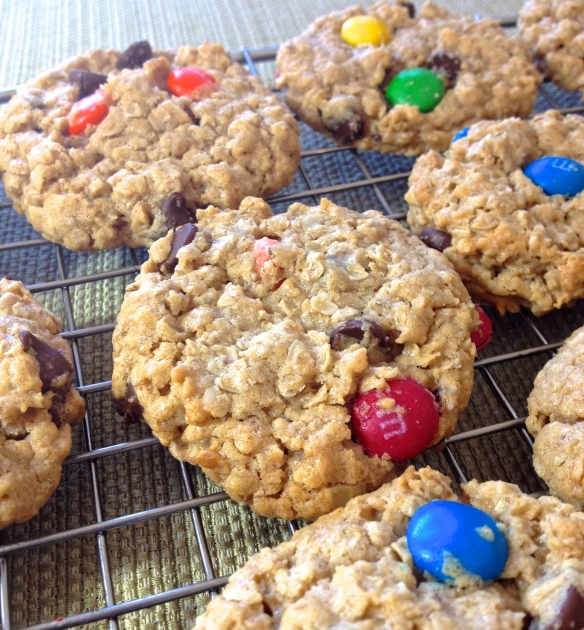
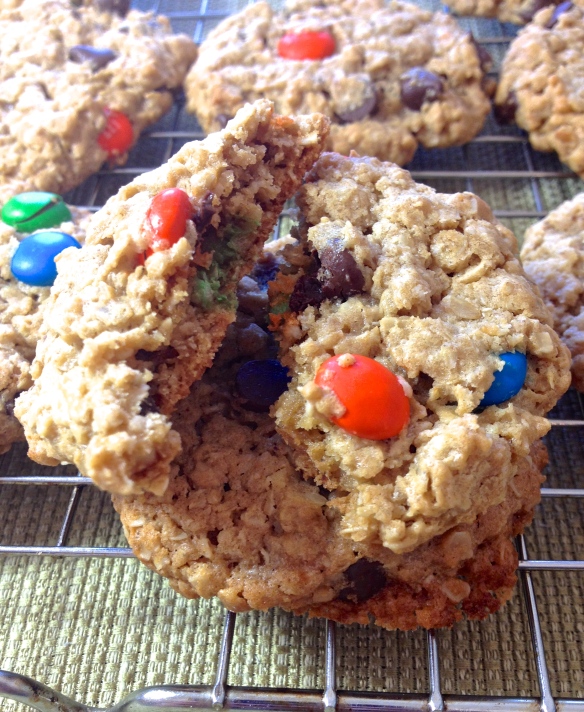
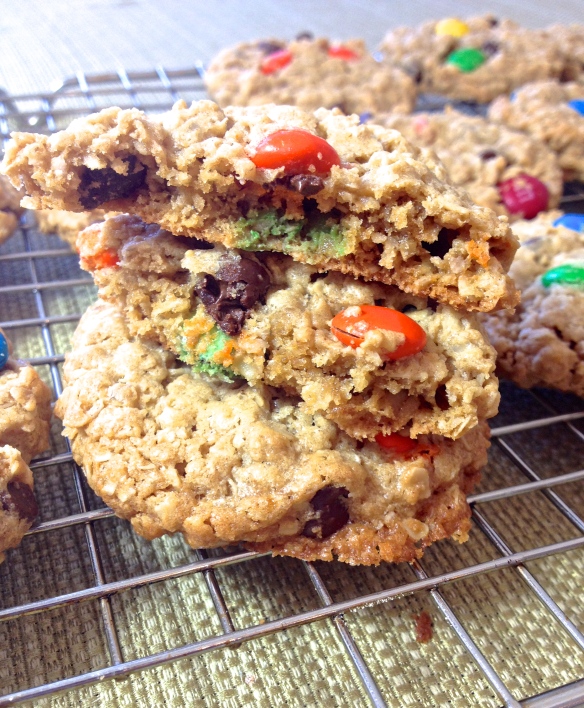
That’s right. The quick-cooking oats and three whole eggs hold these monster cookies together just fine, and they have the best chewy texture. I was worried that the lack of flour might result in flat pancake cookies, but they also stay tall and thick. In fact, you’d be wise to pat them down a little before baking, because their shape holds up really well in the oven. I made them extra-large because no way was I making regular-sized MONSTER cookies, and seriously, each cookie is like a meal in itself! The peanut butter and oats offer such a fantastic texture and flavor, and the chocolate chips and M&Ms bring in a nice dose of richness. IMG_1232

For those of you gluten-free folks out there, here is a cookie that you can eat too! Just make sure to use gluten-free oats, and you should be all set. My gluten-free mother, who has long since resigned herself to forgoing homemade cookies, was astounded to hear that she could actually eat these. At first she thought I was teasing her! Nothing like a pleasant surprise in the form of a monster cookie. 🙂 IMG_1236

Ditch the flour and make yourself a batch of these overloaded monster cookies. You’ll never have to decide between peanut butter, oatmeal, and chocolate chip cookies again!IMG_1241

Monster Cookies

Makes about 3 dozen cookies

1 & 1/4 cup light brown sugar, packed

1 cup granulated sugar

3 large eggs

1/2 cup (1 stick) unsalted butter, softened

1 & 1/2 cups creamy peanut butter

1 teaspoon vanilla extract

1/2 teaspoon salt

2 teaspoons baking soda

4 & 1/2 cups quick-cooking oats

1 cup chocolate chips

1 cup M&Ms

Directions:

Preheat oven to 350 degrees F. Line or grease two cookie sheets and set aside.

In a large bowl, beat together the sugars and eggs until smooth. Mix in the butter, peanut butter, vanilla, and salt until well-combined. Stir in the baking soda, oats, chocolate chips, and M&Ms.

Roll the dough into balls (mine were about 1.5 tablespoons each) and place 2 inches apart on prepared cookie sheets. Slightly flatten each ball with the back of a spoon or the palm of your hand.

Bake for 10-12 minutes, or until the tops are set and the edges are light golden-brown. Don’t overbake! Cool the cookies for 2 minutes on the cookie sheets before transferring to a wire rack. Store in an airtight container at room temperature.

*Note: the dough balls can also be frozen and baked for 12-14 minutes (without thawing!) as desired.IMG_1244

Recipe adapted from Mel’s Kitchen Cafe

Secret Ingredient Chocolate Pudding

IMG_5634Since I’ve been all about secret ingredients lately (chickpea muffins, anyone?), I figured I’d stick with the trend and post another delicious recipe containing an unlikely ingredient. After undergoing a gingival graft last week (in which a piece of soft tissue from the roof of my mouth was sliced off and sewn onto the gum line of my two front bottom teeth to counteract some recession most likely caused by my orthodontic work in middle school…for those of you who care to know), basically all I’ve been able to eat is yogurt, scrambled eggs, and smoothies. Well, and because I’m me, I’ve been eating blended-up overnight oats, mashed-up turkey meatloaf mixed with zucchini puree, and smashed-up avocado/shredded chicken salad. Hey, I’ve got to keep it interesting!

Anyway, lately my best friends have been soft, cold foods to ease my aching mouth. And what better best friend is there than chocolate pudding? I’ll tell you what: chocolate avocado pudding! It’s rich, smooth, chocolatey, full of heart-healthy fats, and doesn’t taste at all like avocados. At least, I don’t think it does–if you have sensitive taste buds, you might be able to detect a slight avocado-y taste, but the dominant flavor is definitely chocolate. Pure, smooth chocolate. Gahhh.IMG_5635

Not only is this pudding (fairly) healthy, easy, and delicious, but it only takes about 5 minutes to whip up! I highly recommend chilling it for 30 minutes or so, but if you’re feeling impatient you can eat it right then and there. I wouldn’t blame you.

Most of the measurements here are just ballpark figures–feel free to add more or less of the cocoa powder, milk, and sweetener until you reach your desired taste and texture. If you like your pudding a little more creamy and a little less intense, add a few extra tablespoons of milk. If you want a super-chocolatey flavor, add a bit more cocoa powder. If you’re trying to cut back on sugar, just use a tablespoon or two of agave or honey. Unlike delicate pastries or baked goods that require exact measurements, this recipe is highly adaptable and pretty darn hard to mess up. In the past I’ve thrown in a banana, left out the milk entirely, added peanut butter, and doubled (okay, tripled) the entire recipe. Each and every time, it was delicious.IMG_5639

Even if you’re not usually an avocado fan, I urge you to blend yourself up some Secret Ingredient Chocolate Pudding! It’s the ideal comfort food whether you’re recovering from a dental surgery like me, or just want to enjoy a no-bake dessert on a warm summer night. Have fun experimenting–and eating!IMG_5638

Secret Ingredient Chocolate Pudding

Makes 4 servings

2 small, ripe avocados

1/4 cup cocoa powder

1/3 cup milk (coconut, almond, cow milk, etc.)

1/4 cup sweetener (brown sugar, honey, agave nectar, etc.)

1 teaspoon vanilla extract

Chocolate chips for topping (optional)

Directions:

Scoop out the avocado flesh into a food processor or blender. Add the rest of the ingredients and blend or process until very smooth. Spoon into bowls or small ramekins  and chill for 30-60 minutes before serving.

Note: this pudding should be served the day it is made for the best texture and flavor!IMG_5629

Recipe from Emma’s Baking Addiction

Flourless Banana Blender Muffins

IMG_5595A long time ago, in August 2012 to be exact, I posted a recipe for Secret Ingredient Brownies. They were thick, chocolatey, chewy, and fudgey, and I doubt anyone would have been able to guess what the secret ingredient was if I hadn’t told them (or, um, if they hadn’t just looked at the recipe). Two years later, for my birthday, I made a Silken Chocolate Fudge Pie that also included an unlikely ingredient, and my entire family basked in the glory of its deliciousness. When I finally spilled the beans to my taste-testers and revealed that their brownies contained black beans and their chocolate cream pie contained soybeans in the form of tofu (no puns intended, I promise), they were utterly shocked. It proved to me that just because an ingredient sounds strange, doesn’t mean it won’t taste fabulous in the final product!IMG_5592

If you think about it, almost all ingredients would sound strange if we weren’t accustomed to them. For instance, look at an egg: a slimy, shell-surrounded substance that is designed to incubate a growing chicken embryo. Flour is made from a grass-like plant that, by itself, looks about as appetizing as a pond weed, and butter comes from a liquid that squirts out of a cow, evolutionarily intended for its offspring. Yet, when we see eggs, flour, and butter listed in a recipe for chocolate-chip cookies, they don’t seem strange in the least. Socialization is a powerful thing indeed. And sorry if I made you nauseous.IMG_5585

The ingredients in these Flourless Banana Blender Muffins may seem a little strange (yes, I’m talking about you, garbanzo beans), but they all culminate into some of the tastiest little muffins around. These are NOT the fluffy, bread-like muffins that most of us are used to–again, their unusual texture requires some out-of-the-box thinking. They are moist, dense, and full of banana flavor, and their texture almost reminds me of cookie dough. I highly recommend eating these muffins chilled! They’re sweet but not too sweet, and work well as a breakfast, snack, or dessert.

Since these muffins are made in a blender (or food processor), they require minimal preparation work. Just measure out your ingredients, toss them all into the blender, and blend away! You’ll have a hard time keeping your fingers out of the batter, but don’t eat too much because this recipe only makes about 9 muffins. I only had one ripe banana on hand, or I definitely would have doubled it (hint: you should definitely double it).IMG_5596

For those of you who are worried about baking muffins with garbanzo beans, I, for one, could not taste a trace of beans in the muffins. It might even be fun to quiz people on what they think the secret ingredient is…I highly doubt that they’ll be able to guess! Have fun experimenting with these muffins–you can add nuts, chocolate chips, dried fruit, or anything else that sounds good. I promise I won’t judge your ingredient choices, since I just preached to you about being open-minded. Be as open-minded as the person who first decided it would be a good idea to drink the fluid intended for baby cows! Or be a little less open-minded than that, and just throw some walnuts into your banana muffins. It’s totally up to you. 😉IMG_5604

Flourless Banana Blender Muffins

Yield: about 9 standard-size muffins

1/2 cup quick-cooking oats (40g)

3/4 teaspoon baking powder

1/4 teaspoon salt

1/8 teaspoon baking soda

1 very ripe banana (120g)

1 can garbanzo beans, drained and rinsed (250g)

1/4 cup peanut butter

1/4 cup agave nectar, maple syrup, or honey

2 teaspoons vanilla extract

Chopped nuts or chocolate chips for sprinkling (optional)

Directions:

Preheat oven to 350 degrees F. Grease or line 8-9 muffin cups (I used a 12-cup tin and just left three empty).

Place all ingredients in a blender or food processor. Blend until smooth, scraping down the sides with a rubber spatula as needed. Divide the batter among the prepared muffin cups, and sprinkle with nuts or chocolate chips if desired.

Bake the muffins for 20 minutes, or until the tops are firm to the touch (they will look under-done, and that’s okay). Cool for 10 minutes in the muffin tin, and then remove to a wire rack to cool completely.

Store leftovers in an airtight container in the refrigerator.

Recipe adapted from Chocolate Covered Katie

Lemon Poppy Seed Muffins

IMG_5457When I was in sixth grade, my class took an overnight field trip to a recreation camp in a nearby area of Washington. We hiked through the woods, braved the climbing wall, swam in an outdoor pool, and played way too many games of B.S. (“Bubble-Scrub” was the chosen sixth-grade euphemism for that card game at the time) while sitting cross-legged on the cots in our little cabins. I’m not sure how much our teachers and parent chaperones enjoyed what was essentially a two-day sleepover with more than sixty pre-teens, but we sure had a fantastic time. IMG_5452

One of the best parts about the camp was its food. We ate in a large dining room, and whenever a table wanted more of a certain dish (pot roast, roasted red potatoes, dinner rolls), they just had to hold up the empty bowl or basket and a waitstaff would quickly replace it. My peers and I were enthralled at this magic, and it made enough of an impression for me to still remember the menu almost a decade later.IMG_5453

Somehow, the subject of this particular field trip came up over dinner the other night, and my dad (who happened to be one of the ever-patient middle school teachers on the trip) was in awe that I remembered everything we ate. He always teases me for remembering the details of my past birthday parties, what toys I got each Christmas of my childhood, and what we had for dinner seven years ago. I suppose my crazy memory is just another trait of my foodie self–I have always loved good food, and considering the amount of time I spend thinking about past meals, it makes sense that they have pretty well-worn paths in my memory. Some might think it’s ridiculous that I can recall what we had for dessert on the night of my sixth-grade field trip, but it’s just who I am.IMG_5476

Speaking of dessert at my field trip in 2006 (sorry that it took me three paragraphs to get to that point), what we had was lemon poppy seed cake. Unlike all the other components of the meal, there were no seconds (or thirds, or fourths) on dessert, and each of us got only one thick slice, drizzled in a lemony glaze. It was fantastic, and reinforced my love of lemon poppy seed baked goods. I have always loved lemon anything, especially in the spring and summer months. When my mom mentioned that she needed to bring a baked good to a PTA meeting the other day, I quickly volunteered to supply muffins. In an attempt to conjure up some bright spring vibes (we’ve had gray skies and drizzle lately), I opted to make lemon poppyseed muffins. With their fresh citrus flavor and tender crumb, they are sure to brighten up anyone’s day. The poppy seeds give these lemon muffins a wonderful little crunch, and the sour cream adds moisture and just the tiniest hint of tang. Who knows, these muffins might even be good enough to stay at the forefront of your memory for years to come! Enjoy. 🙂 IMG_5479

Lemon Poppy Seed Muffins

Yield: 12 standard-size muffins

2/3 cup granulated sugar

Zest and juice from 1 large lemon

2 cups all-purpose flour

2 teaspoons baking powder

1/4 teaspoon baking soda

1/4 teaspoon salt

3/4 cup sour cream (or Greek yogurt)

2 large eggs

1 teaspoon vanilla extract

1/2 cup unsalted butter, melted

2 tablespoons poppy seeds

Directions:

Preheat oven to 400 degrees F. Line a 12-cup muffin tin with paper liners or spray with cooking spray. Set aside.

In a large bowl, combine the sugar and lemon zest with your fingertips until the sugar is moist and fragrant. Whisk in the flour, baking powder, baking soda, and salt.

In a separate bowl, whisk together the sour cream, eggs, vanilla, melted butter, and lemon juice until well-combined. Using a rubber spatula, gently fold the wet ingredients into the dry ingredients until no flour streaks remain. Fold in the poppy seeds.

Divide the batter among the muffin cups, filling about 3/4 of the way. Bake for 18-20 minutes, or until an inserted toothpick comes out clean and the muffin tops spring back when lightly pressed. Cool the muffins for 5 minutes in the tin before removing to a wire rack to cool completely. Store leftovers in an airtight container at room temperature.IMG_5458

Recipe adapted from Brown Eyed Baker

Better-Than-Boxed-Mix Brownies

IMG_5367In late April, my boyfriend, Kaleb, and I decided to take a Saturday off of homework and instead spend the day shopping in a nearby city. That meant clothing stores for me, an art supply store for Kaleb, and REI for us both. We ate lunch buffet-style at a little Indian restaurant I had heard good things about, and it was delicious. Kaleb bought me a new sundress at Target, I watched him wander around his art store with childlike excitement in his eyes, and we had fun pining over all the incredible REI running clothes we can’t afford. We got back to our university campus in the early evening and ate chicken gyros at the cafeteria, which was a pleasant surprise considering that on weekends it usually features very few, very unexciting options. After dinner, we settled down to watch House M.D., one of the shows that we are currently re-watching. It was a fabulous day…until about 8pm.

To spare you the details, I ended up getting a mild case of food poisoning, which kept me in bed all the next day and unable to attend one of the massive outdoor programs we were putting on as Resident Assistants. Darn. 😦 I moaned to Kaleb that I might never eat at a buffet again, sounding just like my mother. She once had a horrific experience at a buffet in an airport–food poisoning on an airplane=not fun at all–and has refused to come within five feet of so much as a salad bar ever since. Of course, seeing as there was an eight-hour gap between my lunch and my symptoms, the culprit could just as easily have been the gyro I ate in my very own university cafeteria, but there’s no way of knowing. Either way, it might be a while before I will touch chicken curry or Greek tzatziki sauce again. IMG_5369

The kicker is that just that morning I had exclaimed to Kaleb how I hadn’t been sick in over a year, which seemed like quite the triumph. I immediately regretted saying anything that could jinx my healthy streak, and sure enough I paid the price for that moment of gloating with my illness later that night.

“Isn’t it so weird that I got food poisoning on the very day I was bragging about not getting sick?” I asked Kaleb.

“Umm..not really, actually….” he said, much to my disappointment.

“Why?!” I demanded.

“Well, because you worry about getting food poisoning pretty much every day,” he said. I thought about this for a few moments, then begrudgingly agreed. Yeah, okay…that is valid.

The truth is, I am just a teeny bit paranoid about food poisoning, and am constantly asking if it’s okay to eat this turkey sandwich that’s been sitting out for an hour, drink this milk that has a sell-by date of three days ago, or buy sushi from the cooler in our campus store that seemed to be not quite cold enough. My dad patiently texts reassurance from hundreds of miles away, and Kaleb patiently voices reassurance from our kitchen counter or a cafeteria table. It’s not like I question everything I eat–maybe one thing every few days–but I certainly have earned my reputation as a constant food-poisoning-worrier amongst those who know me well.IMG_5377

Surprisingly, one thing I have never worried about is raw eggs–but only if they’re in something I’m baking. I grew up licking mounds of raw cookie dough off my fingers as my mom washed the dishes, and I can never resist taste-testing cake batters, muffin batters, and brownie batters. I once read a book in which a girl’s mother let her mix up an entire bowl of brownie batter and eat it with a spoon when the girl came home from a hard day at school, and I always yearned to re-create that scene in my own kitchen. I don’t think I ever did, but not for lack of want. I realize that salmonella and other food-borne pathogens are potentially very dangerous, but I’m afraid that my cookie-dough-eating days are far from being over. Sometimes I think I am nothing more than a walking contradiction, but I mean, we’re talking about raw chocolate chip cookie dough. Let’s be real.

Anywhoo, enter these fantastic brownies. The title says it all: they really are better than a boxed-mix version, but still have those characteristic crackly tops and chewy, fudgy interiors. These are not, I repeat not, cakey brownies. There is nothing dry, crumbly, or cake-like about them. One of the reasons I love them so much is that it almost seems like you are eating a square of brownie batter…they’re that rich! I had the slight problem of “evening my rows” as I cut these babies, and by the end of the whole ordeal I had probably consumed close to a whole brownie’s worth. I still maintain that I was ensuring that each square had perfectly straight edges and no stray crumbs attached, but I also refused Kaleb’s offer to help me cut them and take some of the “work” off my hands. IMG_5390

All you need to mix up these brownies is one bowl, one whisk, and one rubber spatula. I recommend weighing your ingredients to ensure the perfect texture, but regular measurements are also listed for those of you who don’t own a kitchen scale. Be careful to take these brownies out of the oven as soon as a toothpick comes out clean so that you don’t over-bake them, which could result in dryness. I warn you that they are a little difficult to cut cleanly due to the fudginess (which I declare is a word), but that just means all the more post-cutting “clean up” for you. 🙂 And you don’t even need to worry about consuming raw eggs, since they’ll be all baked up by then! You can have your brownie “batter” and eat it too, without a trace of salmonella paranoia. Yay!

Note: just to be on the safe side for food poisoning, you should probably eat up all these brownies as fast as you can. No point in risking it by letting them sit around, right? 😉IMG_5382

Better-Than-Boxed-Mix Brownies

1/3 cup (28 grams) unsweetened cocoa powder

1/2 cup + 2 tablespoons boiling water

2 ounces unsweetened chocolate, finely chopped

4 tablespoons (57 grams) unsalted butter, melted

1/2 cup + 2 tablespoons (140 grams) vegetable oil

2 eggs + 2 egg yolks

2 teaspoons vanilla extract

2 & 1/2 cups (496 grams) granulated sugar

1 & 3/4 cup (248 grams) all-purpose flour

3/4 teaspoon salt

Directions:

Adjust your oven rack to its lowest position and preheat the oven to 350 degrees F. Line a 9×13″ pan with aluminum foil, leaving a 1″ overhang. Spray with cooking spray and set aside.

In a large bowl, whisk together the cocoa powder and boiling water until smooth. Quickly add in the chopped unsweetened chocolate, and whisk until the chocolate is melted. Add the butter and oil and whisk until combined (the mixture may look separated or curdled, which is fine). Whisk in the eggs, egg yolks, and vanilla until smooth.

Whisk in the sugar until the mixture is homogenous. Using a rubber spatula, fold in the flour and salt until just combined.

Pour the batter into the prepared pan and spread it out evenly. Bake for 30-35 minutes, or until an inserted toothpick comes out clean (or with just a few crumbs attached). Transfer the pan to a wire rack and cool for 1 & 1/2 hours.

Holding onto the foil, lift the brownies out of the pan and place directly on the cooling rack. Cool completely before slicing into squares. Store in an airtight container at room temperature.

Recipe from Brown Eyed Baker, originally from Cook’s Illustrated

Oatmeal Chocolate Fudge Bars

IMG_5366If there’s one thing I’ve learned from my many years of baking, purchasing, reading about, talking about, and eating food, it’s that “healthy” means something different to just about everyone. Yes, we can probably all agree that deep-fried Twinkies have a very low chance of ever making it into the “healthy” category, and I’ve never met a person who has labeled fresh broccoli as “unhealthy,” but there is still a crazy level of disagreement when it comes to clean eating. I’ve read diet books that forbid the consumption of bananas, grapes, and watermelon due to their high sugar contents, but the vending machine in my residence hall back at school has a “fit pick” sticker pasted on Grandma’s Oatmeal-Raisin Cookies. There are also “fit pick” stickers on bags of low-fat pretzels and salted peanuts, which are scorned by others for their simple carbohydrates and high fat content, respectively. Sometimes it seems like there’s just no winning.IMG_5348

All that being said, there is winning when it comes to this recipe! I’m going to refrain from trying to convince you that these Oatmeal Chocolate Fudge Bars are “healthy” (because, yes, there are real milk chocolate chips and gobs of peanut butter in them), but I will say that they have no flour, no butter, no white sugar, and no un-pronouncable additives or preservatives. What they do have is a soft, slightly crumbly crust made from oats, maple syrup, and peanut butter–side note: pure maple syrup+peanut butter is one of the best unlikely combos ever–and a thick, smooth filling that consists purely of chocolate and peanut butter. I personally think these bars taste best when eaten straight from the fridge, but you can also freeze them to make them last longer. Although if you’re anything like my family and me, the bars will be devoured in record-breaking time whether or not they’re hidden away in the freezer. I recommend saving yourself the trouble by keeping them thawed in the fridge and at-the-ready for eager consumption. Even if you decide that these Oatmeal Chocolate Fudge bars aren’t 100% healthy, they are certainly 100% delicious…and when it comes to desserts, that’s what really matters, right? IMG_5340

Oatmeal Chocolate Fudge Bars

Yield: 16-25 bars (depending on how large you cut them)

2 & 3/4 cups quick-cooking oats (220g)*

1/2 teaspoon salt

1/2 cup pure maple syrup**

1/4 cup + 1/2 cup creamy peanut butter, divided

1 tablespoon water

1 teaspoon vanilla extract

5 ounces chocolate chips (I used milk chocolate)

Directions:

Line an 8×8″ pan with aluminum foil or parchment paper, leaving a short overhang, and set aside. In a medium-sized bowl, whisk together the maple syrup, 1/4 cup peanut butter, water, and vanilla until smooth. Stir in the oats and salt.

Scoop about 2/3 of the oat mixture into the prepared pan and press it down firmly and evenly with the back of a metal spoon. Set aside.

In a smaller bowl, combine the 1/2 cup peanut butter and chocolate chips. Microwave for about 40-60 seconds, stirring after each 20-second increment, until the mixture is smooth. Pour the chocolate mixture over the oat layer in the pan and spread evenly.

Sprinkle the remaining oat mixture evenly over the melted chocolate, and carefully press it down. Chill for at least an hour, or until the chocolate is firm. Carefully lift the bars out of the pan while holding onto the foil or parchment paper, and cut into squares.

*I only had old-fashioned rolled oats on hand, so I just pulsed them about 20 times in my food processor. Using old-fashioned oats by themselves will change the texture of the bars, making them more crumbly.

**Honey or agave nectar can be substituted for the maple syrup. If you do use maple syrup, make sure you are using PURE maple syrup (not regular pancake syrup).

Recipe adapted from Chocolate Covered KatieIMG_5349

Soft and Chewy Chocolate Chip Cookies

IMG_5297You guys, I finally did it!! I made regular, typical, standard, good old-fashioned chocolate chip cookies. No browned butter this time. No special caramel-filled chocolate chips. No toasted coconut, fancy sea salt, pretzels, or Oreos. And you know what? They were amazing. They reminded me that sometimes, you don’t need all the bells and whistles. There’s a reason that chocolate chip cookies are so iconic, holding their place as America’s #1 favorite cookie (at least according to The Huffington Post). I mean, chocolate chip cookies are essentially little balls of flour, sugar, butter, and chocolate…what more do you need?

<Psst…don’t worry; I am only capable of making about one “normal” batch of cookies every five years. Knowing me, browned butter/pretzels/m&ms/caramel bits/the contents of my baking cupboard will be back inside my cookies soon.>IMG_5305

On an entirely different note…I finally did it!! I decided to haul this little blog away from the back burner and onto my plate again. I won’t give you all the excuses I have about being an extremely busy third-year college student trying to balance classes, psychology research, being a resident assistant, and re-training after a long running injury. Oh yeah, and I didn’t have a kitchen of my own during the school year. But if I were to give those excuses, it would end with me apologizing for being M.I.A. for so long and hoping that there are still people out there who love reading recipes for ridiculously soft and chewy chocolate chip cookies. And the occasional quinoa salad…because balance.

As to the future of Emma’s Baking Addiction, we’ll just see how this summer goes. I’ll do my best to keep adding to the blog, but life might take over again in its pesky way. For now, you should at least make a batch of these incredible chocolate chip cookies. The addition of cornstarch makes them soooo soft, and if you’re careful not to over-bake them, they’ll stay soft and chewy for up to a week! My poor brother, who has been begging me to make “regular” chocolate chip cookies for over a year now, will be thrilled to find a box of these in his Montana mailbox. I can’t mail you all cookies, but I really hope you will make them yourself. The fact that I refrained from making a thousand adjustments to this recipe should tell you something….yes, they’re that good. Enjoy! 🙂 IMG_5286

Soft and Chewy Chocolate Chip Cookies

Yield: 2.5-3 dozen cookies

3/4 cup (1.5 sticks) unsalted butter, softened to room temperature

3/4 cup brown sugar, packed

1/4 cup granulated sugar

1 large egg, at room temperature

2 teaspoons vanilla extract

2 cups all-purpose flour

2 teaspoons cornstarch

1 teaspoon baking soda

1/2 teaspoon salt

1 & 1/4 cup chocolate chips

Directions:

Using an electric mixer, beat together the butter and sugars until light and fluffy. Mix in the egg and vanilla until combined. In a separate bowl, whisk together the flour, cornstarch, baking soda, and salt. On low speed or with a wooden spoon, add the flour mixture into the wet ingredients and mix just until combined. Stir in the chocolate chips. Cover the dough with plastic wrap or foil, and chill for at least 1 hour and up to 2 days.

When ready to bake, preheat the oven to 350 degrees F. Line two baking sheets with parchment paper or a baking mat. Scoop the chilled cookie dough into 1-tablespoon-sized balls and place on the prepared cookie sheets. Bake for 8-10 minutes, or until edges are set and slightly golden (be careful not to over-bake!). Let the cookies cool on the sheets for 5 minutes before moving to a cooling rack.

Recipe from Sally’s Baking Addiction

Caramel Chocolate Chip Cookie Bars

Bars1I kind of have mixed feelings toward the whole DYI craze. Cognitively I know it’s often a really good idea for the environment, for your bank account, for your health and for your sense of accomplishment to do things like make your own yogurt and can your own tomatoes and bake your own bread, but realistically it can be a little hard to put into motion. I mean, sometimes my greatest sense of accomplishment about the day comes from taking the time to rinse and recycle a peanut butter jar rather than simply throwing it away. I try. I promise I do!

Sadly, corporations are onto me and my fellow lazy busy well-intentioned members of society. Containers of pre-peeled/pre-cut veggies, packets of pre-made spice mixtures, and bags of pre-shredded cheese stare at us from grocery store aisles saying, “Buy me, buy me! Your life will be so EASY if you just BUY me!”  Basically, the fewer steps you have to do, the more expensive a product is. And the more waste and manpower go into creating it. And the more marketed it is. And the more tempting it is to toss it into your cart with a mixture of guilt and gleeful relief. Hashtag-first-world-problems.

Sometimes I manage to refrain from buying all the enticing lazy-person products out there, but sometimes I just can’t help myself. It should come as no surprise that baking aisles are already a little bit dangerous for me, especially the chocolate chip area. Who knew there were so many kinds of special delicious add-ins these days?! Things like mint-filled chocolate morsels and neapolitan marshmallows were definitely not around ten years ago. Right?Bars2

I’ve only recently become aware about the existence of wonderful little things called caramel bits, which are essentially round bits of caramel. Shocker! Whenever I do bake with caramel, I usually just use the little plastic-wrapped caramel squares, especially if I’ll be melting them down. The only problem is that it takes for-freaking-EVER to unwrap all those tiny cubes. That’s why it’s so amazing that someone came up with the fantastic idea of making caramel bits that require NO UNWRAPPING AT ALL! It’s a dream come true for nerds like me.

Naturally, I knew it wouldn’t be long before I’d have to incorporate caramel bits into a baking project. Sadly, baking projects don’t happen all that often these days due to my busy college life, but once in a while I find time to clear a space in my cluttered little kitchen and create something wonderful. Last time’s something-wonderful was Caramel Chocolate Chip Cookie Bars. Chocolate chip cookie bars are about as easy as it gets…just your standard chocolate chip cookie recipe pressed into a 9×13 pan and baked until golden-brown. Simple, standard, but always delicious!

I won’t even pretend that it’s possible for me to KEEP a recipe simple and standard, so I turned the melted butter from the recipe into browned butter (please don’t laugh, those of you aware of my obsession) and added in caramel bits along with miniature chocolate chips. It was an excellent idea, if I do say so myself. The nutty browned butter paired with chocolate and caramel was a fantastic flavor trio, especially in the form of extra-chewy cookie bars. And I didn’t even have to feel guilty for using my newfound caramel bits since I was saving a step AND saving on waste (because no plastic wrappers)! Totally economical. Totally budget-friendly. Totally healthy. Or at least we can pretend. One thing that these bars definitely WILL bring you is a sense of accomplishment. Because delicious things are always good accomplishments. Remember that!Bars5

Caramel Chocolate Chip Cookie Bars

Makes 24 bars

12 tablespoons (1.5 sticks) unsalted butter

1 cup brown sugar, packed

1/2 cup granulated sugar

1 large egg

1 large egg yolk

2 teaspoons vanilla extract

2 cups + 2 tablespoons all-purpose flour

1/2 teaspoon baking soda

1/2 teaspoon salt

1 cup mini chocolate chips (increase to 1.5 cups if using standard-size)

1/2 cup caramel bits (optional)

Directions:

Preheat oven to 325 degrees F. Line a 9×13″ glass pan with tin foil and spray lightly with cooking spray. Set aside.

Melt the butter in a small saucepan over medium heat, whisking constantly. Keep whisking as the butter foams and bubbles. When the butter becomes golden-brown and fragrant, immediately turn off the heat and pour the browned butter into a mixing bowl. Let cool for 5 minutes.

Meanwhile, combine the flour, baking soda, and salt in a separate bowl.

Whisk the sugars into the melted butter until smooth. Whisk in the egg and egg yolk, followed by the vanilla. Stir in the flour mixture just until incorporated. Stir in the chocolate chips and caramel bits.

Spread the mixture into the prepared pan and pat down evenly. Bake for 25-30 minutes or until golden-brown. Let the bars cool before cutting.

(Recipe adapted from Two Peas and Their Pod)

Healthy No-Bake Cookies

no-bakecookiesMy first batch of no-bake cookies can only be described as a disaster. I was in middle school at the time, and my friend and I were lounging around her house trying to decide what to do when her mom suggested no-bake cookies. I had never heard of them but was all too willing to try them out. The recipe called for butter, peanut butter, sugar, vanilla, oatmeal, and milk…I’m pretty sure that was it. Total health food! Luckily our pre-teen metabolisms could handle it, and we got right to work.

The standard recipe for no-bake cookies is pretty simple: melt the peanut butter, butter, and sugar; stir in everything else; drop the mixture onto cookie sheets. Let it set up, and you’re done. Fool-proof, right? Not so much…

My friend and I divided the task of measuring ingredients, and peanut butter fell onto my side. “I think there’s a jar of Skippy in the cupboard,” she said, and I obligingly skipped over to the cabinet. Sure enough there were two jars of peanut butter, one farther back than the other. I chose the emptier one in the back, if only to help her family use it up. As soon as I screwed open the jar I noticed a funny smell, but I didn’t say anything. My family always bought natural peanut butter that you had to stir, so I figured Skippy just smelled a little different. That was my first mistake.nobakecookies2

I scooped out the appropriate amount of peanut butter and dumped it into the saucepan along with the other ingredients. Five minutes later we were forming the mixture into little balls and placing them onto a wax-paper-lined cookie sheet. I’ve always been a “taster” when it comes to baking (my justification is that any incorporated germs are killed by the heat of the oven…and let’s just pretend the no-bake thing doesn’t exist) so I definitely snuck a pinch or two of the dough. It tasted…bad. Not a little bad, a lot bad. It’s a taste that I now know can be described as rancid nuts (shocker, right)?! Seeing my expression my friend tried it too, and made the same disgusted face as I had.

“Why didn’t you tell me the peanut butter smelled funny?” she asked. “We could have used the other kind.”

“Well, uh…” I started to reply. “I don’t know.” Satisfying answer for sure.

We threw out the entire batch and sadly resumed our lounging around. But fear not, because we definitely made a successful batch at another point in time! I think I probably put her in charge of the peanut butter…

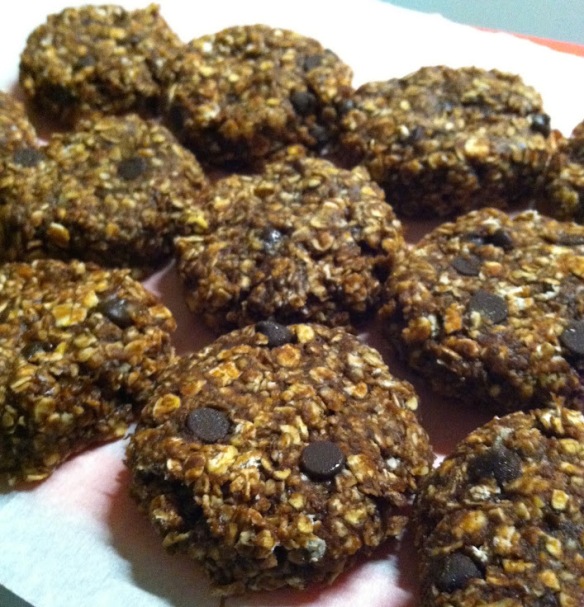
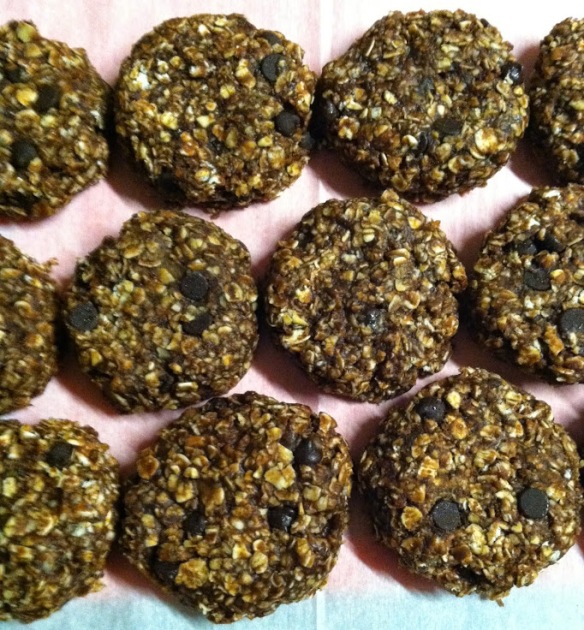
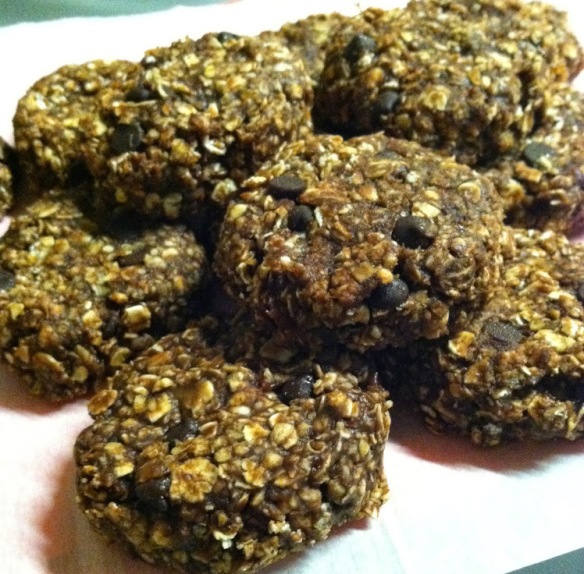
And now we have reached the end of the road where I stop talking about my crazy life and cut to the chase. THESE no-bake cookies are just about as easy as the originals (if not easier) but they have the benefit of actually being good for you. Yeah, there’s chocolate, but it really doesn’t count since the rest of the ingredients are so healthy. That’s how it works–you heard it from me! They’re pretty darn good too, considering the lack of butter and sugar. They definitely aren’t as sweet as “regular” cookies, so if you aren’t used to that you can definitely add in a couple tablespoons of sugar or additional honey. Also, the riper your banana is, the sweeter the cookies will be. Bananas FTW! Always.

But yeah. These easy-healthy-delicious cookies are winners, at least in my opinion. We’ve got chocolate, peanut butter, honey, AND banana all in the same place, which can only lead to good things. Just make sure your peanut butter’s not rancid, okay? Great. 🙂

nobakecookies3Healthy No-Bake Cookies

1/2 cup creamy peanut butter

1 small ripe banana, mashed (1/3 cup)

1/3 cup honey

1/4 cup cocoa powder

1/4 cup milk (any kind)

3 cups quick-cooking oats

1/2 teaspoon cinnamon (optional)

Pinch of salt

1/3 cup mini chocolate chips

Directions:

Place the peanut butter and mashed banana in a medium saucepan over low heat. Stir until melted and smooth, then remove from heat. Stir in the honey, cocoa powder, milk, oats, cinnamon, and salt until combined. Stir in the chocolate chips.

Scoop the dough into rounded tablespoons and place on a lined cookie sheet. Press each mound of dough down slightly until the desired shape is reached. Chill for at least 2 hours before enjoying. Store covered in the refrigerator for up to 10 days.

(Recipe adapted from Sally’s Baking Addiction)